How to Fix Yellow Triangle Issue on Your Drive [BitLocker Error]?
When you encounter a yellow triangle sign or an exclamation mark on your C drive or any disk, it usually indicates a notification related to encryption, often connected with BitLocker, Microsoft’s drive encryption feature. This indicator doesn’t just appear randomly; it’s a clear message regarding the security state of your drive. It suggests that the drive encryption process, likely using BitLocker, is either incomplete or there is a configuration issue that requires your attention.
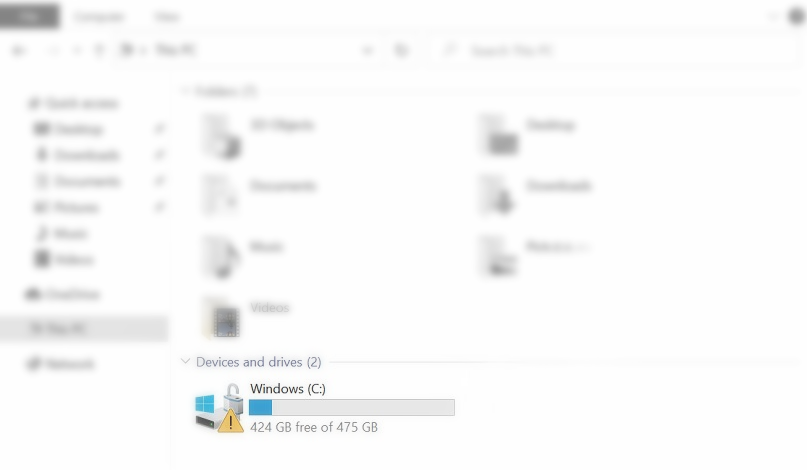
The most frequent cause of this issue is a discrepancy between the drive’s encryption status and the system’s expectations. This might occur, for example, when the drive is expected to be encrypted but isn’t, or when there is an issue with the encryption key. The reason could vary from an interrupted encryption process, improper initiation, or system updates that have altered encryption settings.
Solution 1: Enable and Disable BitLocker
If the yellow triangle suggests that your BitLocker may be turned off, you can try to enable it with these steps:
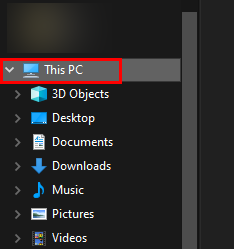
- Open File Explorer and click on This PC in the left pane.
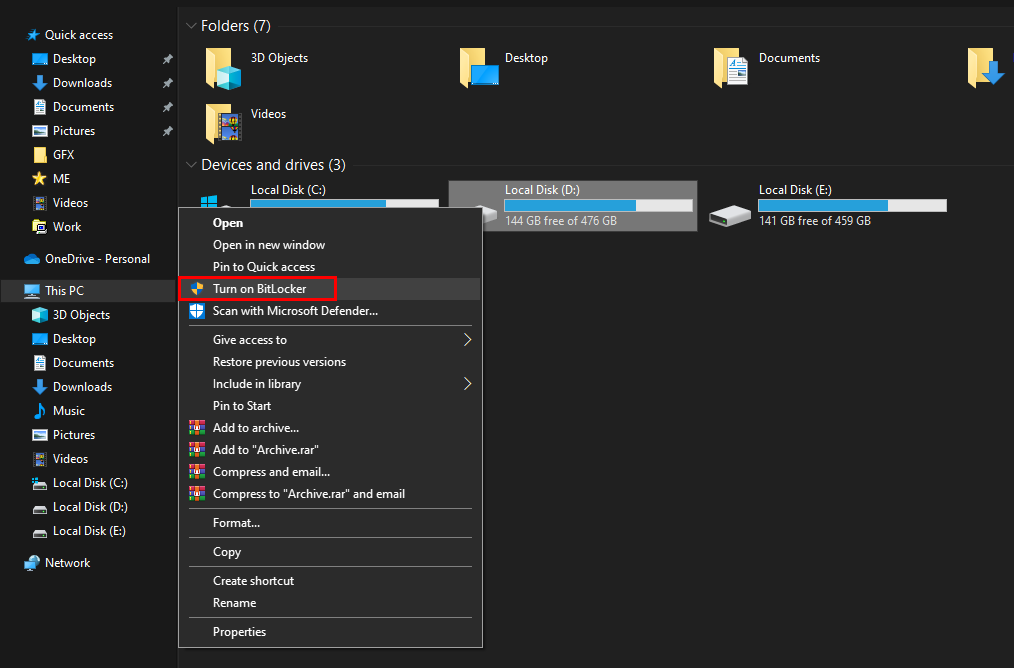
- Right-click on the problematic drive and select Turn on BitLocker.
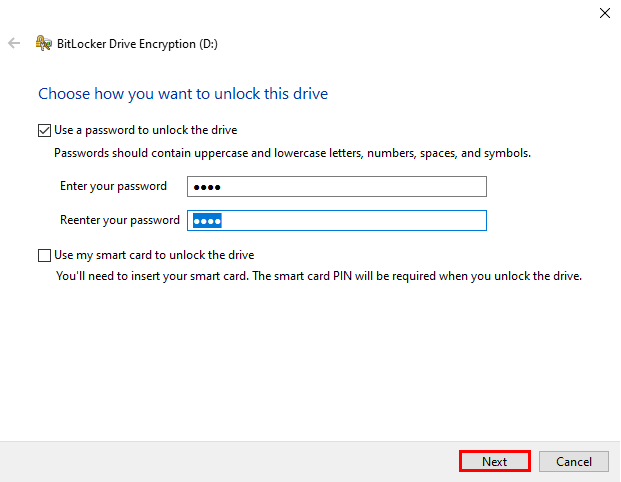
- Choose how you want to save your recovery key.
- Click Next and follow the on-screen instructions.
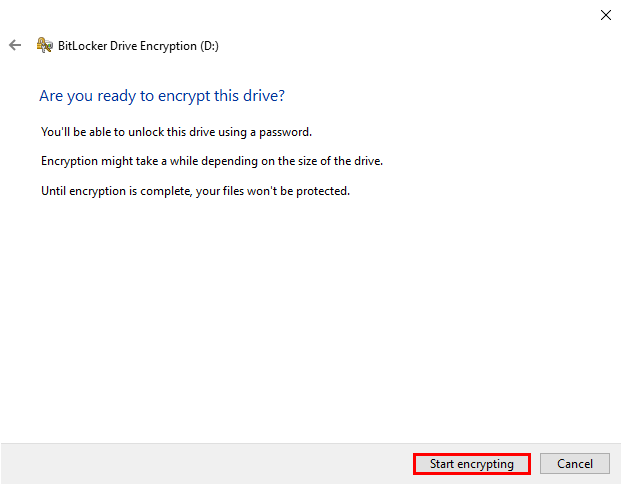
- Finally, click on Start encrypting. BitLocker will be enabled after some time, depending on the size and speed of your drive.
To disable BitLocker, follow these steps:
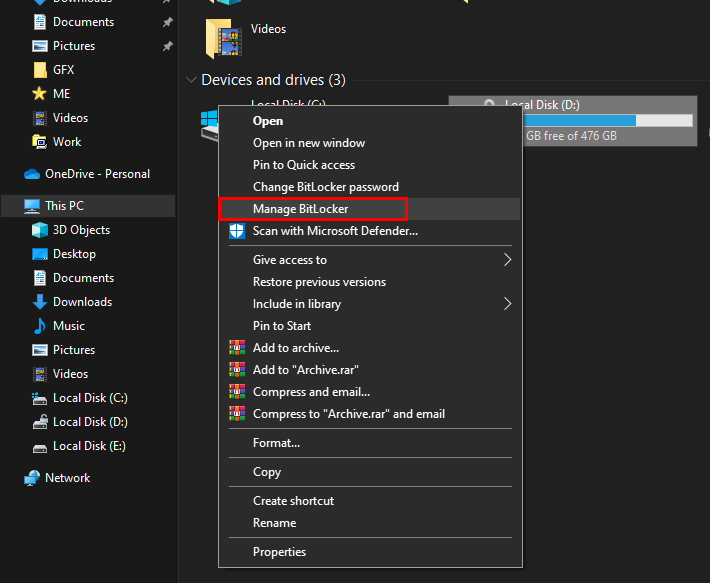
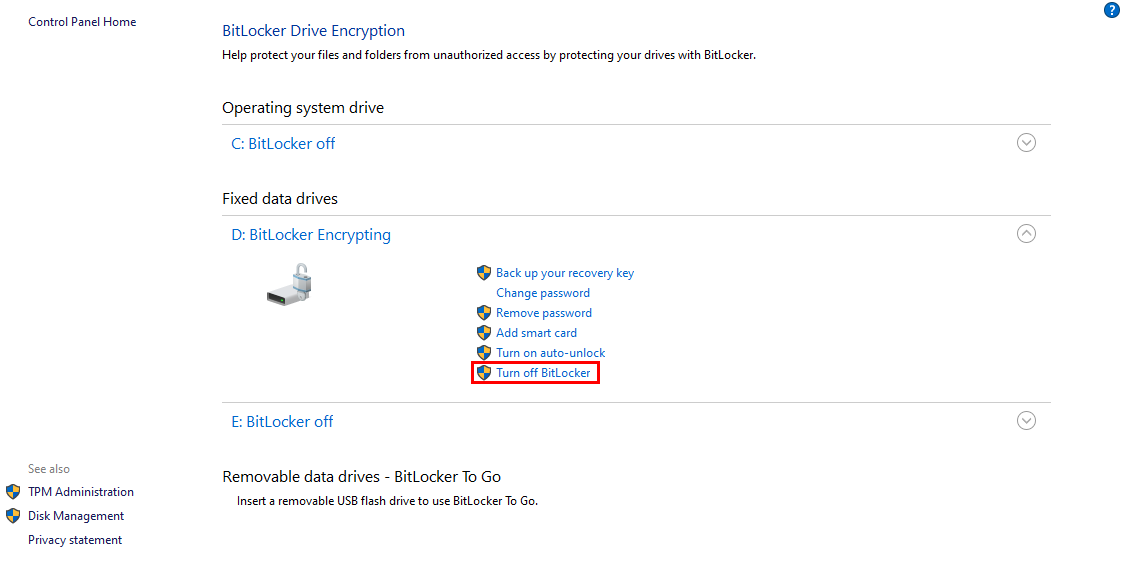
- Right-click on the drive again and select Manage BitLocker.
- Click on Turn off BitLocker and confirm by clicking Turn off BitLocker again.
Solution 2: Run the SFC and DISM Scans
Corrupted or missing system files, as well as issues stemming from Windows updates, can also cause this problem. The System File Checker (SFC) and Deployment Image Servicing and Management (DISM) tools are effective for repairing system files. Let’s try running the SFC and DISM scans.
SFC Scan:
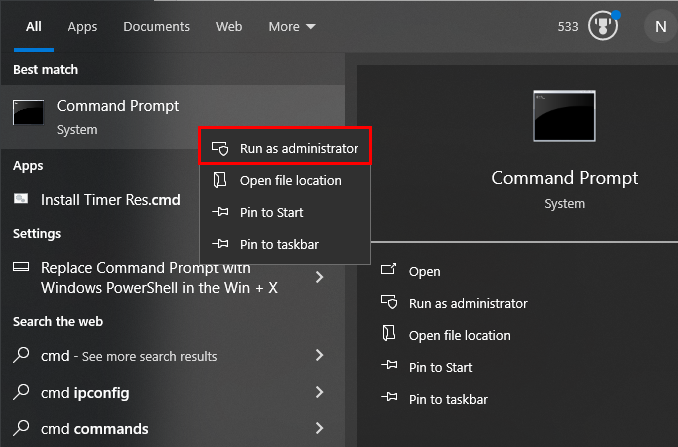
- Launch the Command Prompt as an administrator.
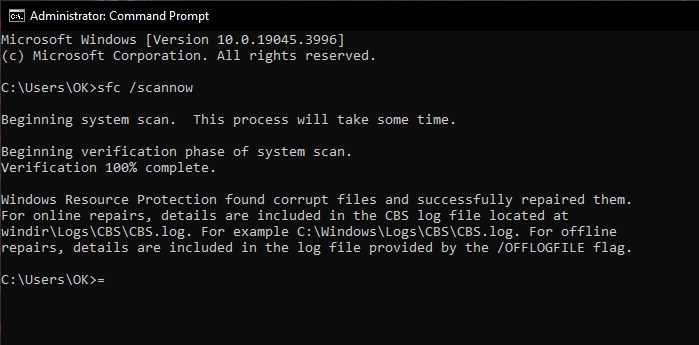
- Enter the following command and press Enter:
sfc /scannow
- After the scan is complete, restart your computer to see if the issue is resolved.
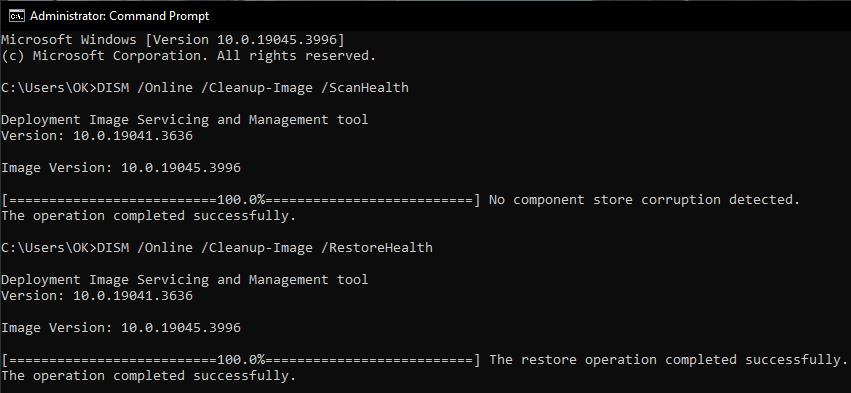
DISM Scan:
- Run the Command Prompt as an administrator once again.
- Input this command and hit Enter:
DISM /Online /Cleanup-Image /ScanHealth
- After completing the scan, enter the following command:
DISM /Online /Cleanup-Image /RestoreHealth
- Finally, restart your computer after the process is finished.
If the software-based solutions provided do not resolve the issue, there may be a problem with your computer’s hardware. Connecting the disk to another computer could help determine whether the issue is with the disk itself or the computer.
If you are unsure how to proceed, seek assistance from a professional or take your computer to a nearby hardware repair store. Inform the technician about any personal or important files on your computer, as data loss is a potential risk. It’s also a good practice to back up your data before attempting any hardware diagnostics.