How to Fix “500 Internal Server Error NGINX” for Client & Server?
 Reviewed by Kamil Anwar
Nginx (pronounced Engine-Ex), an open-source web server publicly released in October 2004, also serves as a load balancer, reverse proxy, and HTTP cache. Its popularity and utility are apparent in its adoption by prominent tech companies such as Microsoft, Google, Facebook, Twitter, and Apple.

Meaning of 500 Internal Server Error in Nginx
Like other software applications or servers, Nginx can encounter errors, which its built-in error reporting can identify. However, the 500 internal server error presents a unique situation. This error also appears on different web servers, such as Apache and IIS.
Error 500 is an HTTP status code indicating a server issue for which the root cause is unclear. Unlike other HTTP status codes, such as 403 (Forbidden) or 404 (Not Found), it doesn’t provide a clue about the potential cause.
How to Fix 500 Error on Nginx on the Client Side?
This error code represents a server-side issue that can typically be resolved on the server. However, in rare instances, your browser may contribute by creating a request the server can’t handle.
To verify the browser isn’t causing issues, open the website in a different browser, on another device, and on another network. If it works properly, clear the cache/data of the original browser and ensure that no browser extensions are causing the problem.
If the Nginx website still displays a 500 error, contact the server admin to resolve the issue.
How to Fix Nginx 500 Error on the Server Side?
This error could result from a simple syntax mistake to a backend application issue. As the error doesn’t disclose the root cause, its troubleshooting can be challenging. However, fear not, the systematic approach discussed below can resolve it.
1. Check Server Overload
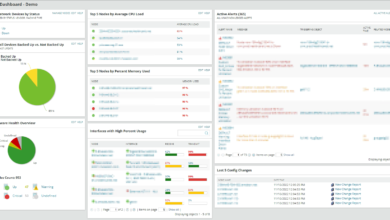
If your server is overloaded, it may display the internal 500 error due to insufficient resources for essential tasks. Check the CPU usage, memory usage, and disk space availability using the Free, Top, or HTop command. The screenshot below illustrates the output after executing the top command.
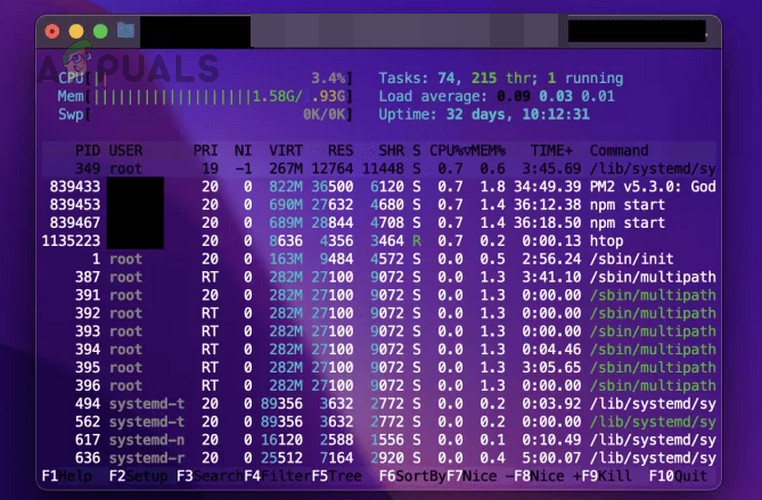
If the server is overloaded, adding more resources should clear the Nginx 500 error.
2. Verify the Configuration Syntax
The most common cause of the 500 error on Nginx is incorrect server settings due to an error in the configuration syntax.
To fix this, go through the configuration files of Nginx and closely check the syntax for any errors or misplaced directives.
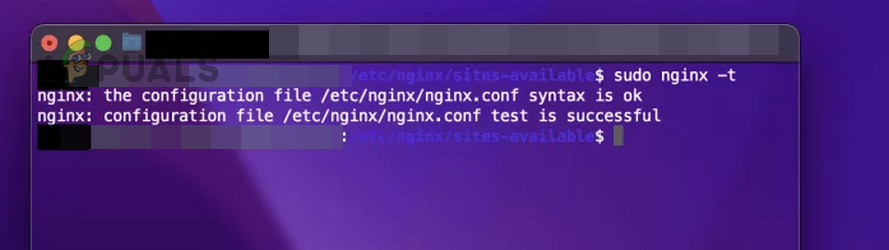
Next, review your Nginx configuration files for syntax errors or misplaced directives. Use commands such as nginx -t or nginx -t -c /path/to/nginx.conf to validate the syntax and identify any errors. Execute the following commands in the Terminal to detect any errors:
cd /etc/nginx/sites-available

nginx -t
You can also use the following:
nginx -t -c /path/to/nginx.conf
If any syntax errors are detected, fix those and execute the following to restart/reload Nginx:
sudo service nginx restart

nginx -s reload
In some cases, you may need to amend the configuration file as under:
try_files with try_files $uri =404
or
try_files $uri $uri/ /index.html; with try_files $uri/ $uri /index.php?$query_string;
3. Verify the Server Logs
When Nginx produces a 500 error, it also creates an entry in the internal error log, which can suggest the error’s root cause. Typically, server logs are located at:
/var/log/nginx/error.log
On a Linux distro, execute the following to open the server log:
cd /var/log/nginx

cat error.log
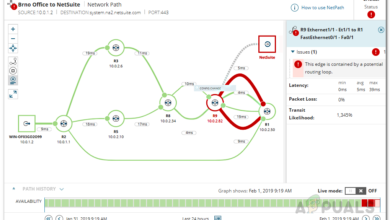
On the resulting page, you can go through to check for any indication of the root cause. For example, look at the image below:
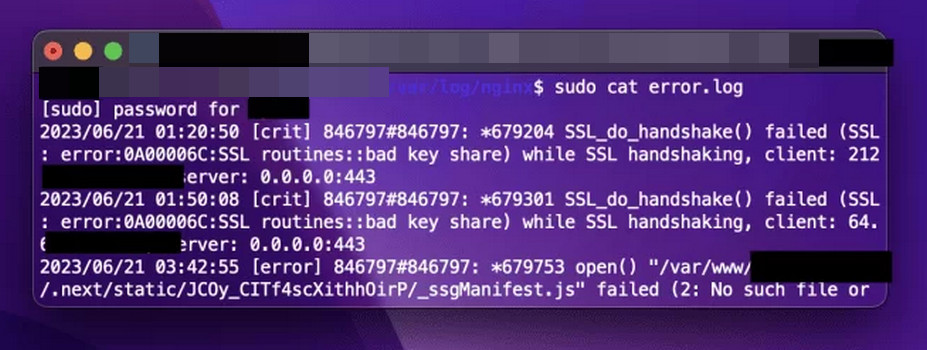
This indicates the server couldn’t establish an SSL/TLS connection with the client due to an SSL certificate issue. After identifying a problem in the logs, you can research potential causes and solutions online.
If you can’t open the log due to a ‘permission denied’ error for the folder, modify the Nginx.conf file by replacing ‘user www-data’ with ‘user root.’ After saving the file, restart Nginx and reopen the log.
4. Disable Cloudflare or Similar Services Temporarily
If you’re using Cloudflare or a similar service on your server, and it’s incorrectly configured or conflicting with recent modifications, temporarily disabling it can help diagnose the issue.
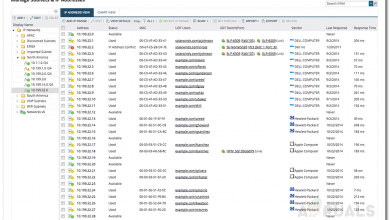
- Navigate to the Cloudflare dashboard and log in using your credentials.
- Go to Overview and expand Advanced.
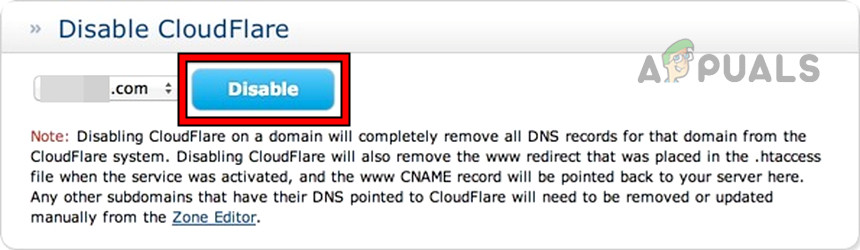
- Click on Pause Website and confirm to do so. If your hosting provider has Cloudflare integrations, make sure they are also disabled.
- Make sure you have the right IPs for the website and verify if the Nginx 500 internal server error is cleared. Remember to check both HTTP and HTTPS versions of the website.
Disable CloudFlare on the Website
5. Check the Server Certificates
If any of your certificates have expired or gone invalid in your current setup, this will certainly cause an internal server error.
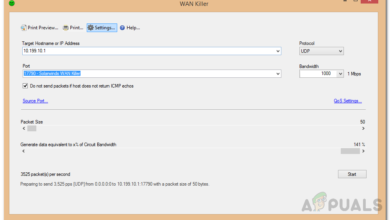
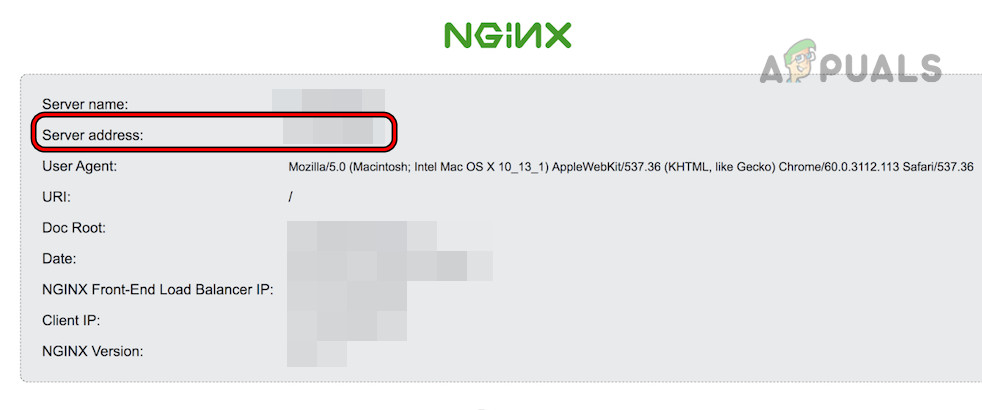
- Configure the Nginx to use the IP address of your website, not the domain name.
Use the IP Address of the Server in the Nginx Settings - Disable SSL Verification in proxy_pass and add the self-signed certificate to it. You can create one in the Cloudflare Dashboard (SSL > Client Certificates).
- See if the server is working correctly. If so, contact the certification issue authority or check your setup for any improper certificate configurations.
6. Check for any Backend Application Errors
If Nginx forwards client requests to another service, which fails to execute properly, it causes a 500 error. For instance, if the server forwards client requests to a backend application like NodeJS, and the application fails to function correctly, it results in the discussed error.
Remember, if the server log shows no errors, it typically indicates a backend issue.
To resolve this, inspect the backend application logs for any errors or exceptions. For instance, on WordPress, you’ll find the Node JS logs at:
/var/www/<your_site>.com/logs/error.log
7. Insufficient File Permissions
If the Nginx server lacks the necessary permissions to access or execute a file, it will cause a 500 error. For instance, an internal server error will occur on a WordPress site if the Nginx server can’t access or serve PHP or HTML files from the public_html folder.
To rectify this, you can modify the necessary Nginx permissions on the server-accessed files or directories using the chmod command, typically 755 for directories and 644 for files.
8. Verify Plugin Compatibility
Plugins crucially enhance server capabilities. But malfunctioning, outdated, or overly updated plugins may cause internal server errors. For example, updating WordPress can disrupt your website’s functionality as many plugins become incompatible until they are updated.
To resolve this, ensure that each plugin is compatible with the server software and other plugins. Although it may seem tedious, it’s worthwhile. Alternatively, try disabling all plugins to see if this eliminates the error.
If you recently updated your server software, try reverting to the previous version (if possible) to see if the error resolves. This will confirm if the update is causing the issue. You can delay the software update until all plugins have confirmed compatibility.
9. Check for a Faulty Script
Like plugins, scripts are crucial for certain website functionality. An invalid or updated script incompatible with the server environment can cause an internal server error.
You can solve this by disabling scripts and checking the Nginx server. If it works correctly, go through the scripts and try to find out the problematic ones.
10. Increase the Server Timeout Value
If the server timeout value is shorter than Nginx’s response time, you will encounter an internal server error. Similarly, if the server’s request takes longer than Nginx’s response time, the issue will occur.
Increasing your server’s timeout value should solve the issue. You can find specific instructions online.
11. Ensure all the Redirections are Working
Ensure all redirections are functioning correctly when Nginx operates as a proxy server. If the server cannot redirect a client request to the backend server, a 500 error will occur.
Temporarily disable all redirections to verify proper operation. If successful, reactivate each one individually to identify the faulty redirect. Once detected, research online to find potential causes and solutions for this specific redirection failure.
12. Using PHP with Nginx
Nginx doesn’t natively support PHP; therefore, PHP misconfigurations with Nginx can result in an internal server error.
To resolve this issue, verify the PHP integration with Nginx. If PHP display errors are disabled, the server will return an Nginx error 500 when PHP encounters an error. Enabling PHP errors can simplify troubleshooting.
On CentOS 7, execute the following:
tail -f /var/log/php-fpm/www-error.log
Alternatively, go to
/etc/php.ini
And change
display_errors = Off
to
display_errors = On
You may also look for a better PHP handler (such as PHP-FPM) and enable the Nginx cache.
13. Use the Bare Minimum Approach
If you still cannot clear the error 500, you can use the bare minimum approach to solve the problem.
- Create a backup of your site and replace the site content with a simple index.html having some plain text.
- Check if the website is working and start adding the directives, features, services, plugins, scripts, etc. one by one.
- Make sure to test the site after each step and see if the problem reoccurs.
- Add back the content to your site and see if the content is causing the issue.
- Once the problematic element is found, you can fix it by searching the Internet.
How to Avoid the Future Recurrence of the Nginx 500 Server Error
You can take the following steps to avoid any recurrence of Nginx 500 error:
- Perform regular server maintenance.
- Make sure the website code and content (images, videos, etc.) are optimized for your setup.
- Establish a CDN to serve the website through its cache.
If you have a query, we are available in the comments section.
Reviewed by Kamil Anwar