How to Resize An Image on Mac in 4 Different Ways [2024]
 Reviewed by Huzaifa Haroon
- Mac users have several built-in options for resizing images, including Preview, Pages, Photos, and the Mail app, catering to different resizing needs.
- Preview offers versatile image editing features, enabling users to resize single or multiple images, crop, and adjust dimensions easily.
- Free third-party apps like Image Resizer app and CapCut provide advanced functionalities for batch processing and image editing, expanding the options for Mac users beyond built-in tools.
If you’ve got a large image that’s taking up too much space or its overall width and height are not suitable, you might want to make it resize it. This could be an image you got from a website with free pictures or a high-quality screenshot you took for your blog.
Resizing an image on a Mac computer is more straightforward than doing it on an iPhone. This guide will show you different situations when you might need to resize your images. We’ll also teach you how to adjust the size of an image on a Mac using Preview, Pages, Photos, and the Mail app, and we’ll mention some free tools you can use for resizing images on a Mac.
Table of Contents
When to resize your images?
You might need to change the size of your pictures for several reasons. Let’s look at some of the most common ones:
- When you’re adding pictures to your website, you might not want to fill up all the storage space you have on your server.
- Sometimes, you might want to put your pictures on a website that has rules about how large the images can be.
- If you’re trying to share pictures with others, the original, high-quality ones are too big to send.
- When printing a picture, you might need it to match a certain size or quality.
These situations show why it’s sometimes necessary to adjust how big or small your pictures are, ensuring they fit your needs without compromising on quality or usability.
READ MORE: 10 Easy Ways to Send Large Files Over Email [2024 Update] ➜
How to resize an image on Mac?
Here, we’ve covered a range of methods, ensuring you’ll find one that suits your needs. Whether you’re a beginner or more experienced, these steps will help you manage your image sizes effectively.
1. Resize an image on a Mac using Preview
To resize an image on your Mac, you can use Preview, which is the default app for viewing images. It’s simple to use for basic tasks like making an image smaller or larger. Preview supports many standard image formats, including. JPEG, JPG, .TIFF, PNG, and more.
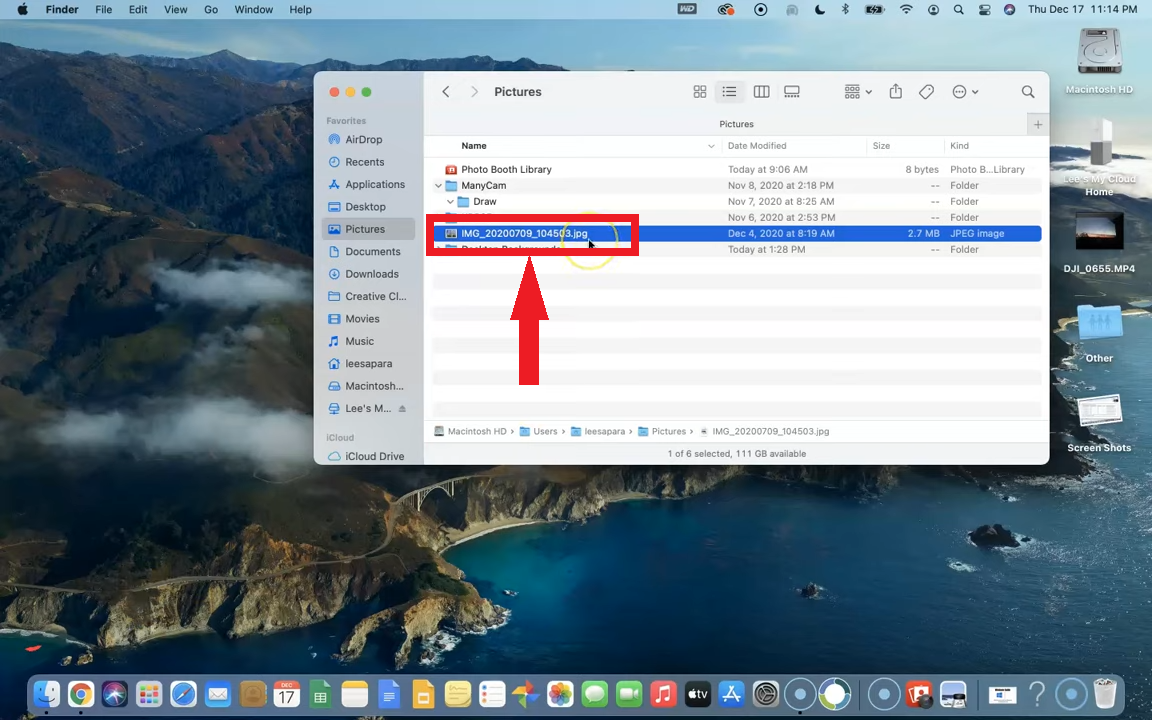
- Start by opening your image in Preview.
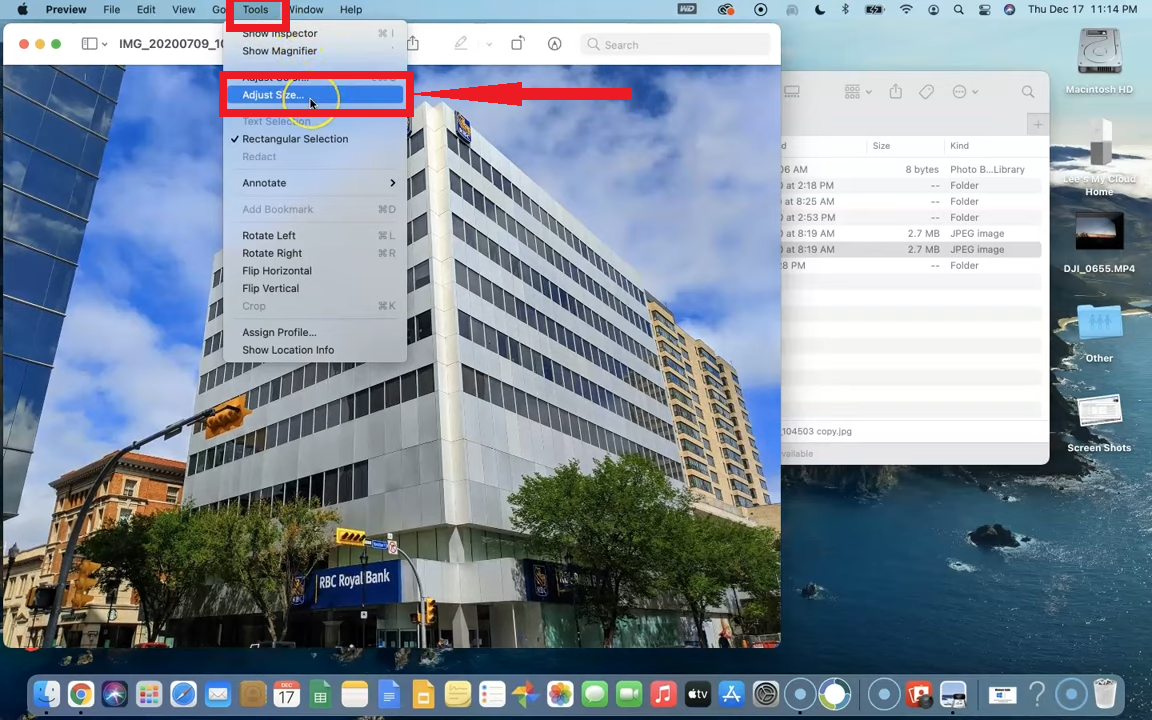
Open the image in Preview - Go to the top menu bar, click on “Tools,” and then choose “Adjust Size.”
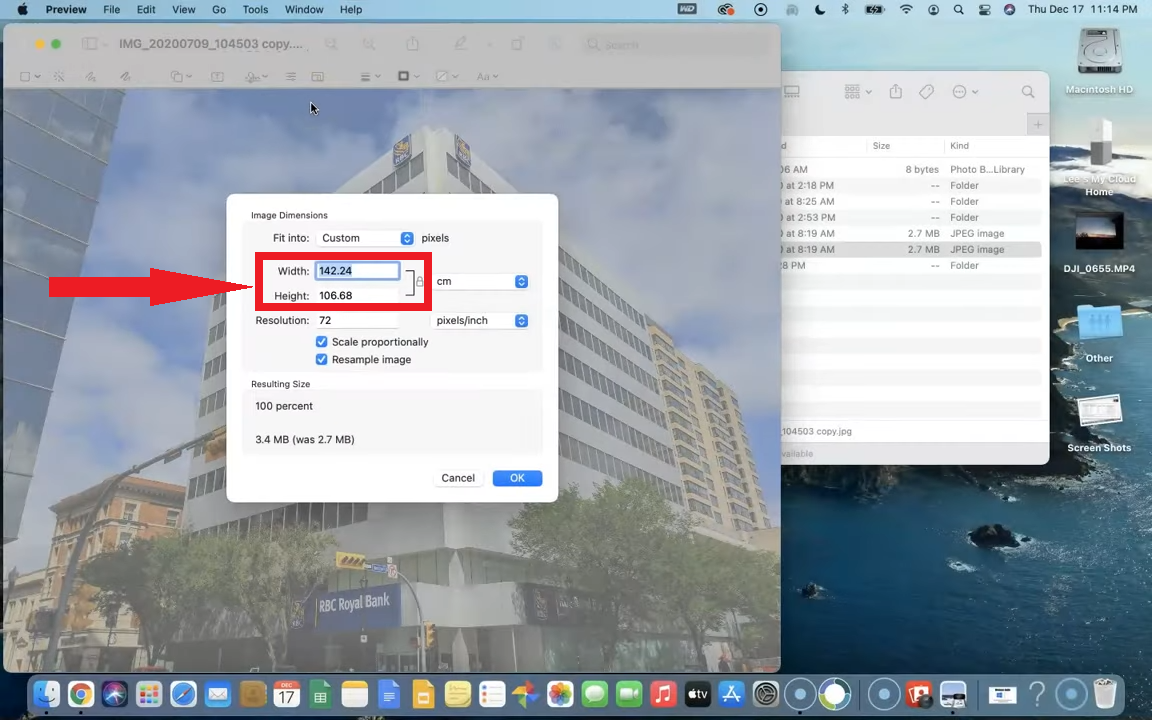
Click on Adjust Size - This action opens the “Image Dimensions” menu, offering various settings.
You’ll see Image Dimensions menu - The current size of the image will be displayed (for example, 142.24×106.68 pixels). A drop-down menu labeled “pixels” allows you to change the measurement units to inches, centimeters, points, millimeters, or percentages if you prefer.
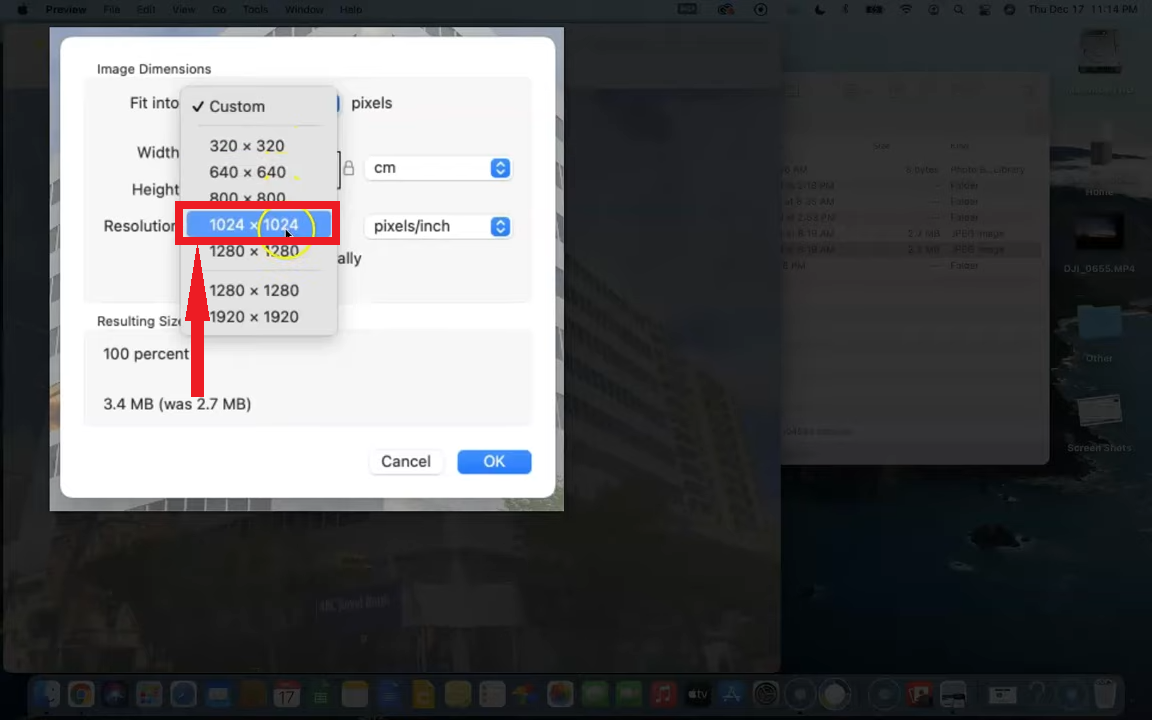
You can adjust the size - To adjust the image size, select a different measurement from the drop-down menu on the right, which is set to pixels by default. For instance, choose a size like 1024x1024.
Choose the size from drop down menu - Once you’re happy with the new size, click “OK.” Remember to save your image after resizing.
Click OK when done
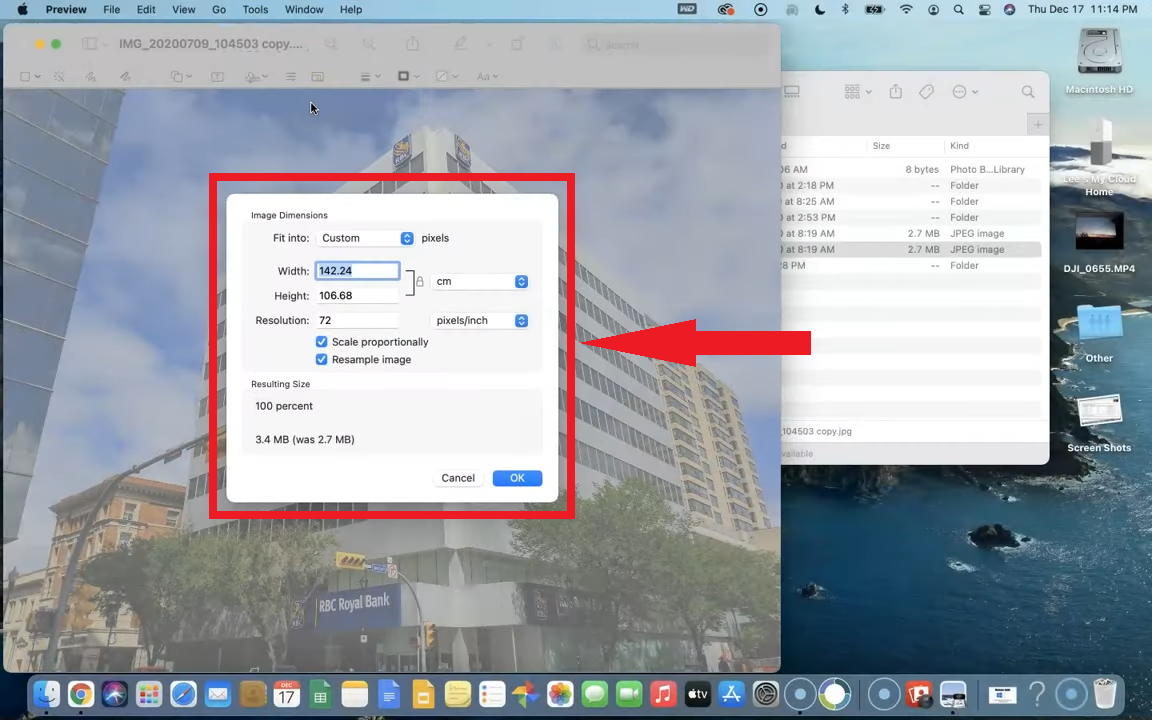
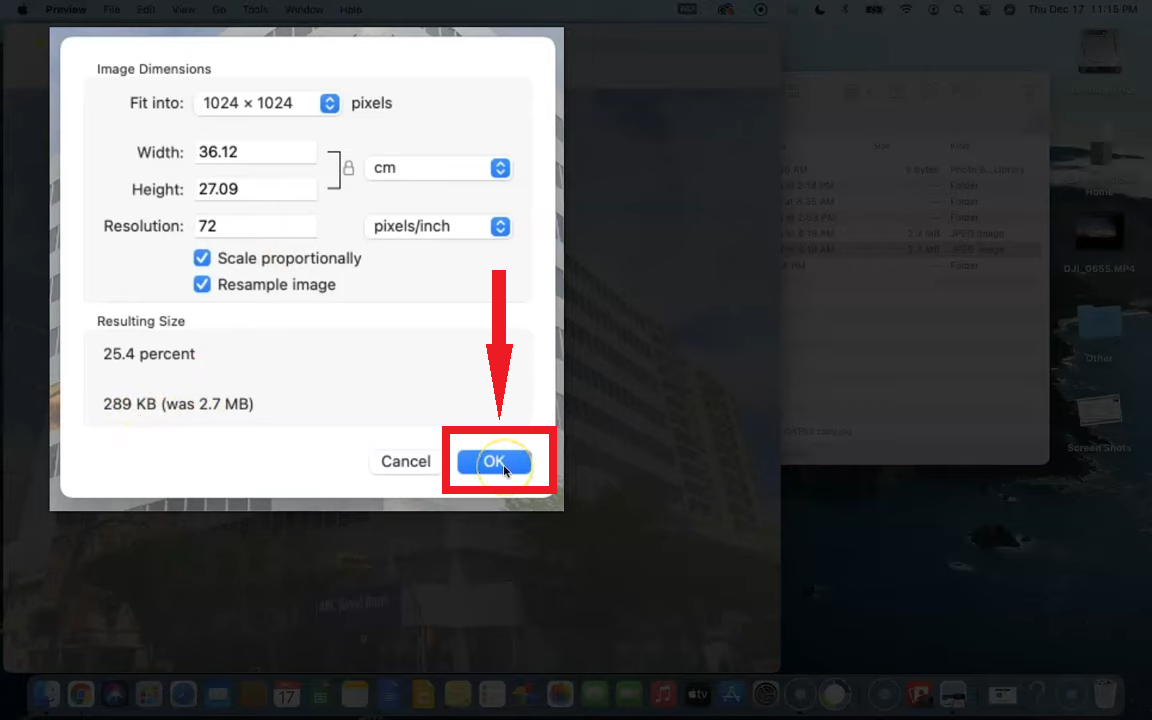
If the “Scale proportionally” option is checked, changing one dimension will automatically adjust the other to keep the image’s proportions the same.
Images sourced from: SaaSTech Servers
READ MORE: How To Animate a Picture Easily in 2024 – Beginner Guide ➜
↪ Resize multiple images at once using Preview
Resizing a bunch of photos on your Mac doesn’t have to be done individually. You can resize many images together using Preview. Here’s how to do it:
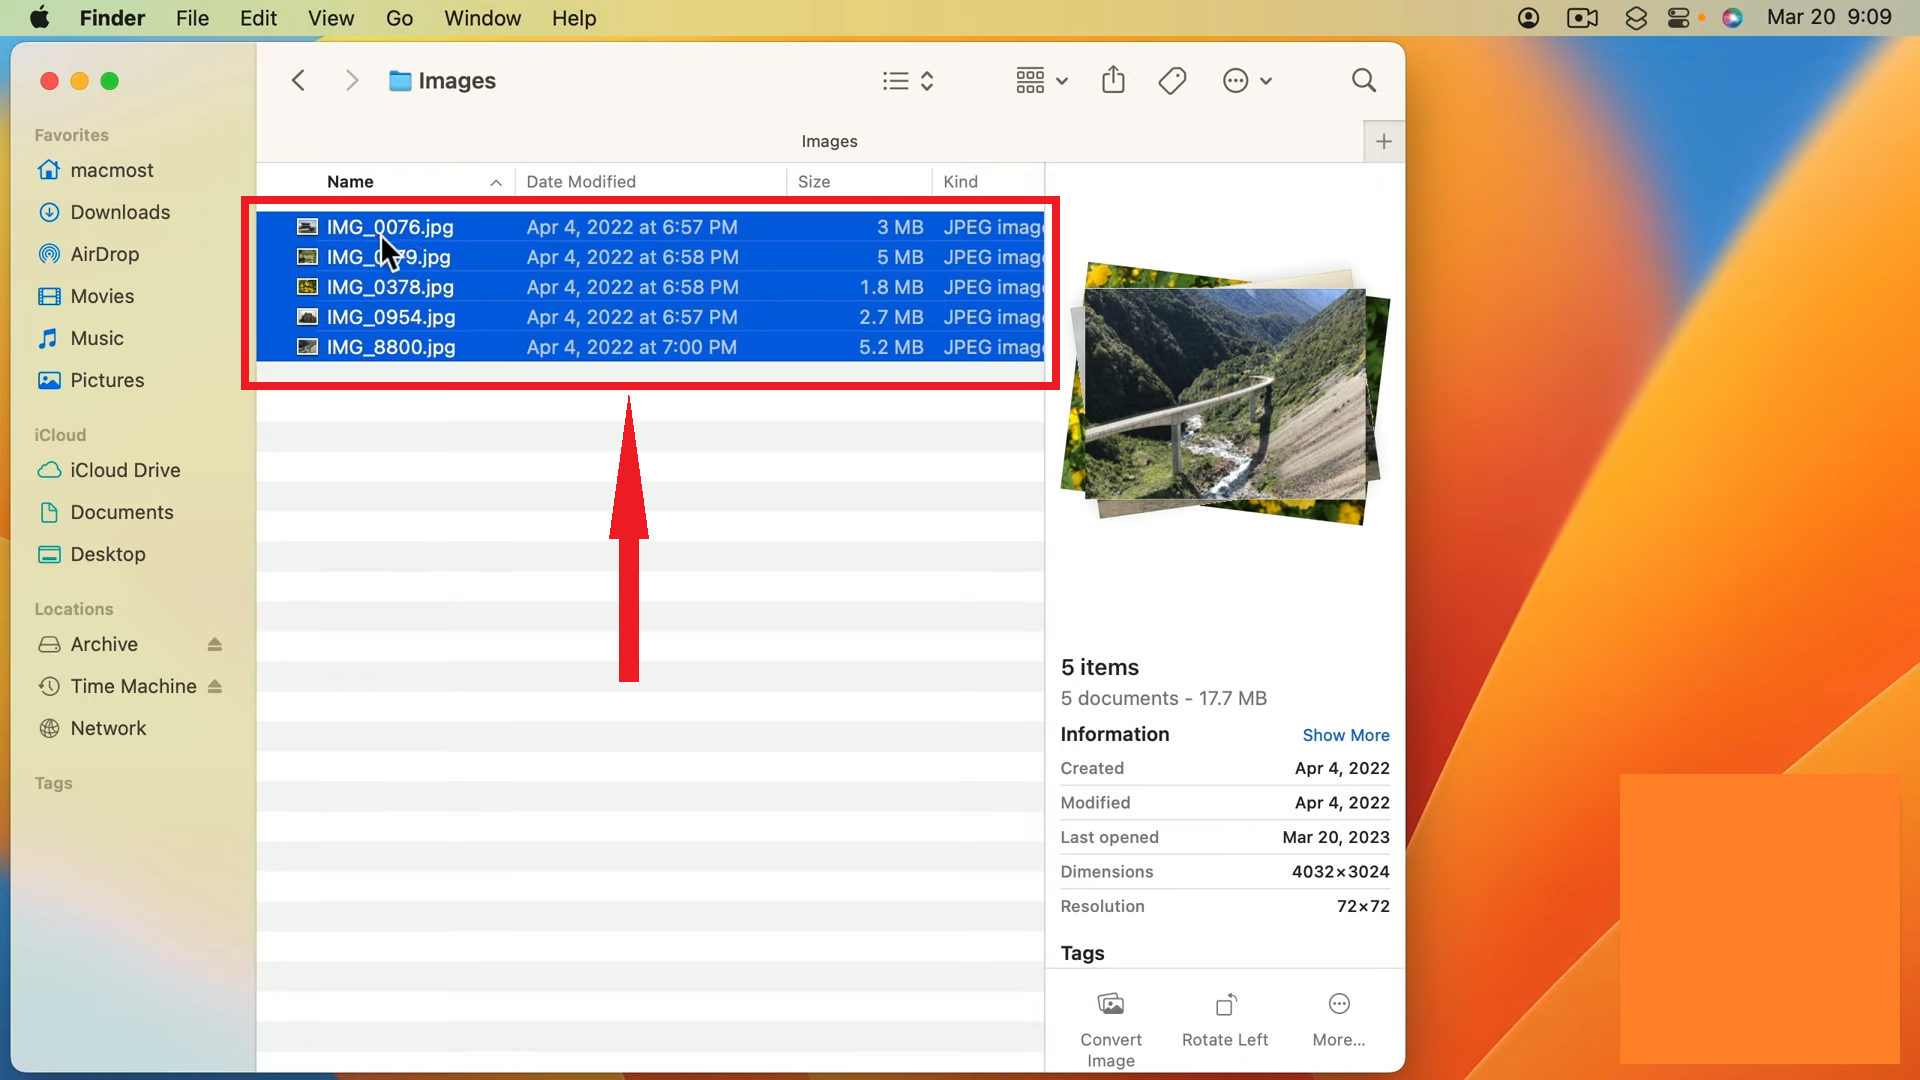
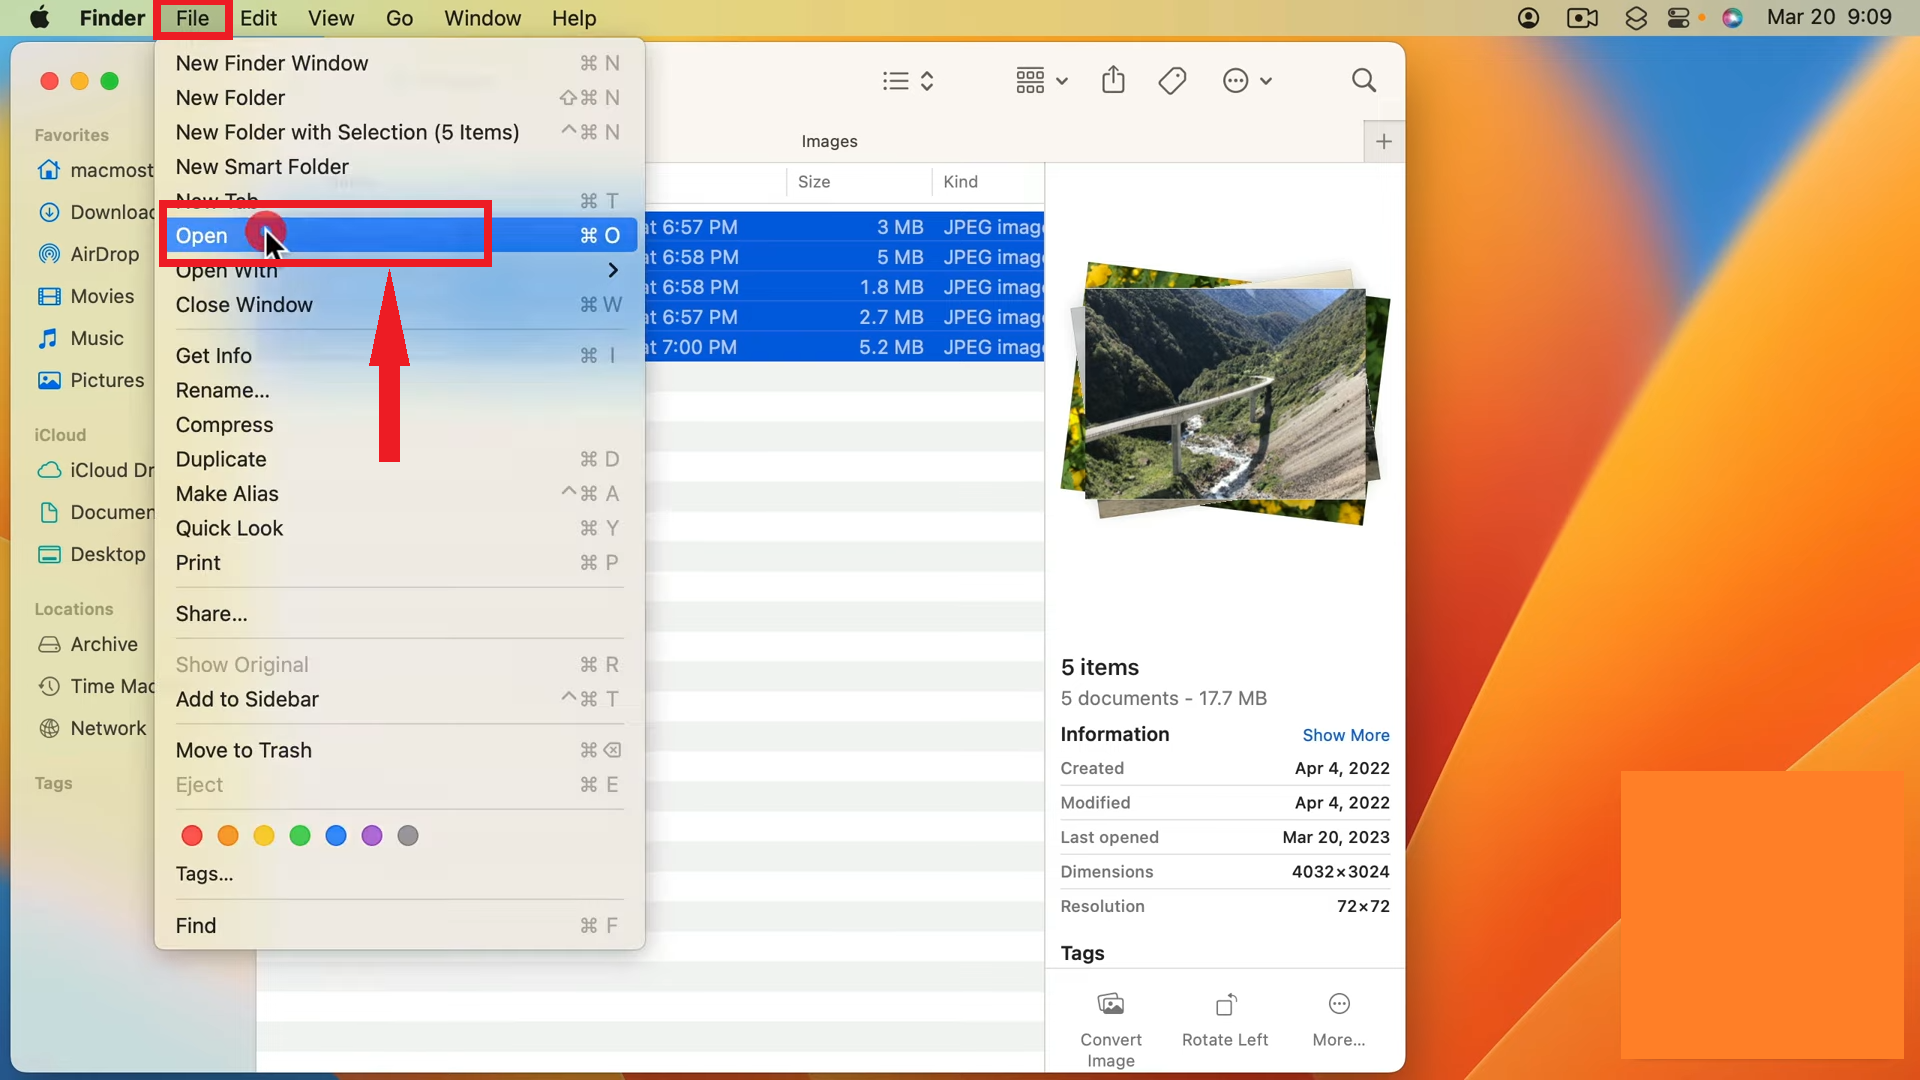
- In a Finder folder, choose all the images you wish to resize by clicking on them, then right-click.
Select all the images - Go to the top menu bar, select “File,” and click “Open.” This will open all the images in Preview app.
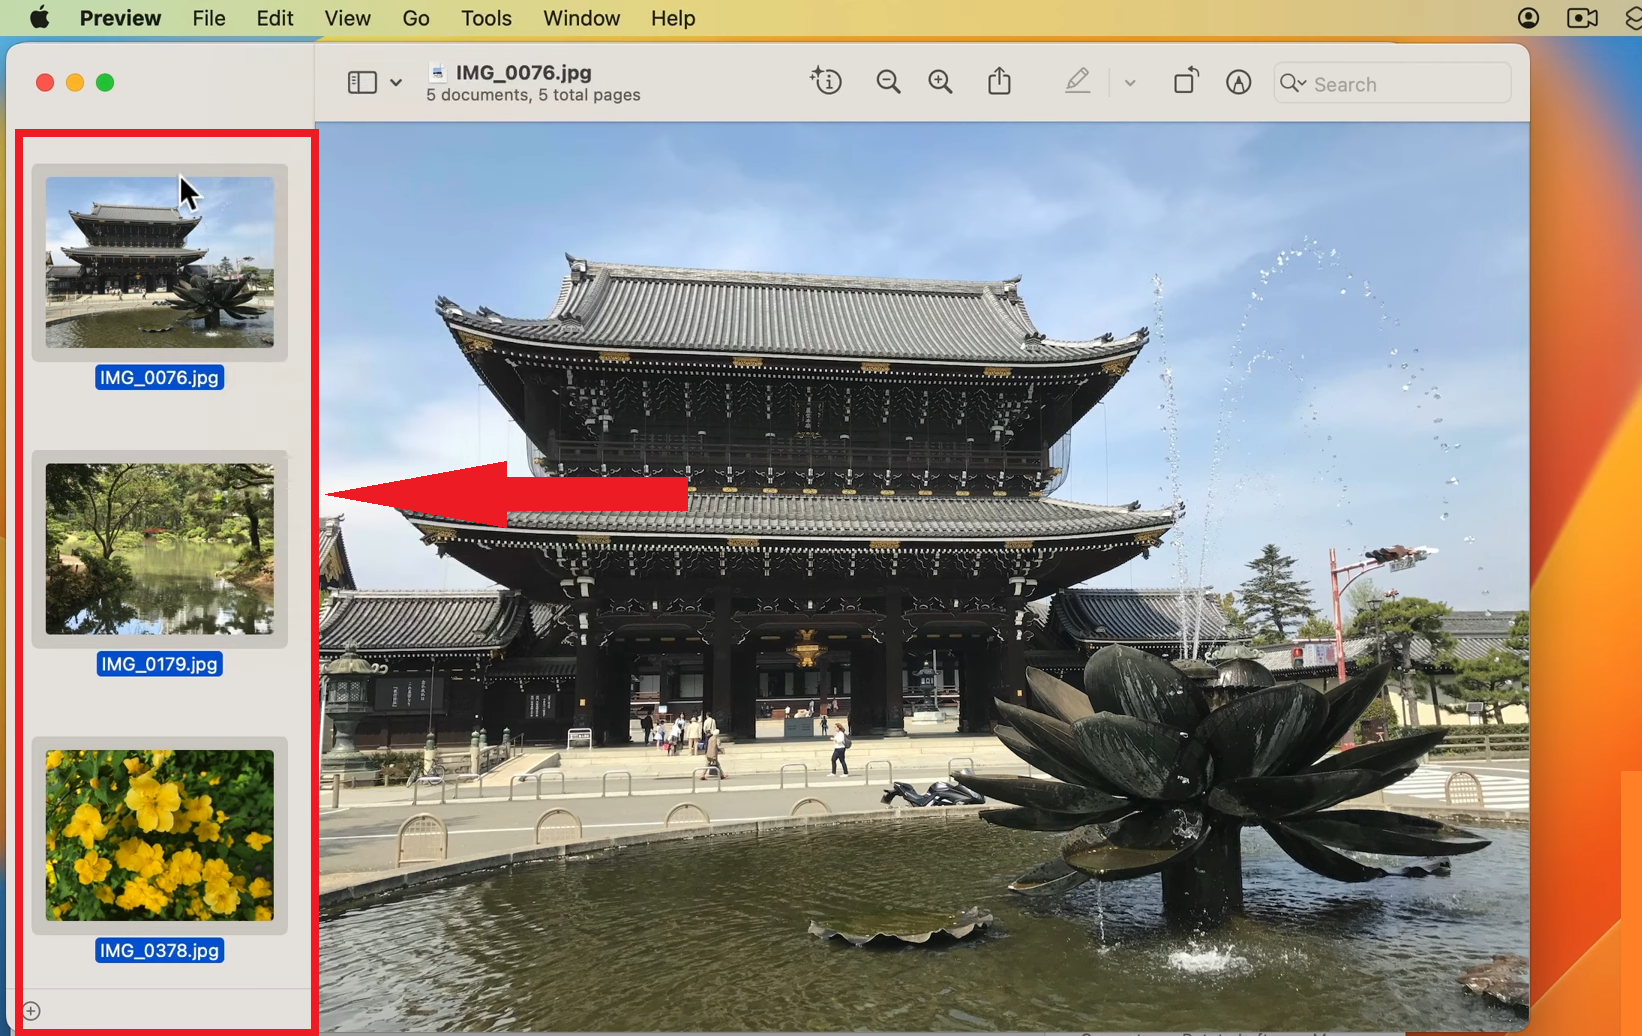
Click Open - Once your images are open in Preview, you’ll notice one image in the middle and the others as small previews on the side. Press “Command + A” to select all the photos.
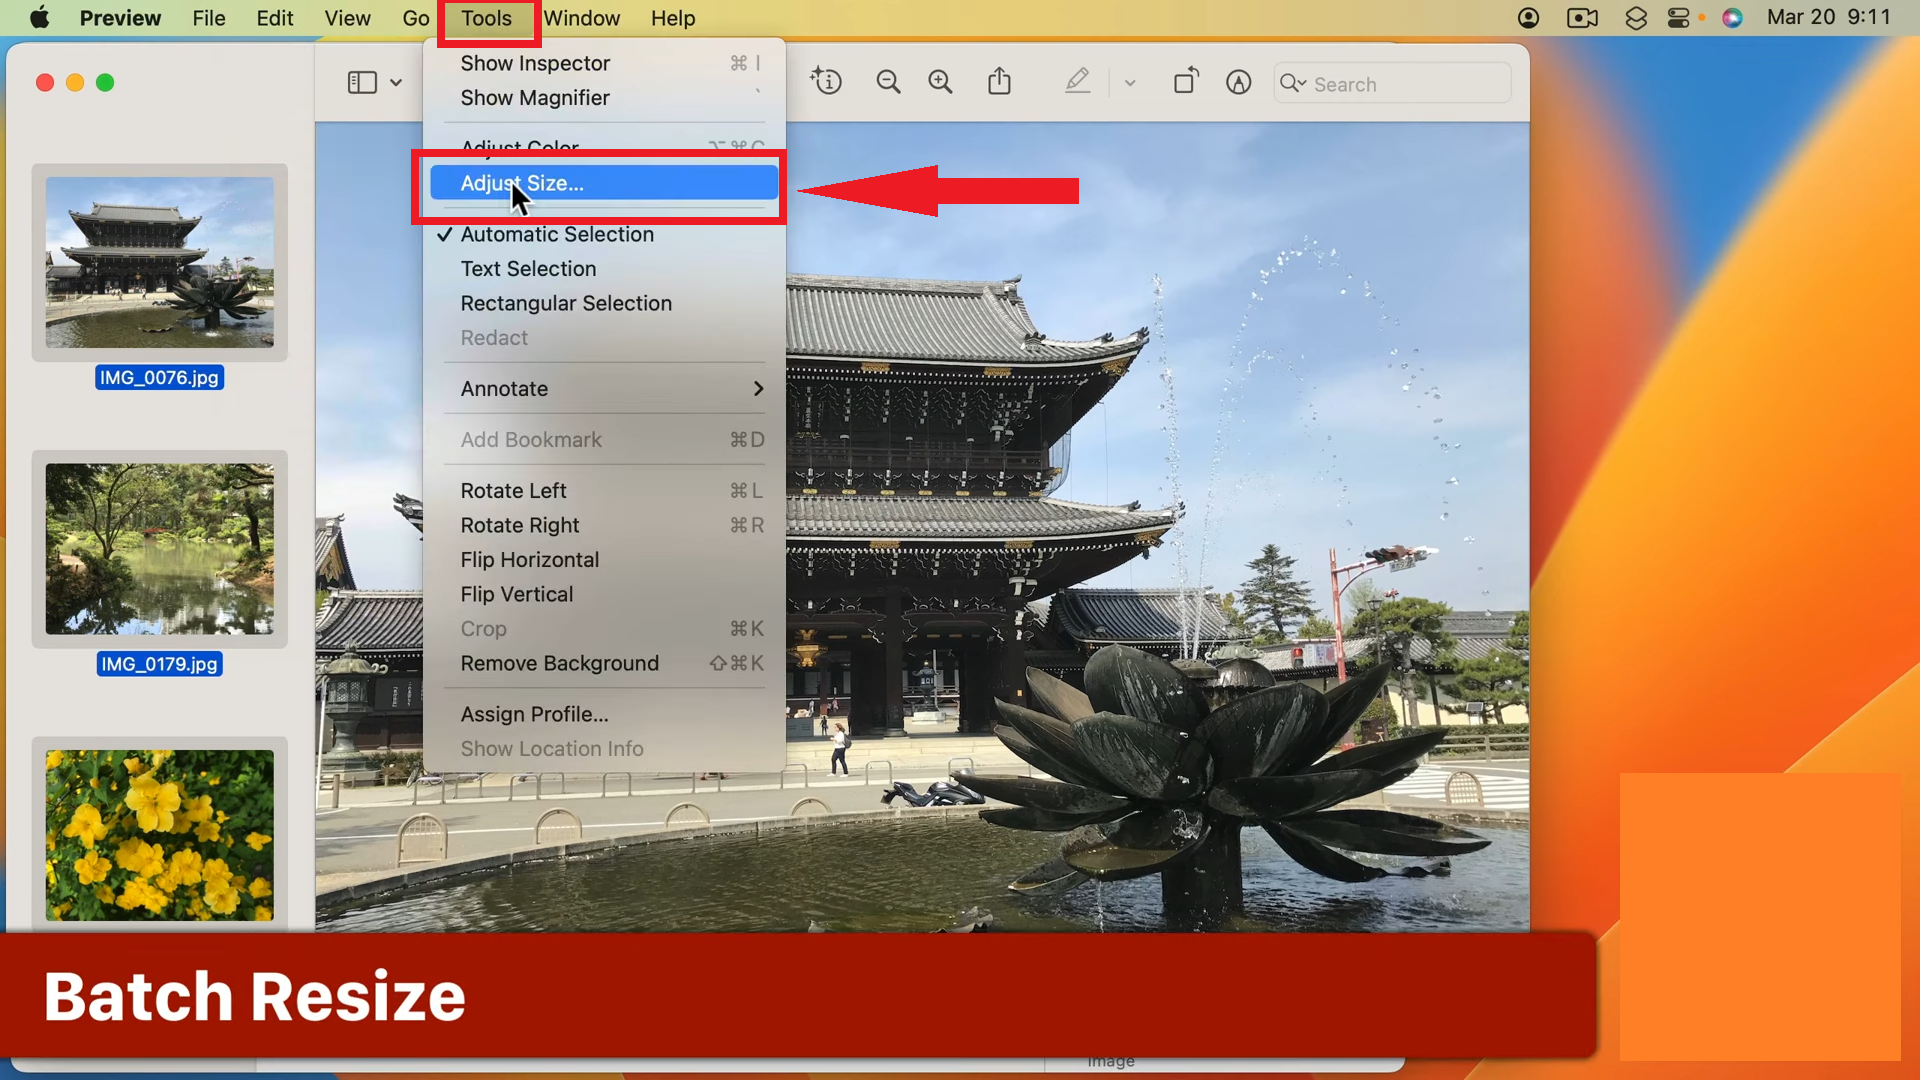
Select all images by pressing Command + A - Head over to “Tools” in the Preview menu at the top and choose the “Adjust Size” option.
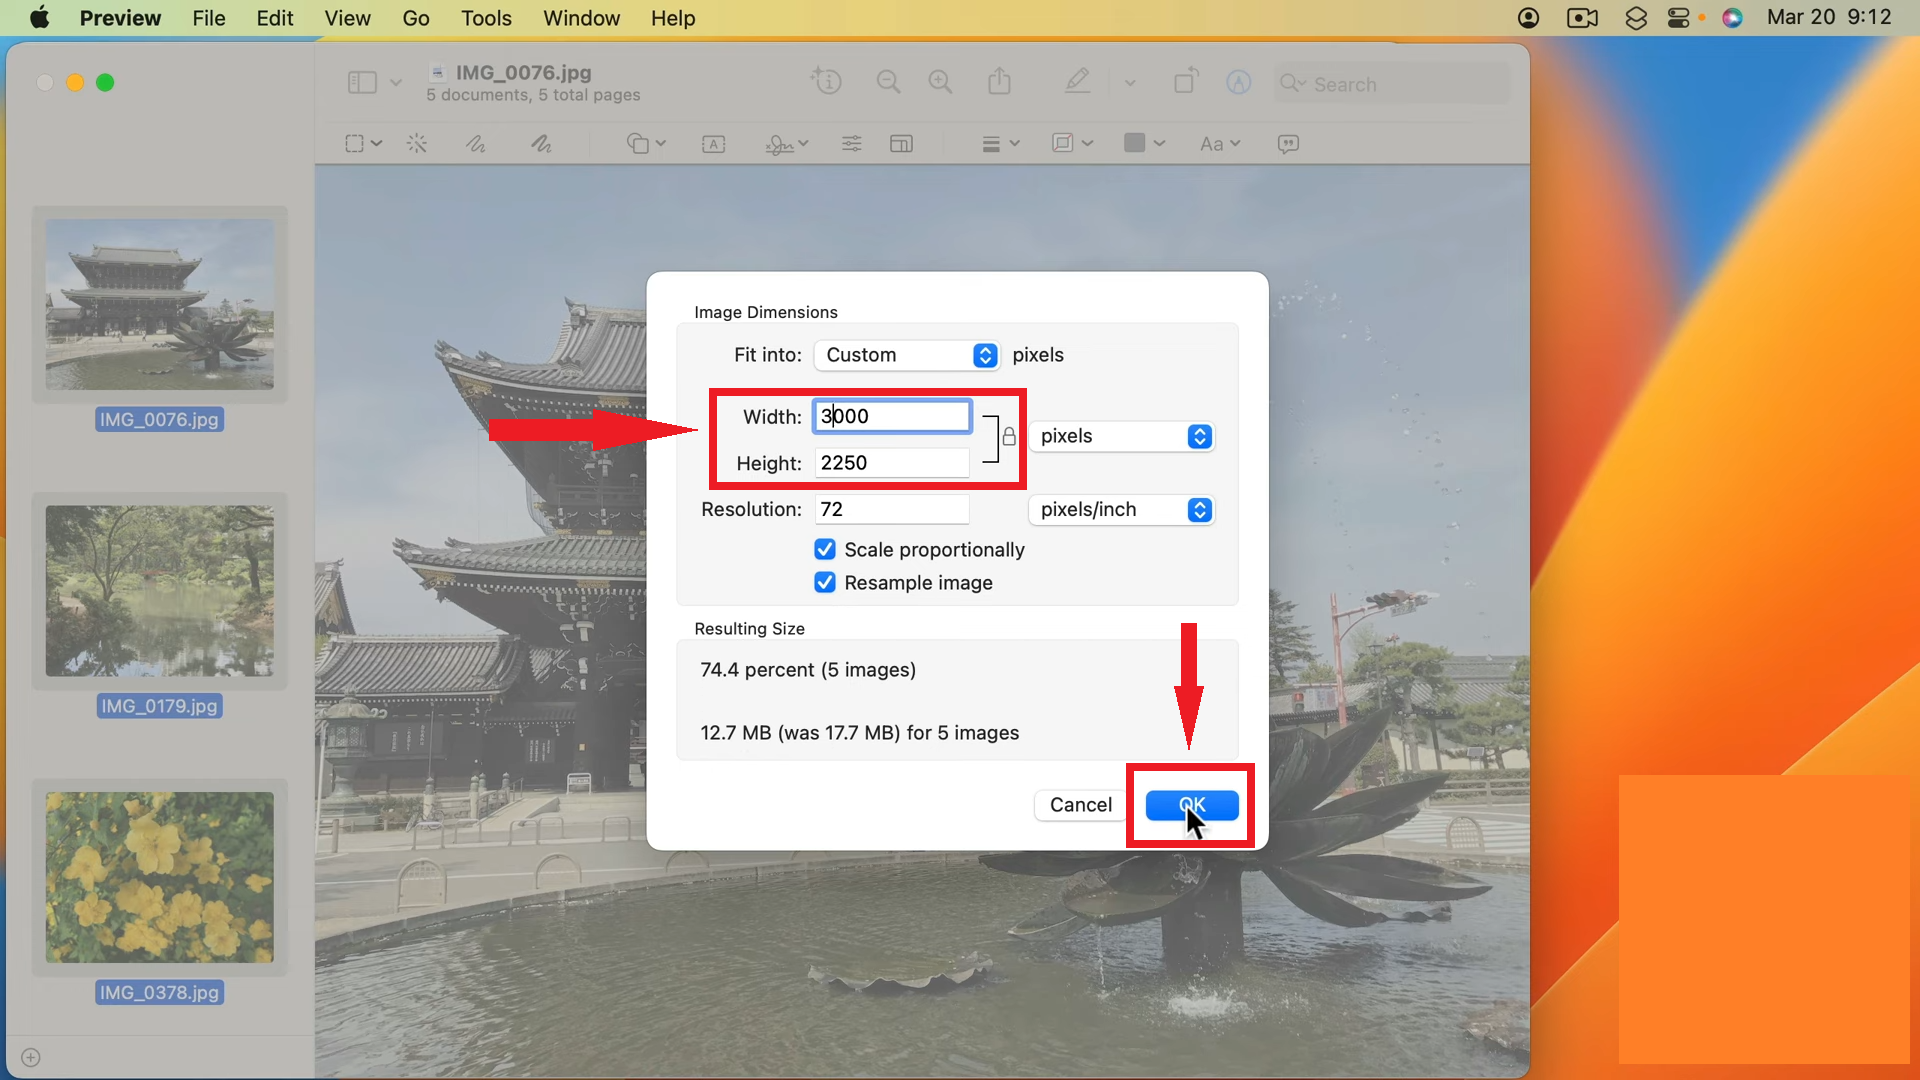
Click on Adjust Size - In the window that appears, set the new size for your images and click “OK.”
Click OK to complete the process
READ MORE: How to Scale or Resize Images in GIMP? ➜
↪ Cropping an image in Preview
Cropping an image in Preview is also straightforward. Here’s how to focus on just the part of the photo you want to keep:
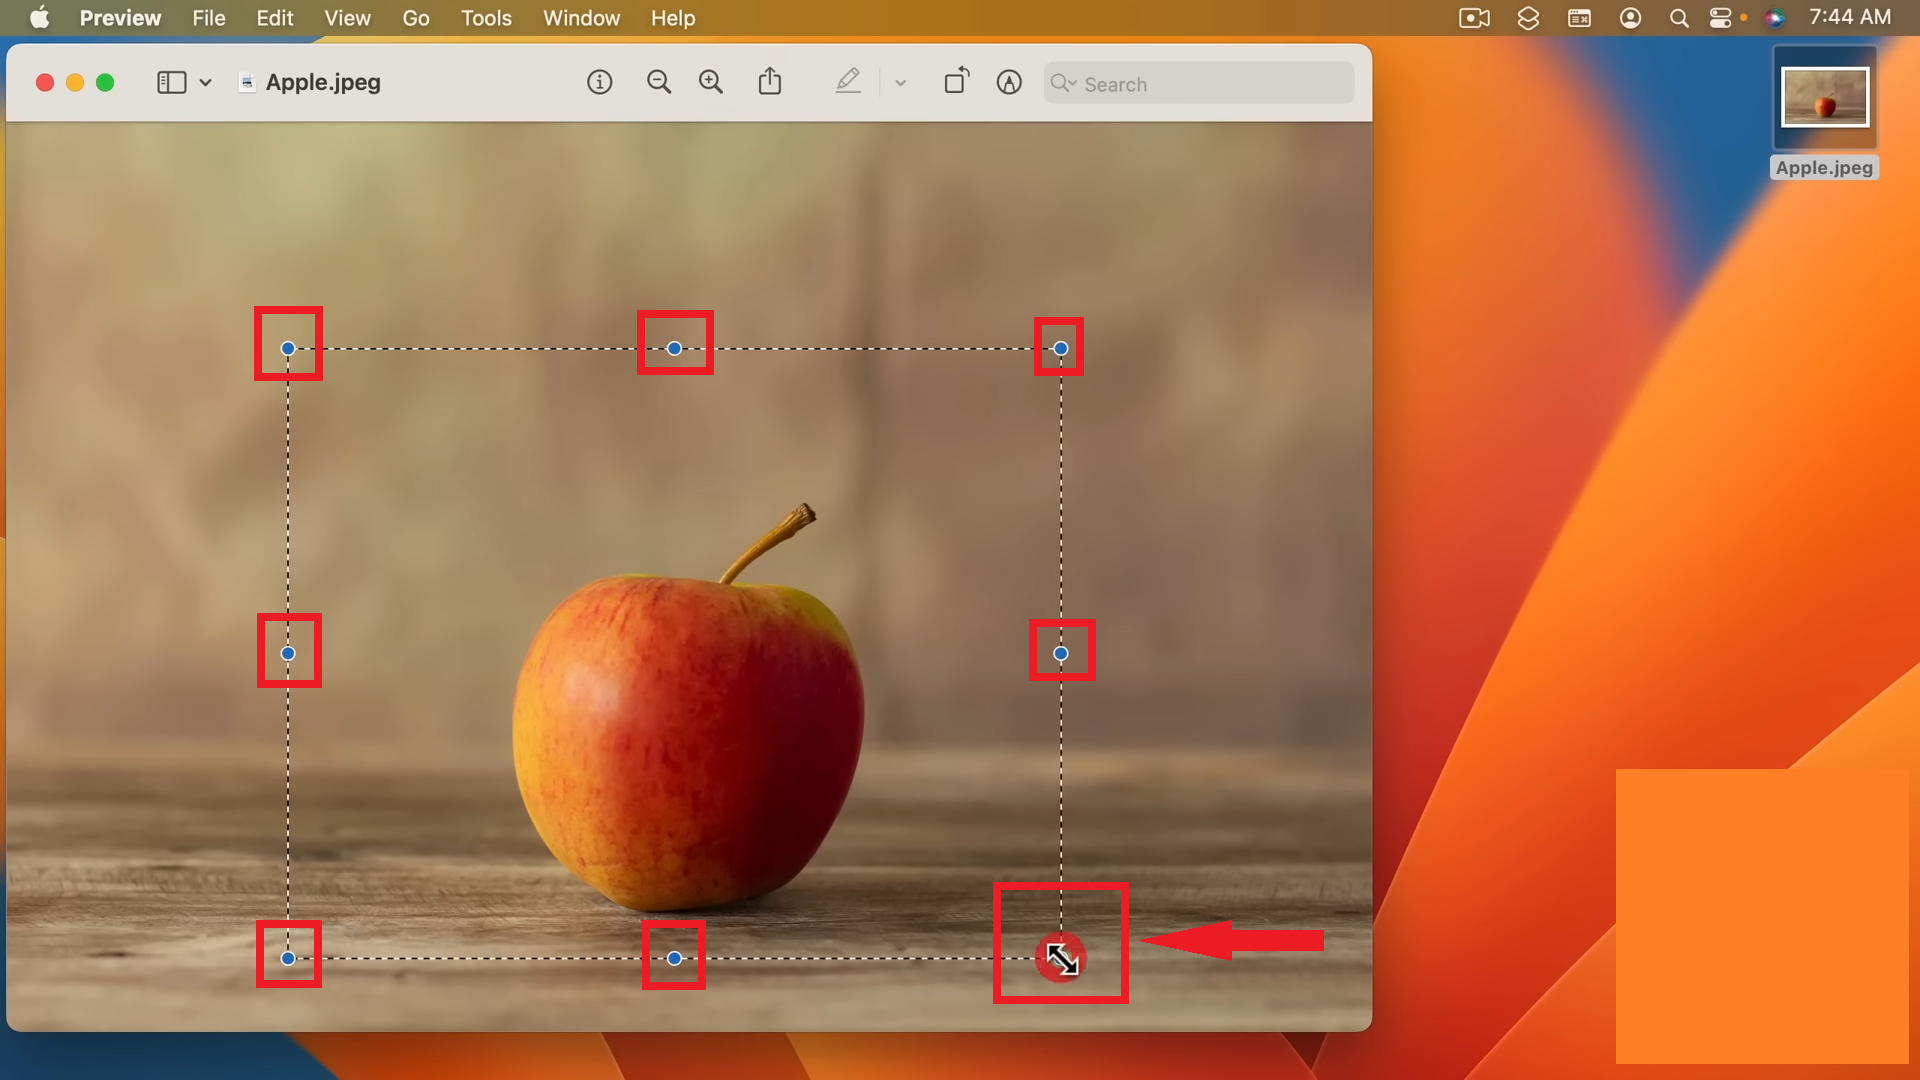
- First, open your picture in Preview, click anywhere on the image, and drag your mouse to draw around the area you’re interested in. When you release the mouse, a dotted line will show the selected part.
Select the area with mouse - Next, go to the top where “Tools” is and click on it, then choose the “Crop” option to cut away the parts outside your selection.
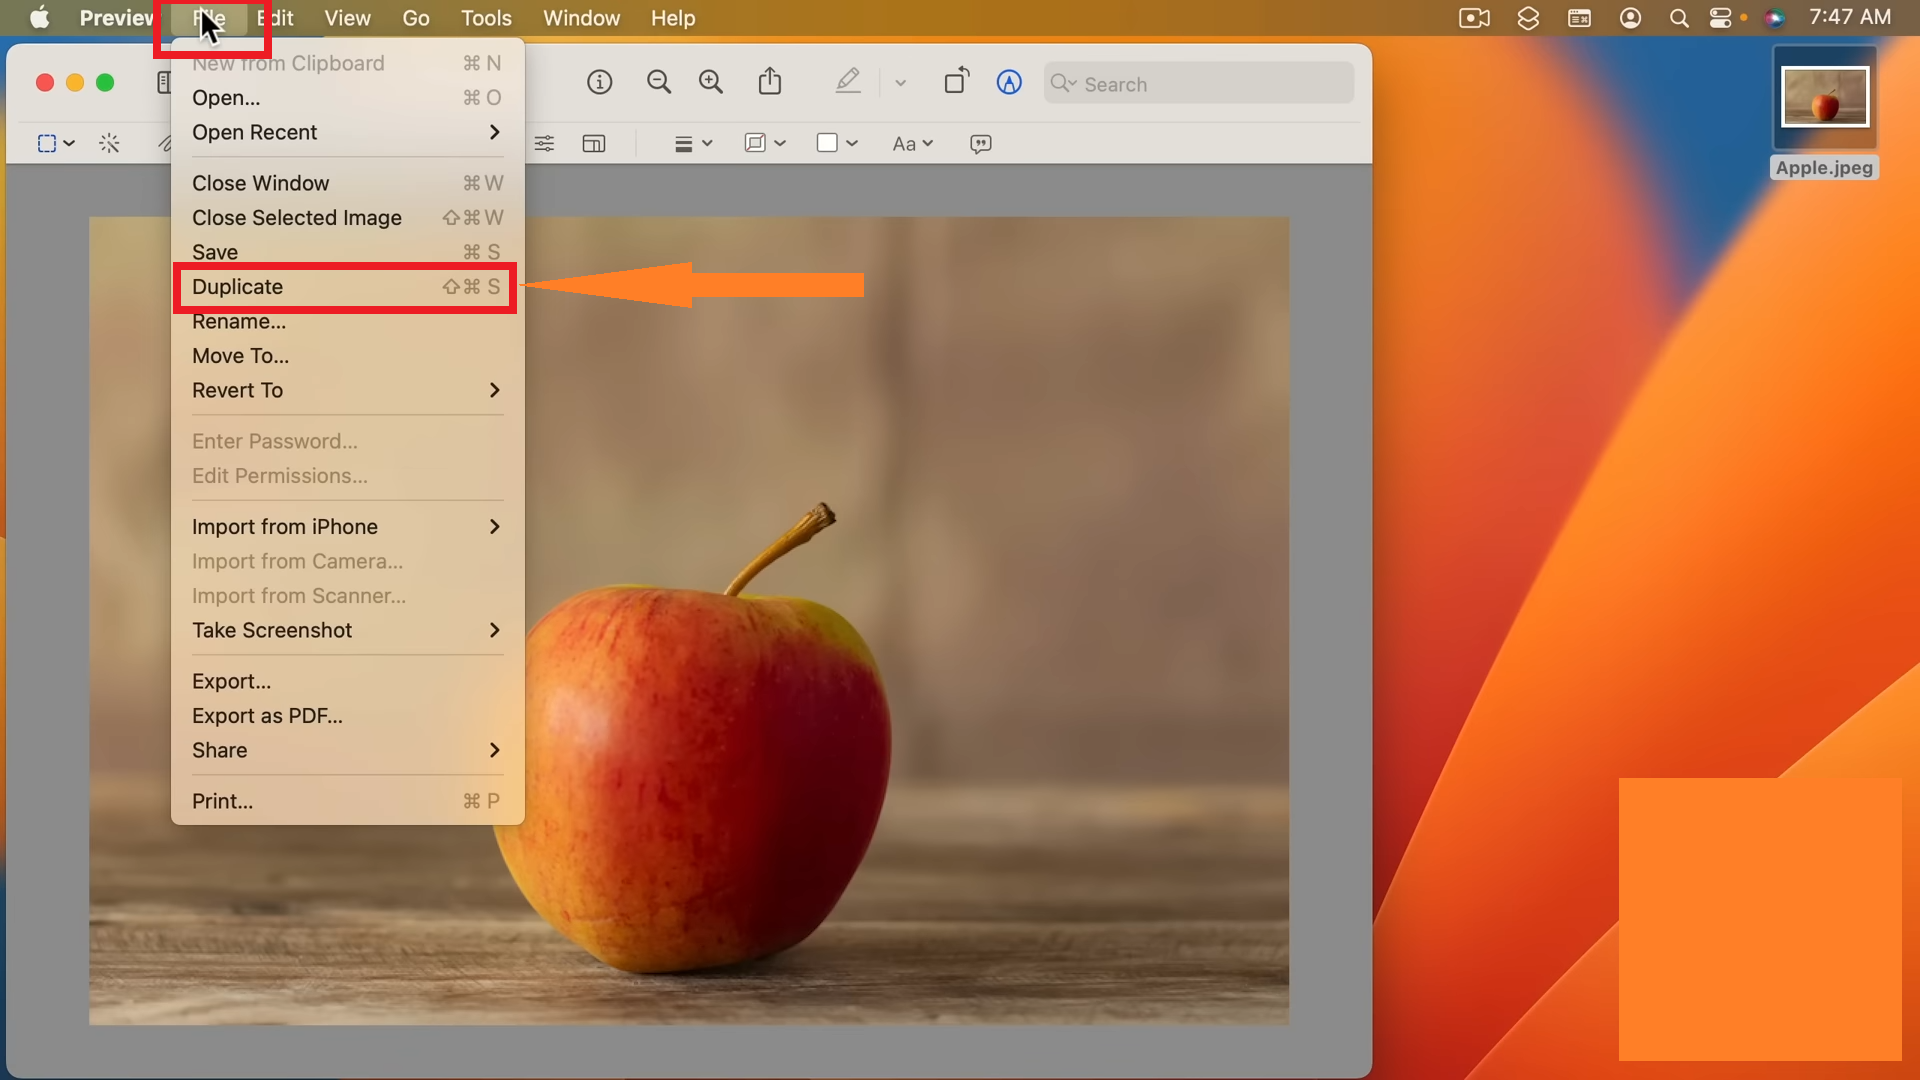
Click on Crop - To save this change, press Cmd+S. If you’d like to save this cropped section as a new file while keeping the original untouched, click on “File,” then select “Duplicate.”
Choose Duplicate to save as a copy

Images sourced from: macmostvideo
2. Resize images on a Mac with Pages
If you’re using the Pages app on your Mac to work with documents, changing the size of pictures within your Pages files is straightforward. Here’s how you do it:
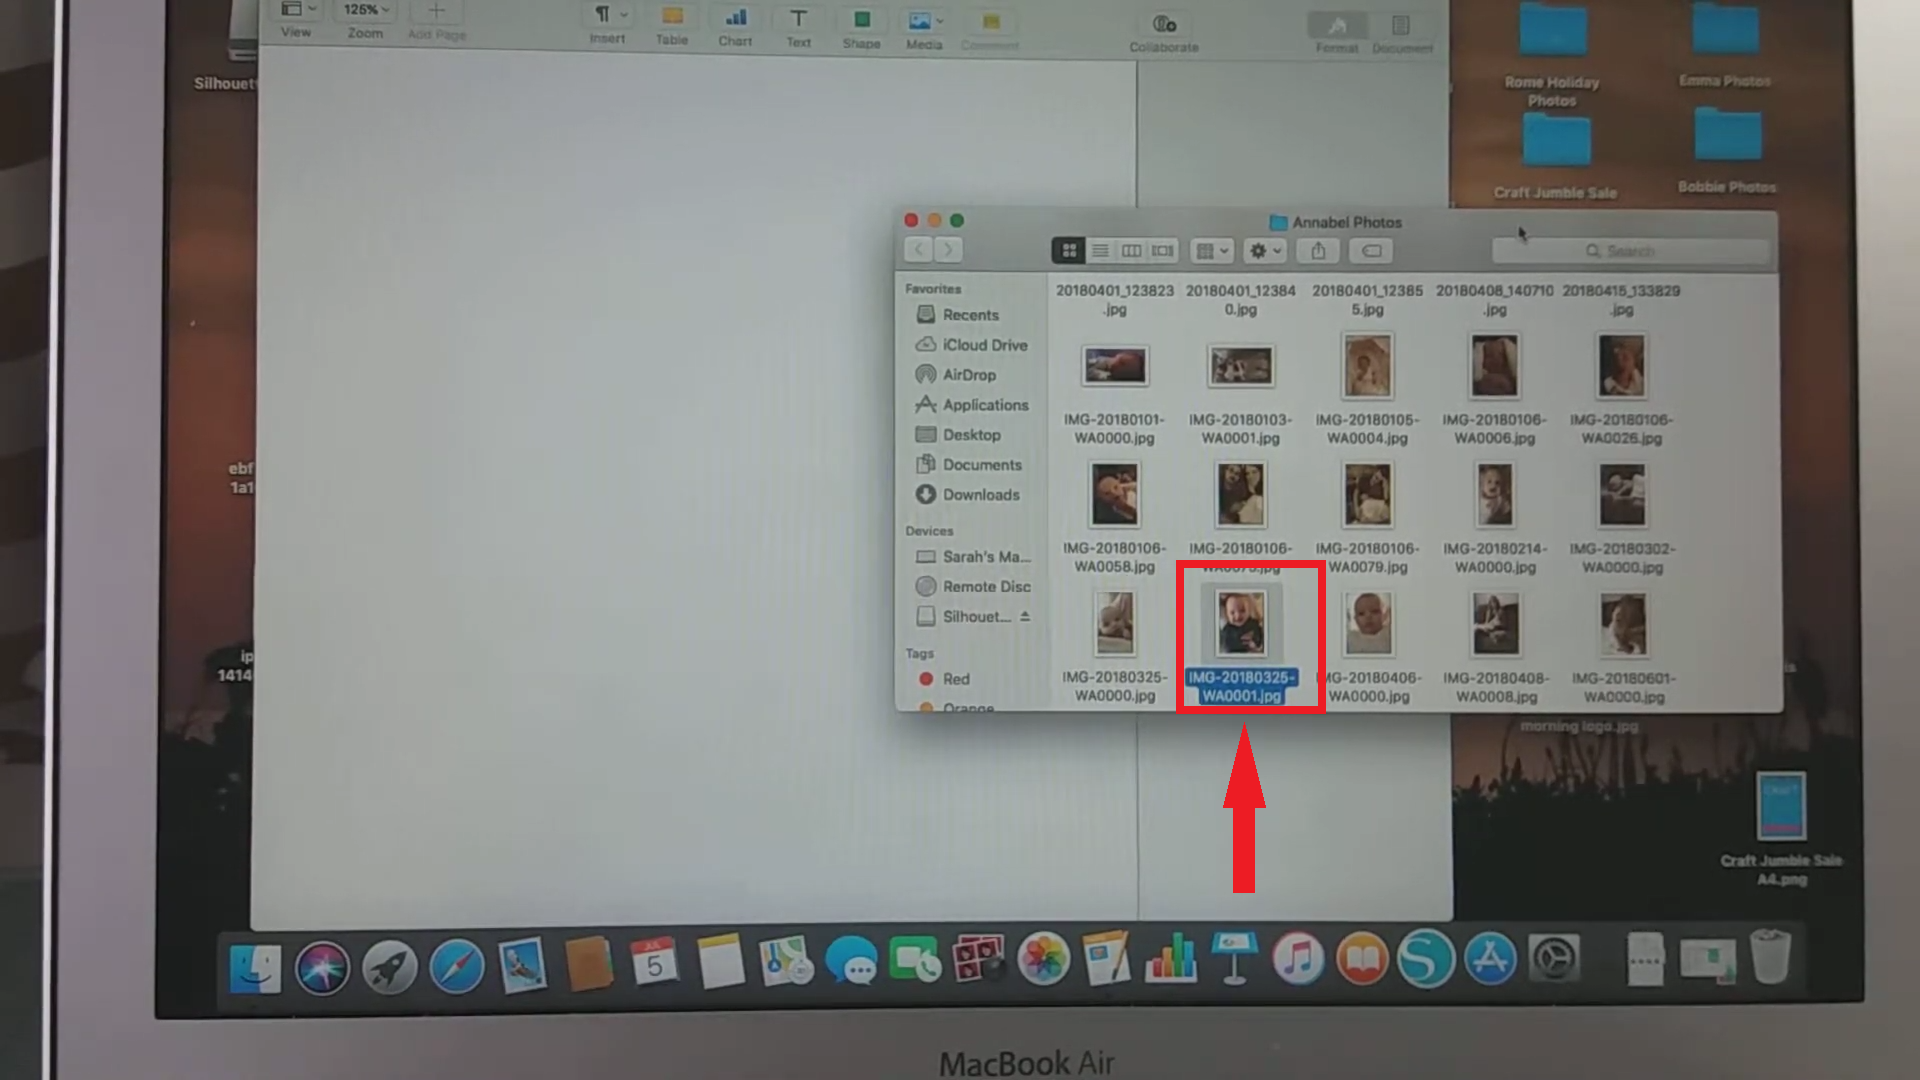
- First, open up Pages and click on the picture you want to make bigger or smaller.
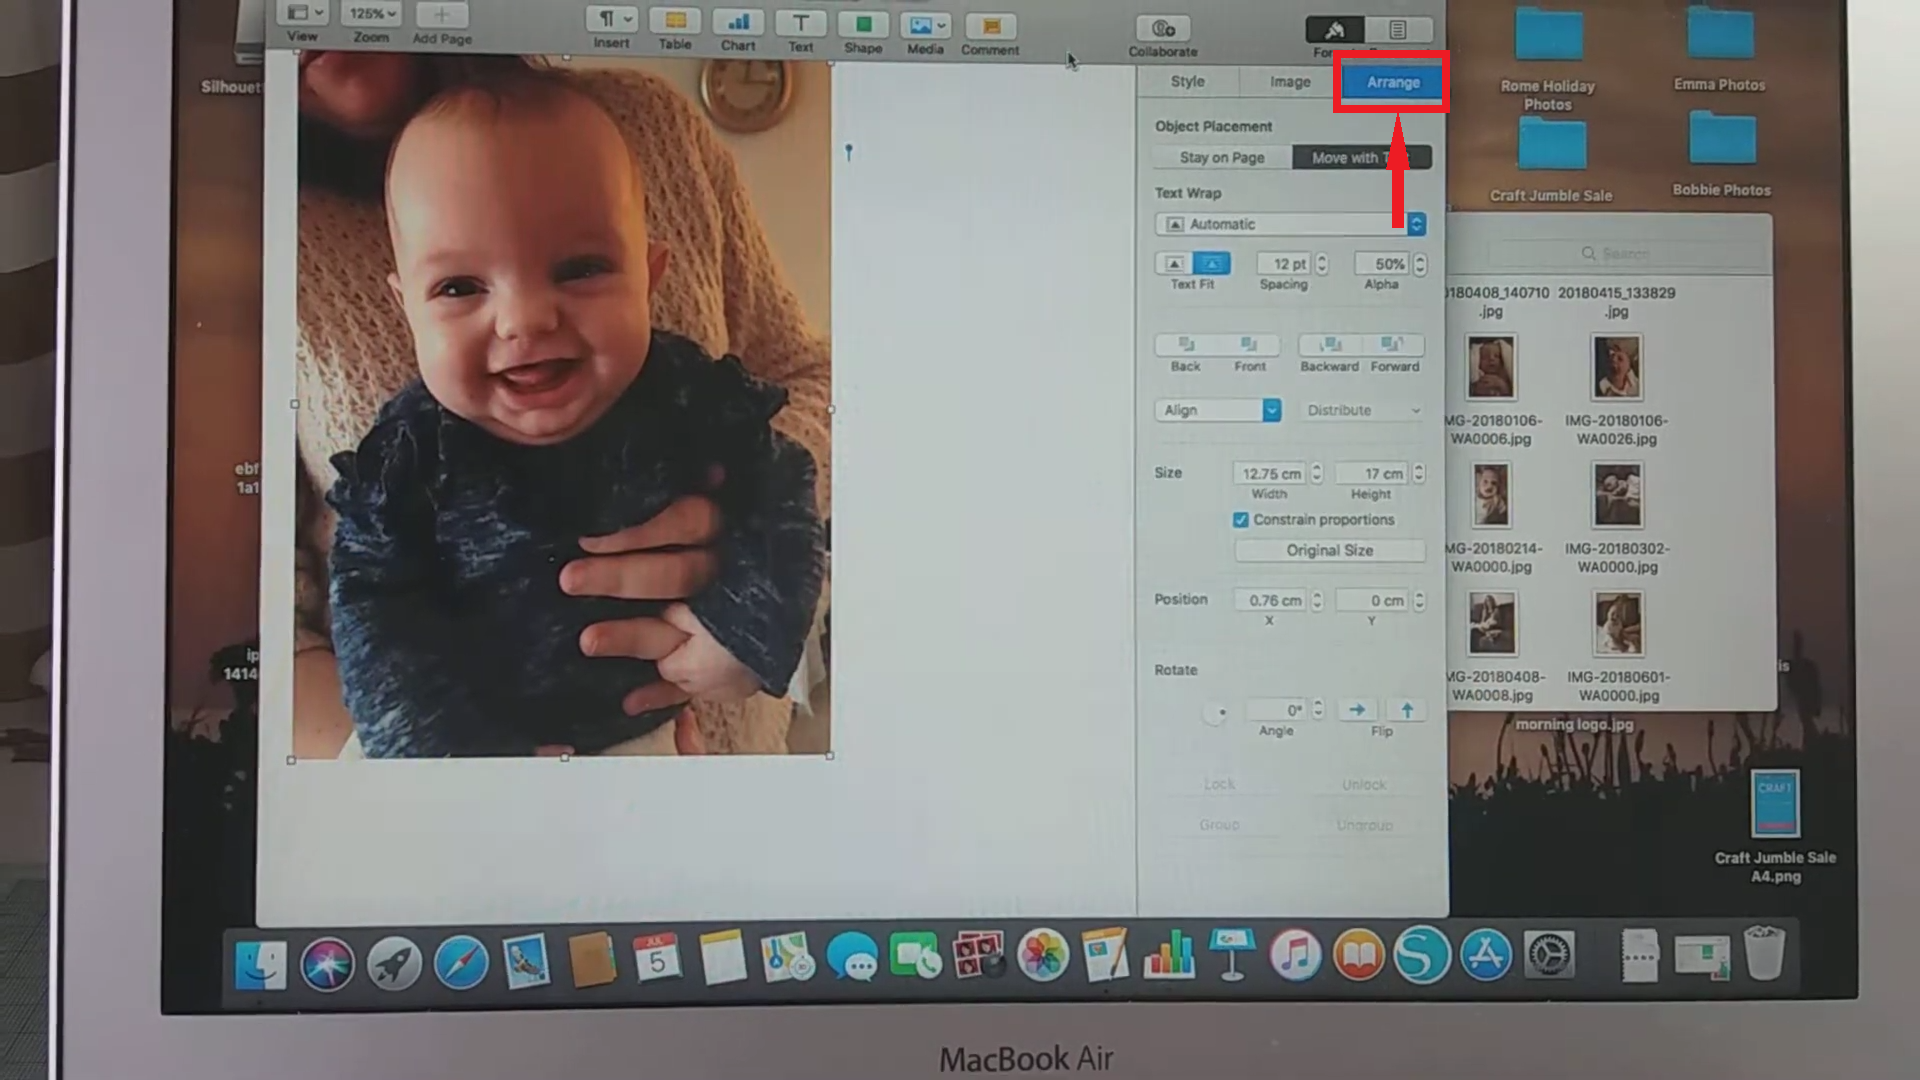
Open the image - Then, look to the right panel and find the “Arrange” section.
Click on Arrange - Inside the “Size” sub-section, you can type in new sizes for your picture. If you want the picture to keep its original shape (so it doesn’t look stretched or squished), check the “Constrain proportions” box. If you change the width, the height will automatically adjust to keep the picture looking right.
Adjust the image size
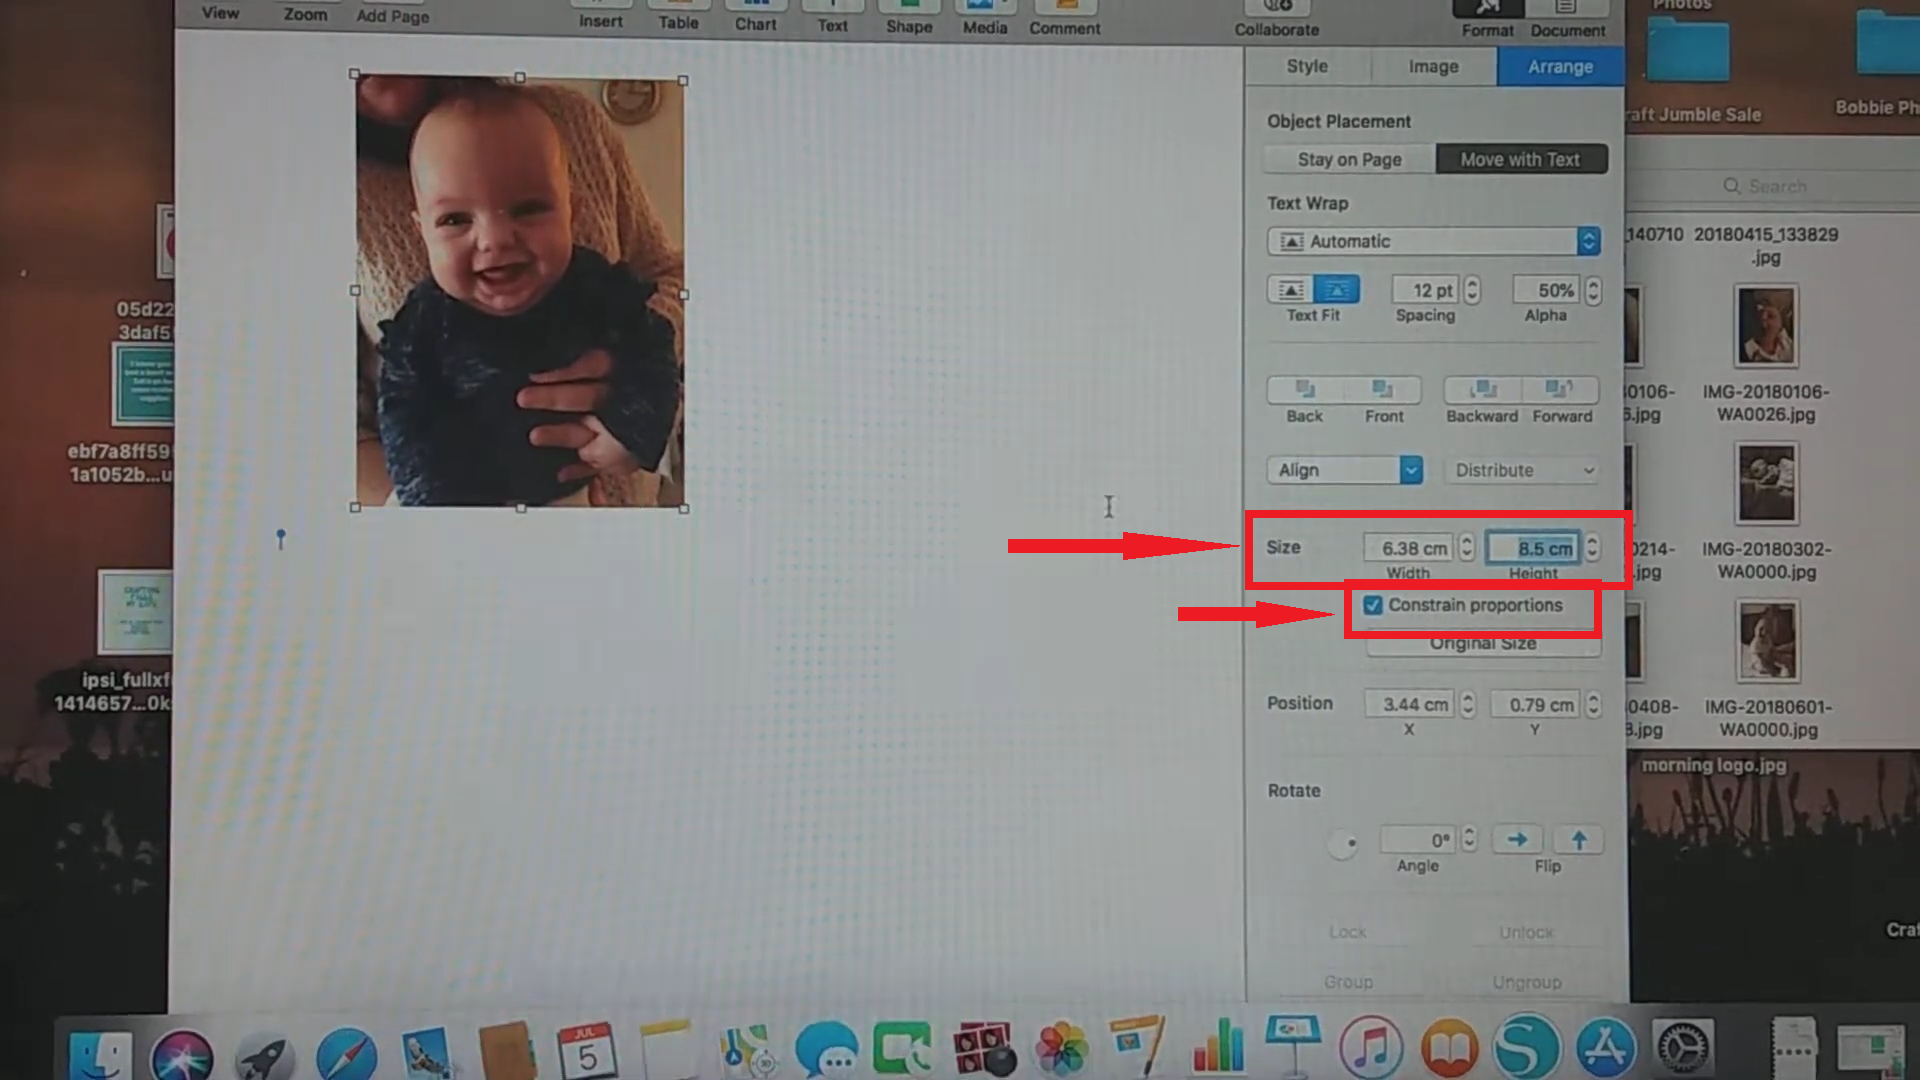
After you enter new numbers for the width or height, the picture in your document will change size immediately.
Images sourced from: Vintage Follie
READ MORE: How to Crop or Resize your PDF Pages Easily? ➜
3. Resize images on a Mac using the Photos app
The Photos app, which replaced iPhoto in 2015, is something many of us use often. Besides just viewing your photos, it allows you to edit RAW images, add your own filters, and even make slideshows.
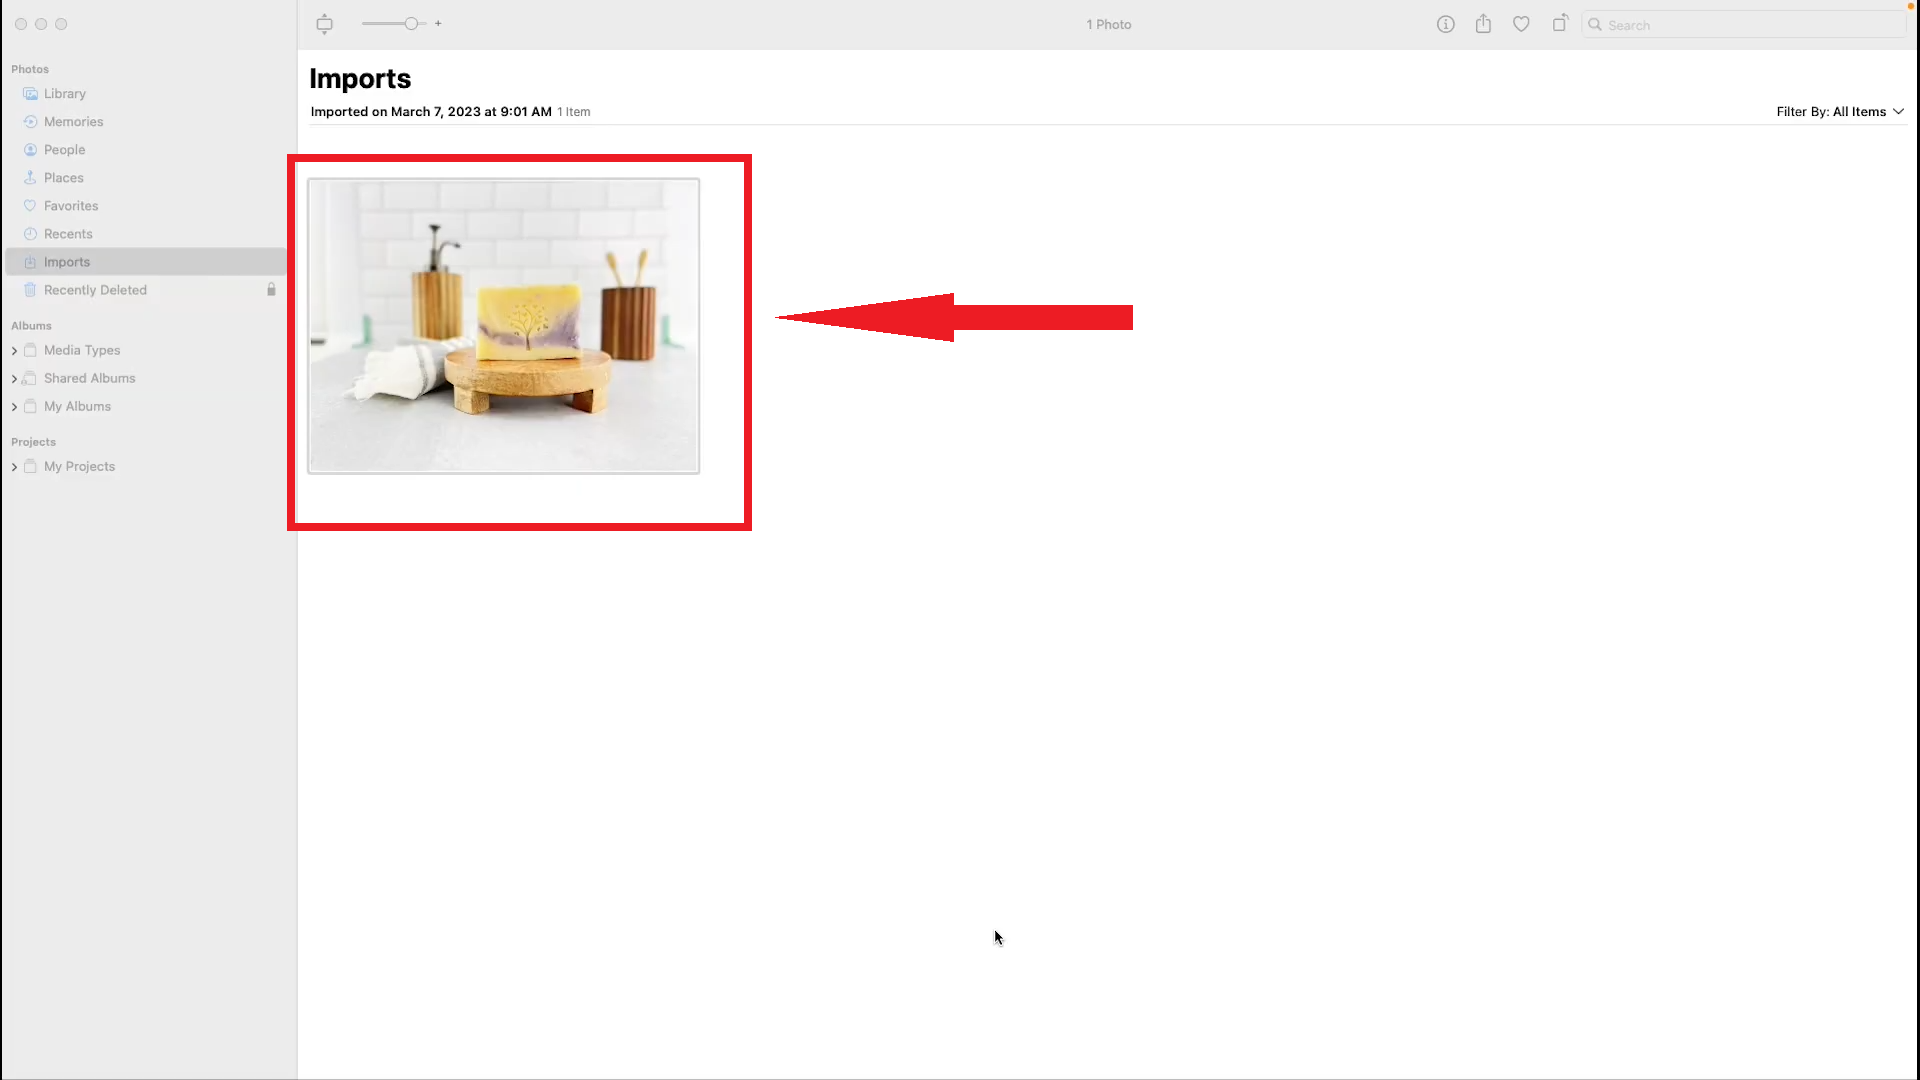
Before editing, you need to add the photo to your Photos library. Pictures from your iPhone, digital camera, or SD card are likely already there. For images from the internet or elsewhere, you can drag them into the Photos app or choose File > Import.
Here’s how to resize a photo in Photos:
- Open the Photos app and pick the photo(s) you want to resize.
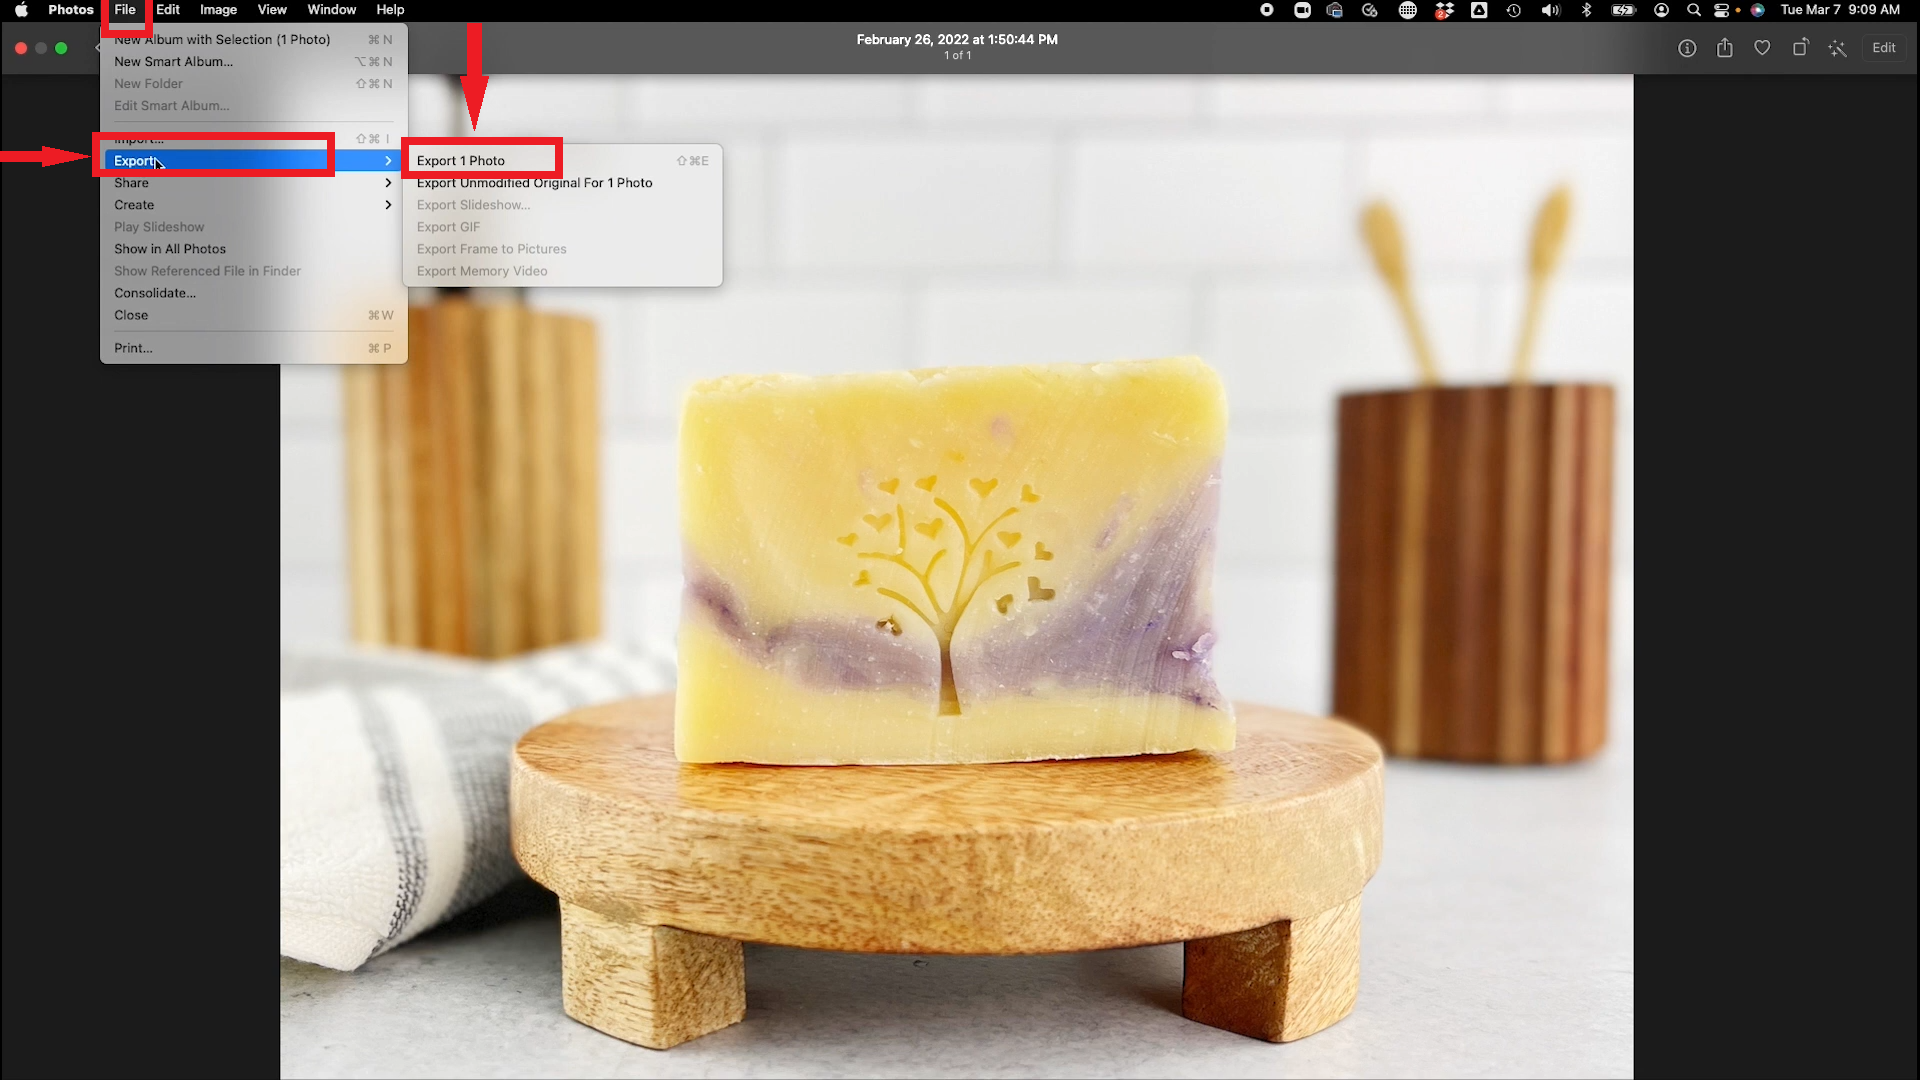
Select the photo you want to resize - Go to File > Export 1 Photo (or more, depending on how many you’re working with).
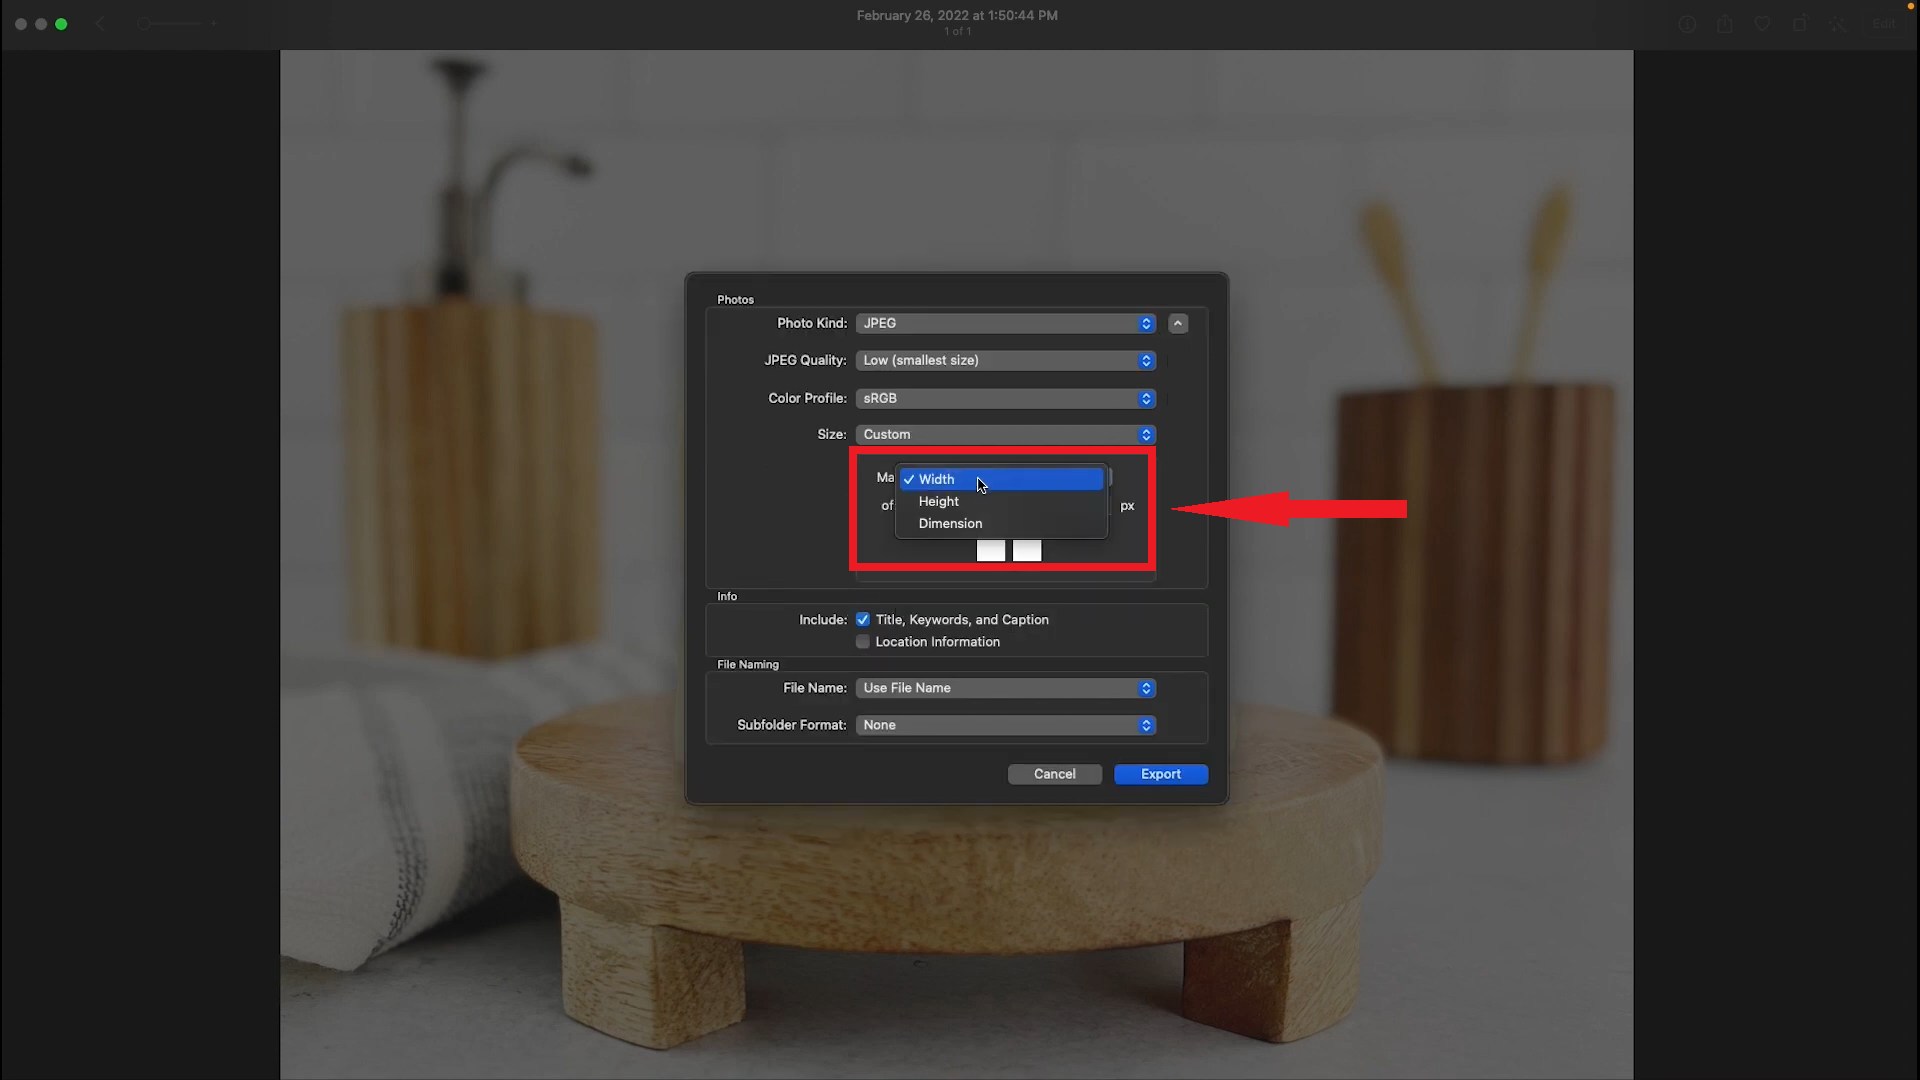
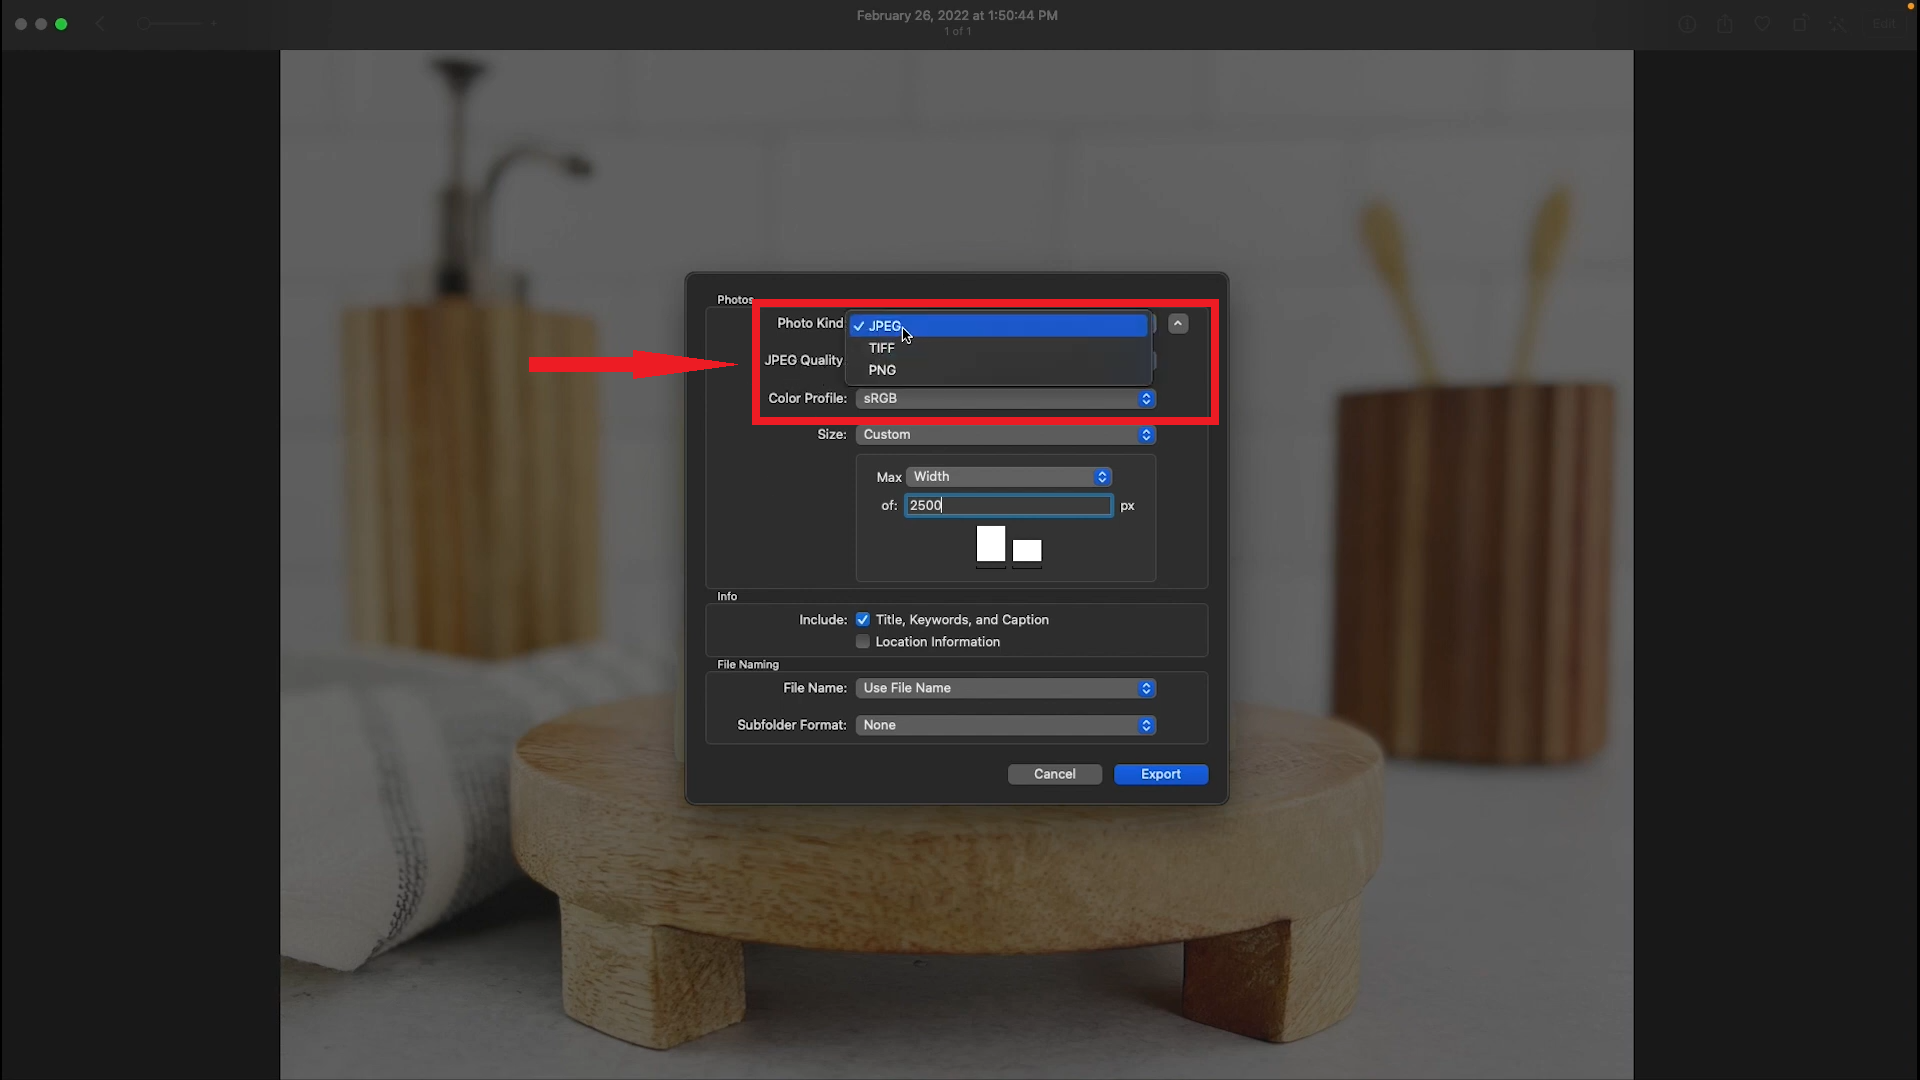
Click Export - You’ll see size options like Full Size, Large, Medium, or Small. “Custom.” It lets you pick your own size in pixels.
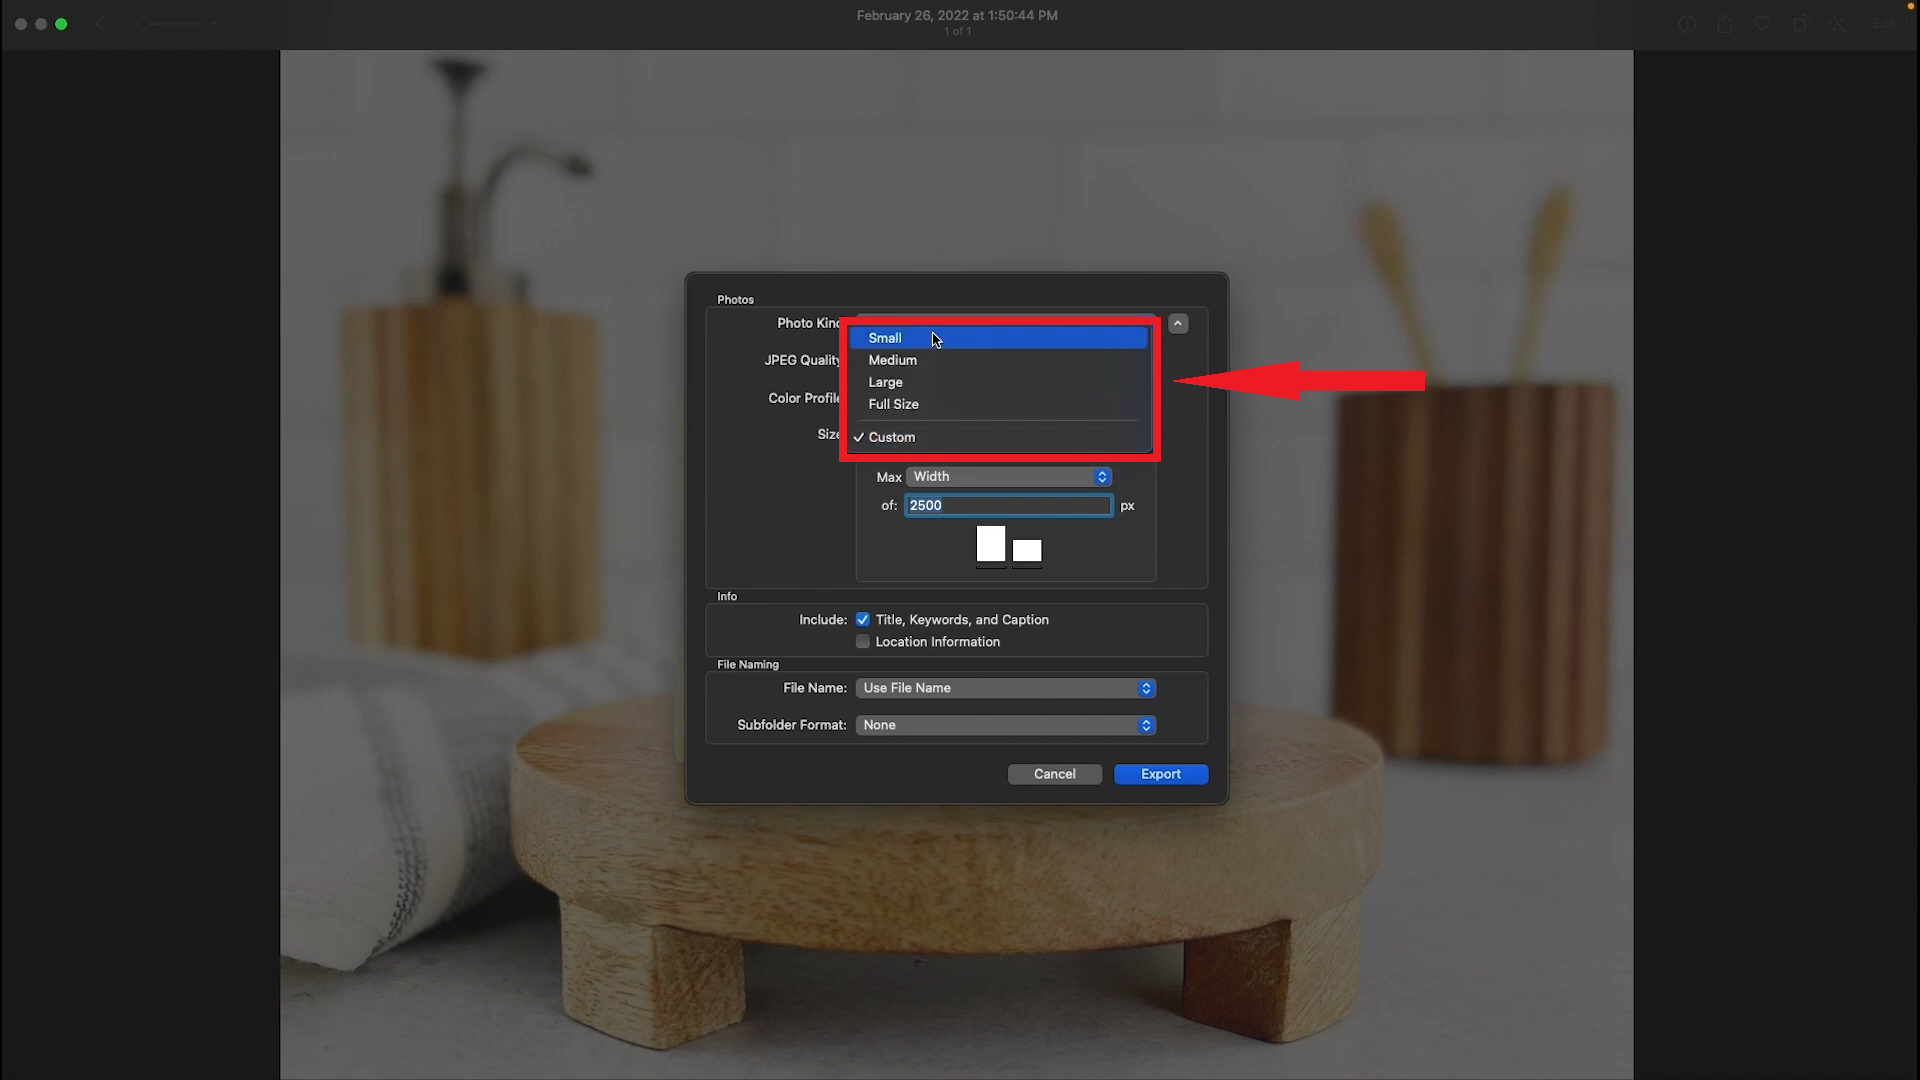
You can pick the desired size - With Custom, you can set a maximum Width or Height. Choosing “Dimension” lets you limit both the width and height to a specific number.
Customize the size - You also have the option to select the file type, adjust compression quality, remove location data from the image, and choose a color profile.
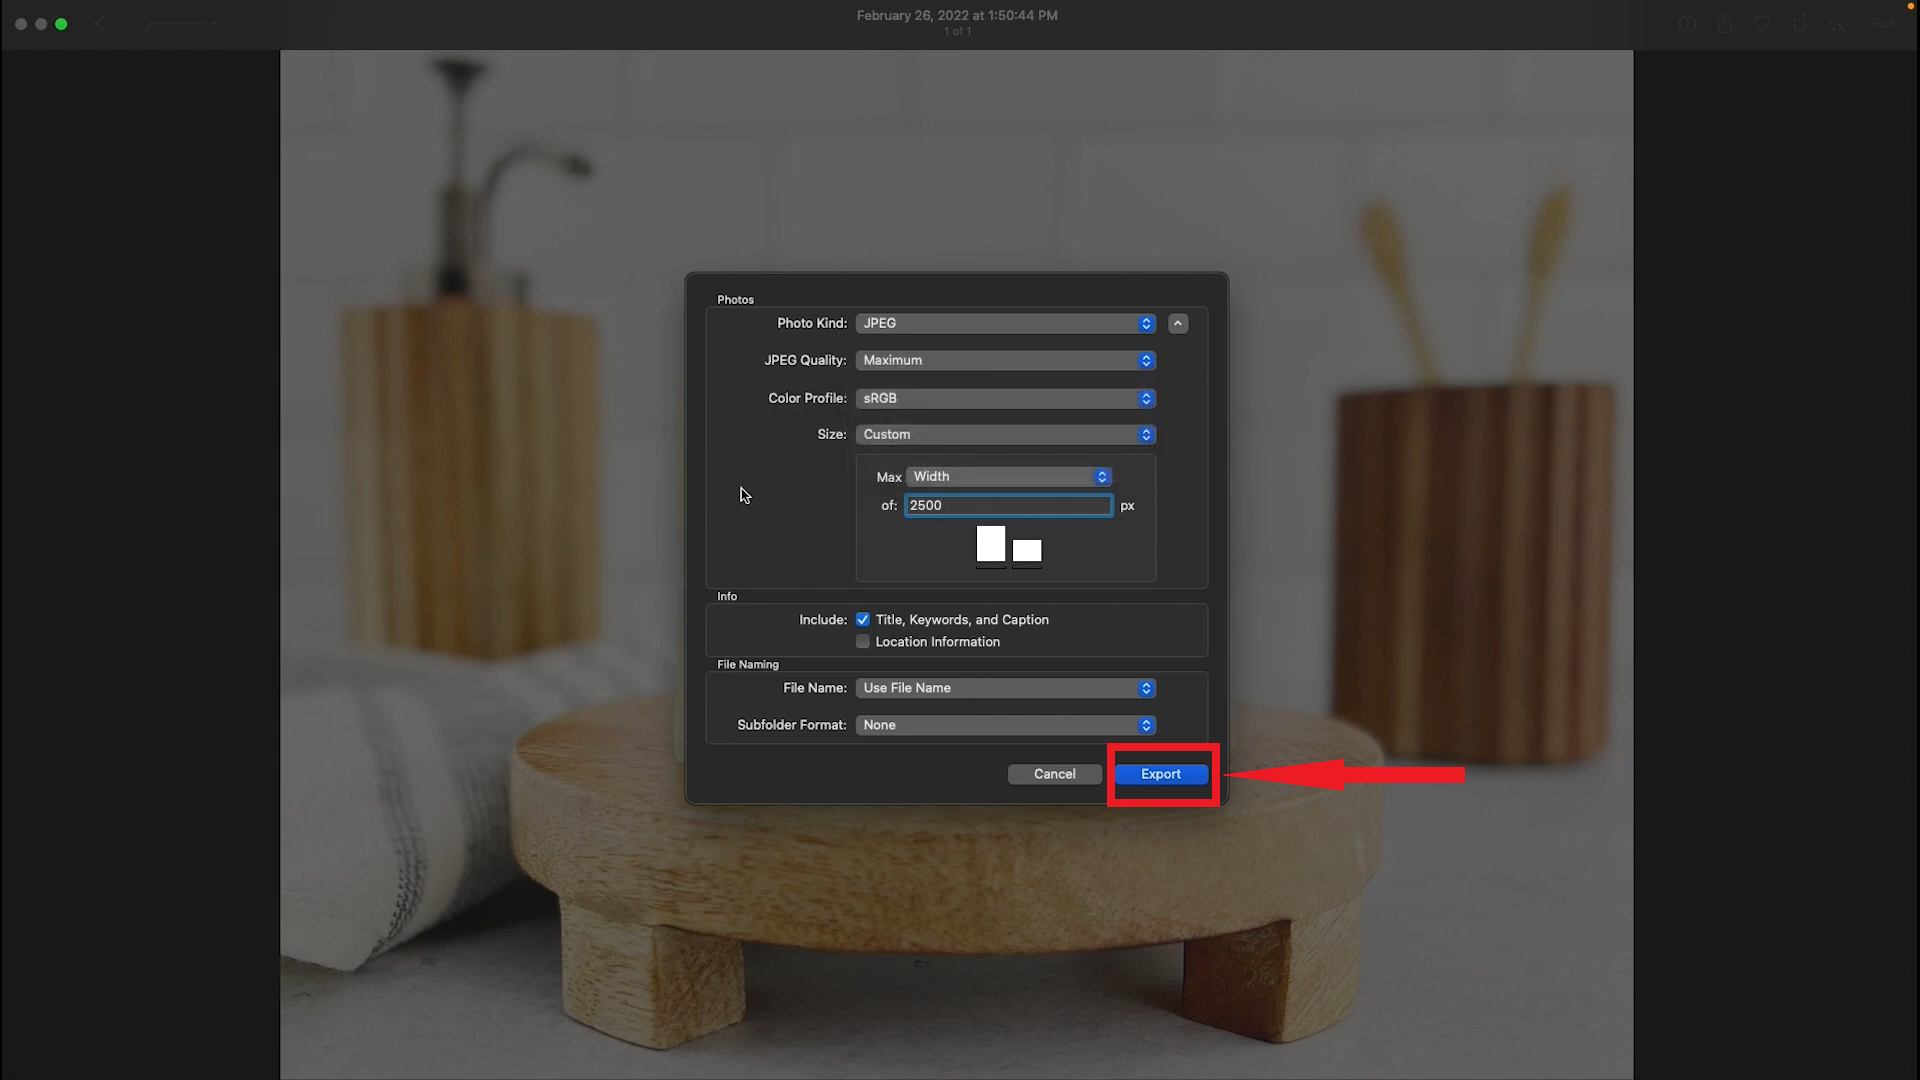
Explore more resizing and editing options - Hit “Export,” then decide where you want to save the resized photo.
Click Export
Images sourced from: By Kristina Nicole
READ MORE: How to Reduce the Size of a Photo or a Picture ➜
4. Resize images on a Mac in the Mail app
If you’re trying to send a big picture through the Mail app on your Mac and it’s too large, you can resize it right in the Mail app. Big images can be a problem because they might get blocked by the email server of the person you’re sending them to. Here’s how you can resize an image in the Mail app:
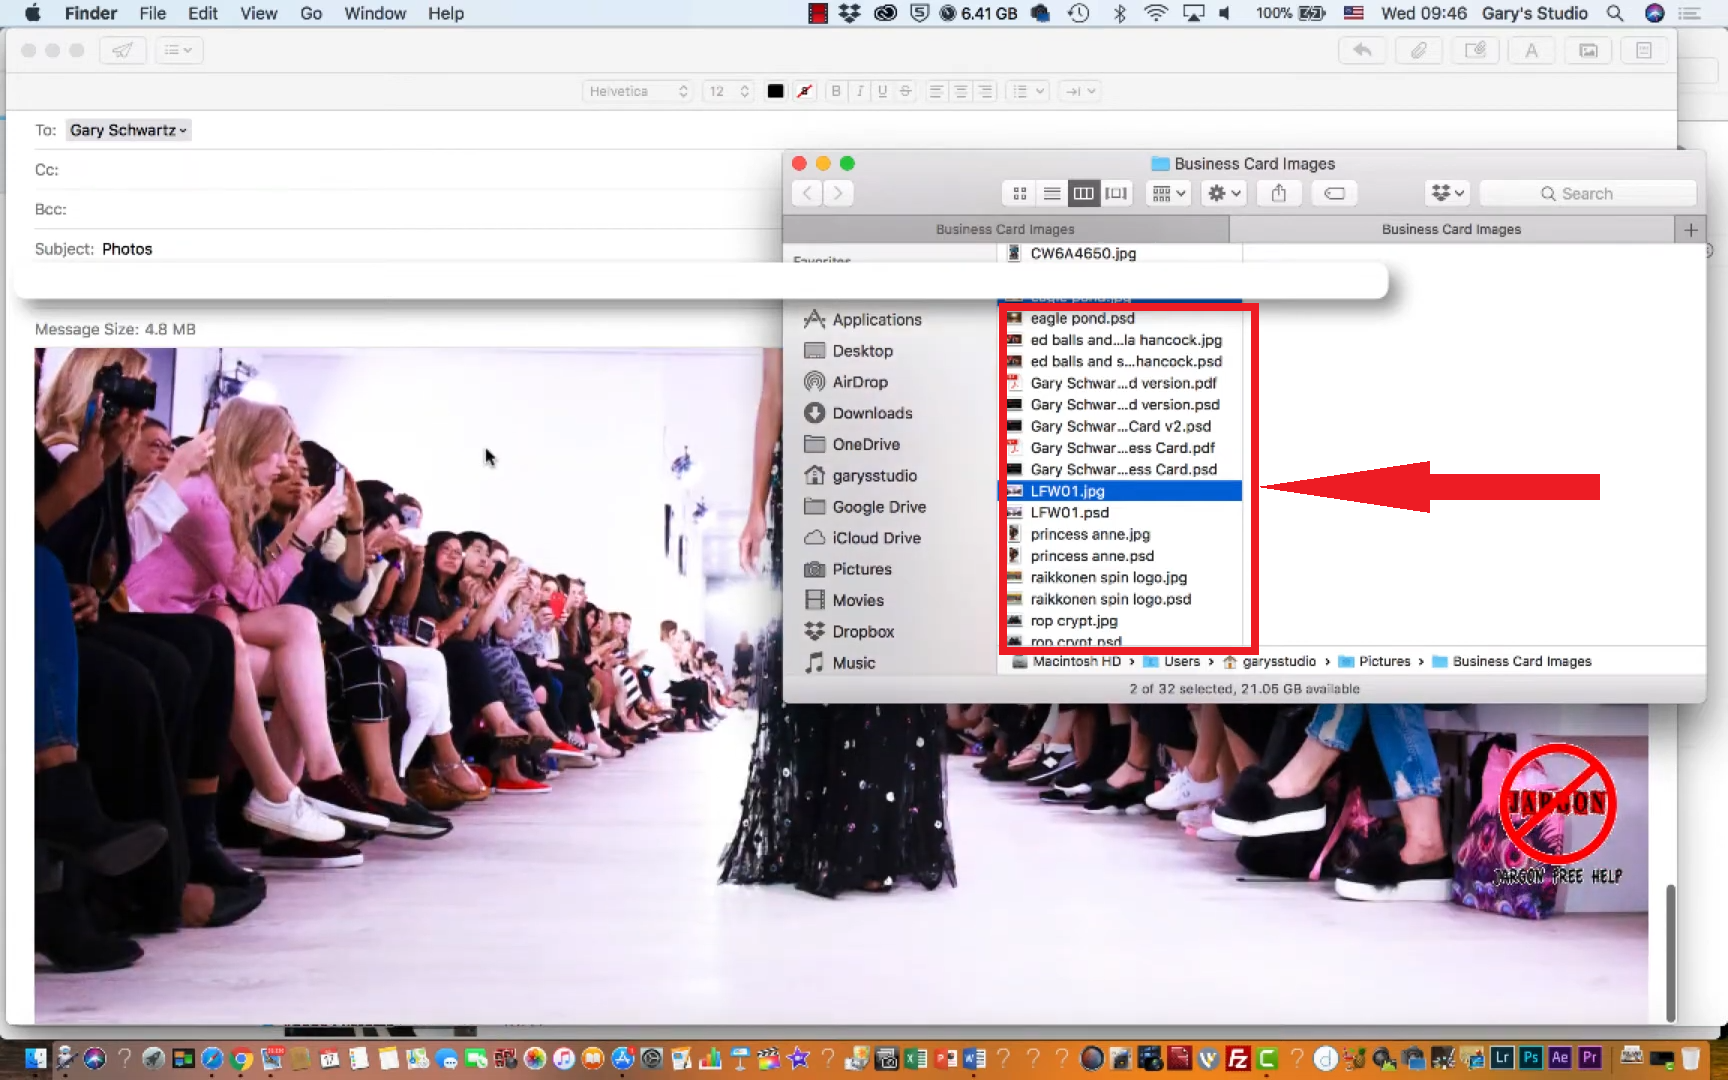
- Start by opening Mail and attaching the images you want to send in an email.
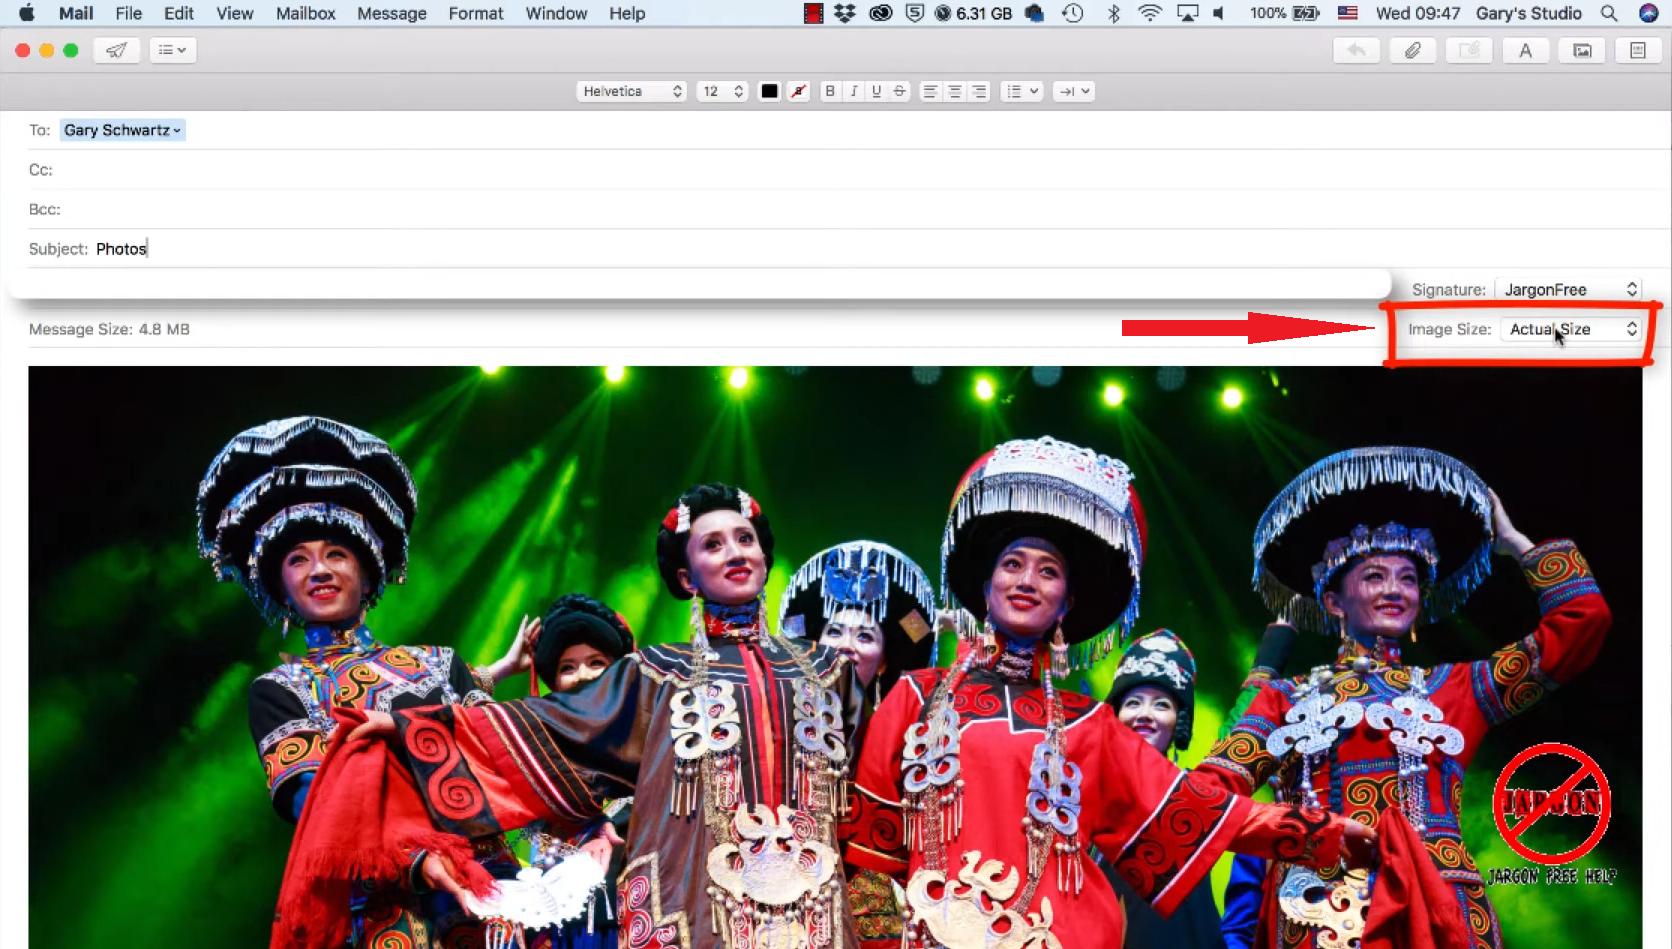
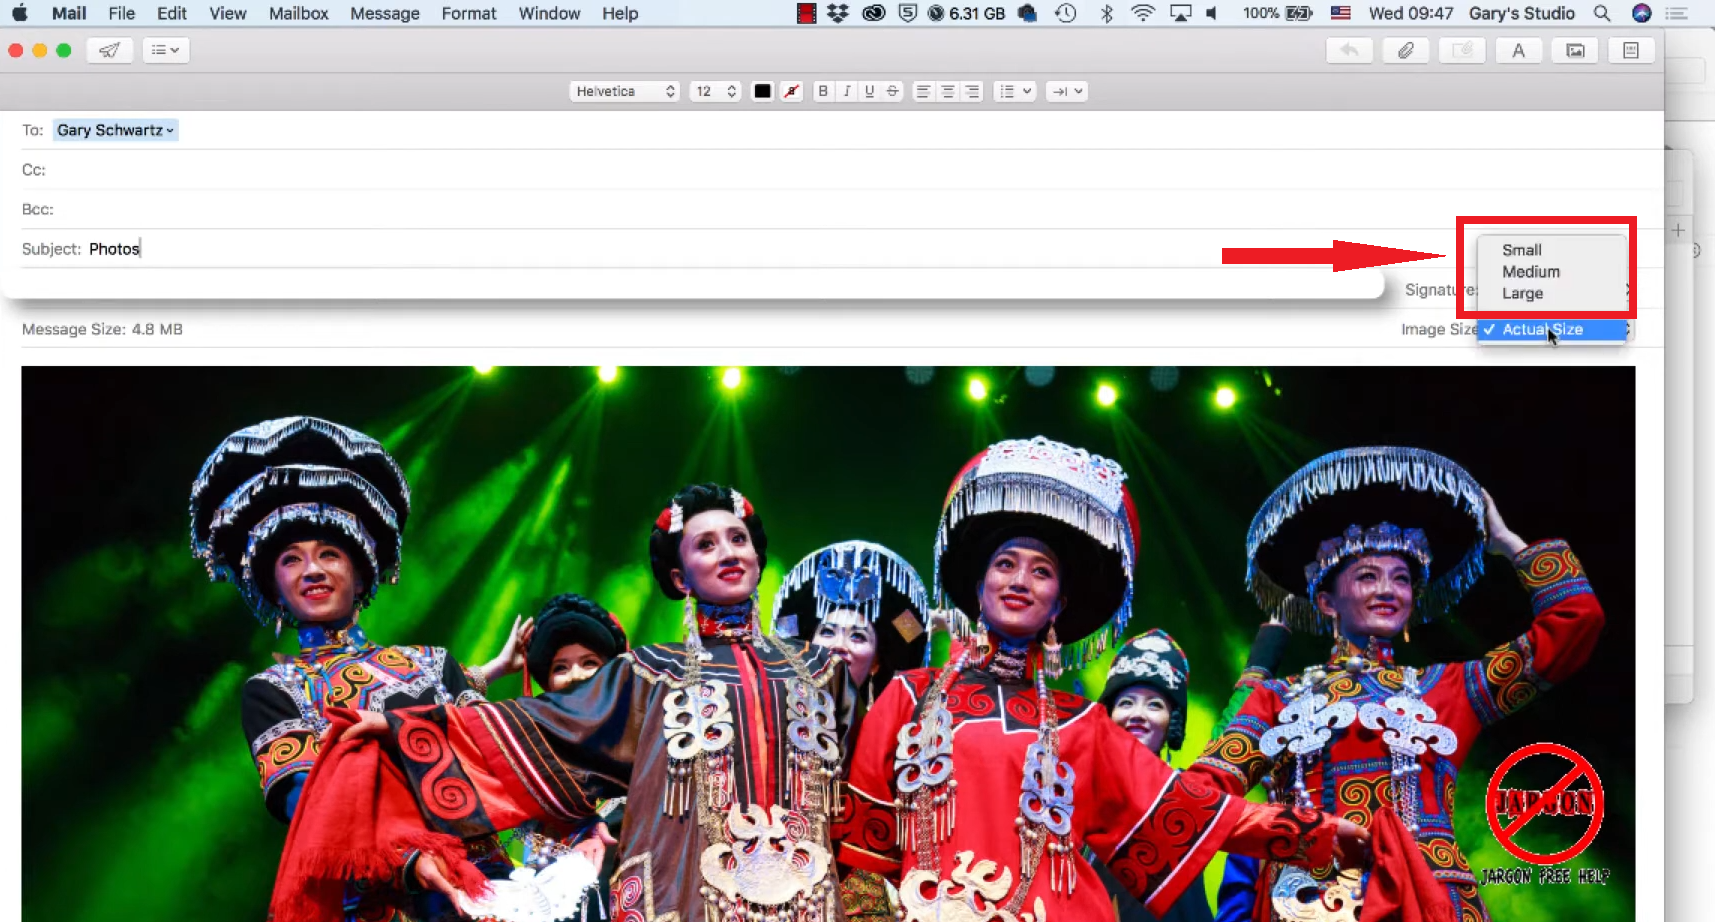
Add the Image as attachment - Look for the “Image Size” option on the right side of the email’s header and click the drop-down menu next to it.
Click on Image Size - You’ll see options for Small, Medium, Large, and Actual size. Pick one, but avoid “Actual size” if you’re trying to reduce the image size.
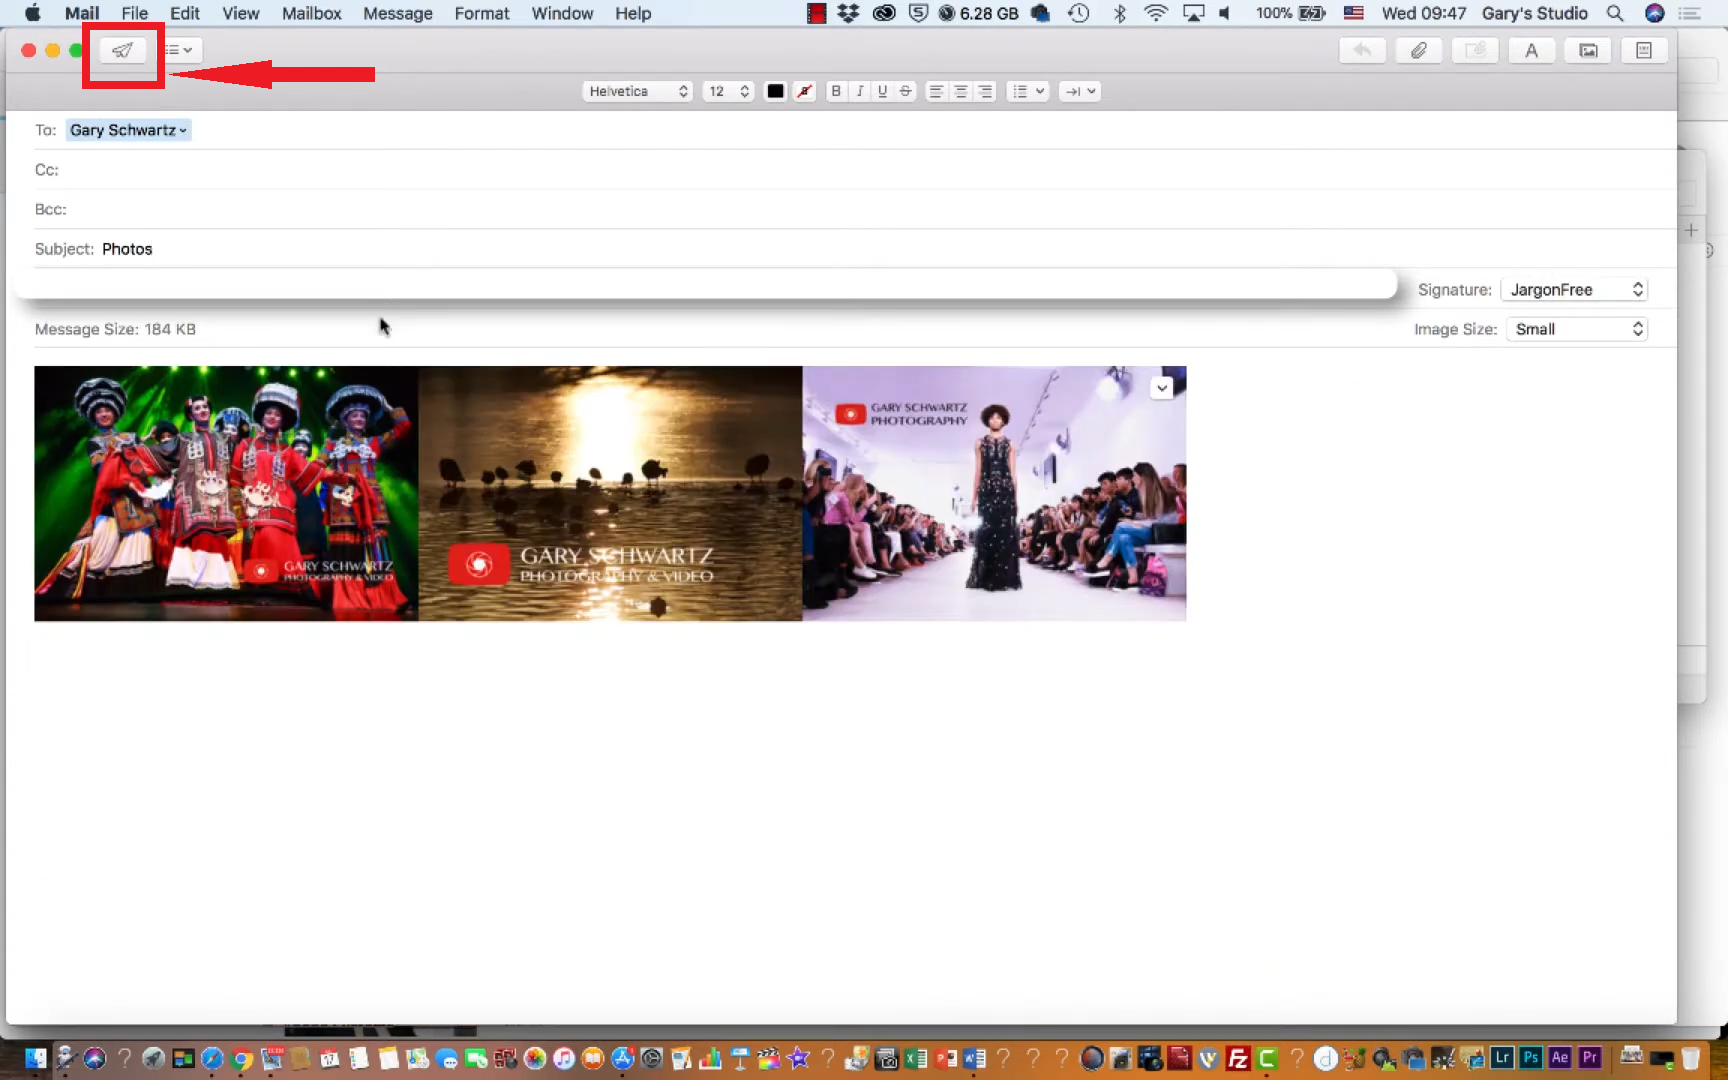
You can resize image here - Once you’ve chosen, go ahead and send your email.
Once done, send your email
Images sourced from: jargonfreehelp
READ MORE: How to Pixelate an Image on Desktop & Mobile [Easy Steps] ➜
Alternative free Mac image resizers
If you’re looking for other ways to change the size of your pictures on a Mac without using the built-in apps, several free third-party apps can help. Here are a few popular ones:
1. Image Resizer app
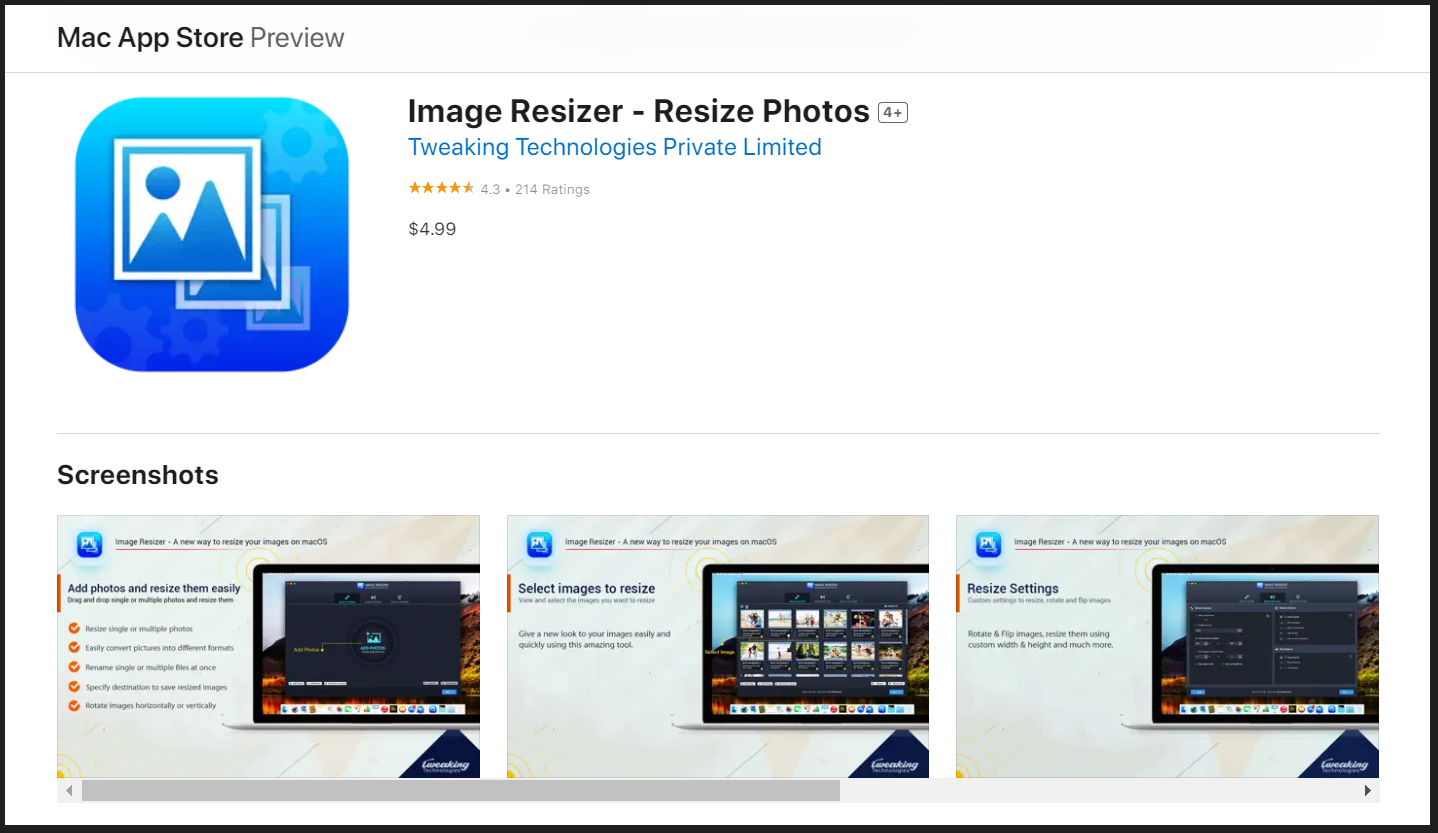
Image Resizer app is quick and straightforward to use, letting you change the size, compress, and even rename multiple images simultaneously. It supports various image formats, including JPEG, PNG, GIF, TIFF, and PSD.
You can easily drag and drop either single images or whole folders into the app and then adjust their size by width or height. Before resizing, you can check the compression quality and add text or sequential numbers to your images.
2. CapCut
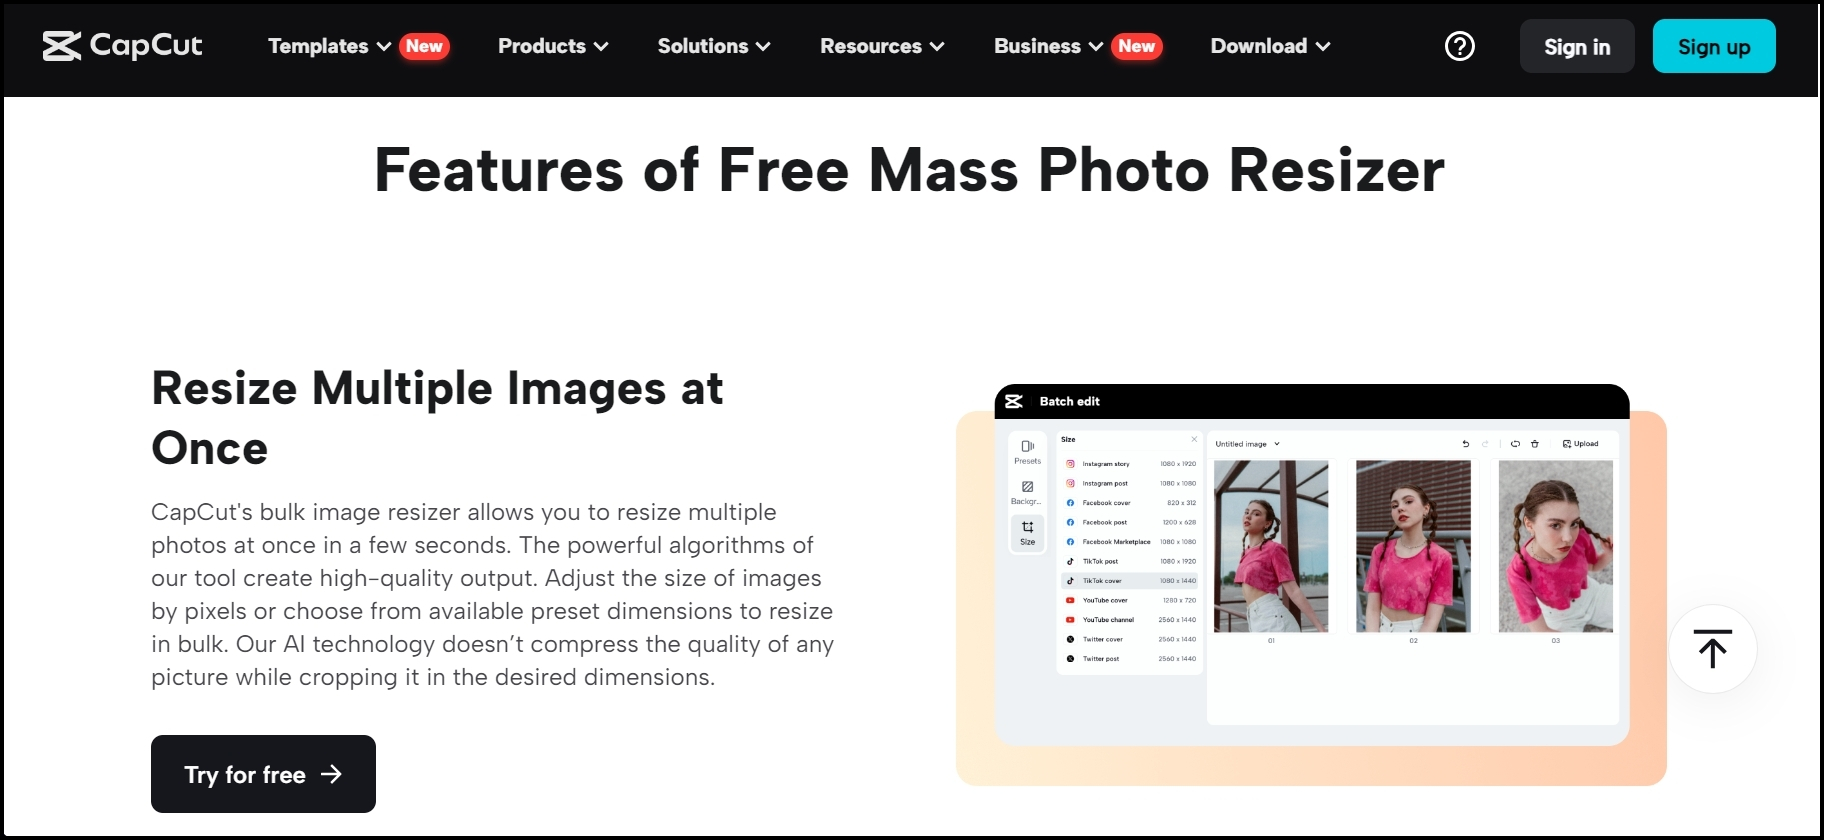
CapCut is a comprehensive tool that makes resizing images on your Mac super easy. But it’s more than just a tool; it’s a community platform that enhances how you interact with digital content.
With CapCut, you can easily adjust the size of your images, edit them to meet your needs while keeping the quality high and share them. It’s beneficial for both individual and team projects.
READ MORE: How to Generate AI Images for Free Without MidJourney ➜
Final thoughts
This guide has shown you the easiest ways to resize images on a Mac, ensuring it’s a task anyone can handle. We’ve looked at quick adjustments with the Preview app, detailed editing through Pages and Photos, and even how to scale down images directly in the Mail app for easier sending.
Additionally, free apps like Image Resizer app and CapCut offer further flexibility for editing. With these steps, managing your images on a Mac becomes straightforward, making your digital content easier to work with and share.
FAQs
You can resize images on a Mac with minimal quality loss by using the right tools and choosing appropriate resolution settings. It’s essential to resize wisely, as increasing an image’s size too much can lead to a loss in quality.
While specific keyboard shortcuts for resizing images directly might not be available, using shortcuts for opening, duplicating, and exporting files can streamline your workflow in apps like Preview and Photos.
If you haven’t closed the app you’re using to resize the image, you can often undo the last action by pressing Command + Z. Otherwise, it’s a good practice to keep a backup of the original image before making changes.
Resizing an image typically doesn’t change its format. However, when exporting or saving the resized image, you can choose a different format if your editing app supports it.
Reviewed by Huzaifa Haroon