How to Fix Lenovo Error ‘Detection Error on HDD0 (Main HDD)’
Some PC users are reporting that all of a sudden, their computer crashed and they cannot get it to boot again. During every booting sequence, they eventually end up seeing the Detection Error on HDD0 (Main HDD) error message. Upon pressing the Esc key as instructed, the booting sequence simply restarts before getting stuck at the same error screen. The issue is also exclusive to SSDs on Lenovo machines

As it turns out, the most popular scenario that might end up causing this error is temporary information stored by your laptop battery or CMOS battery. This typically occurs after an unexpected computer crash and can be resolved by temporarily removing the battery in order to clear the bad data.
However, the issue can also occur due to a bad connection between the hard drive and the connector slot on your motherboard. In this case, you should be able to fix the issue by opening the back cover, cleaning the HDD/SSD slots and ensuring that the connection is correctly established with the motherboard.
In case you’re losing the Legacy boot, try accessing your BIOS settings and switching the default boot mode from Legacy First to UEFI First Mode. A lot of affected users have confirmed that this operation allowed them to get rid of the Detection Error on HDD0 (Main HDD) error.
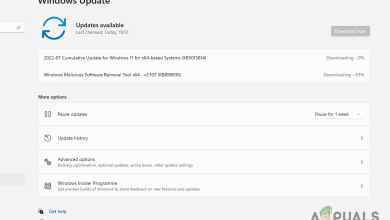
Under certain circumstances, this error message might be the result of an incompatibility between the Chipset Driver and the Intel RST driver. Fortunately, Lenovo already released a fix for this issue – you can enforce it by using the Auto_updater utility in order to update the HDD / SSD firmware to the latest version.
If the issue started occurring while your computer while in Sleep or Hibernation mode, chances are you’re seeing this error due to the fact that your storage device is unable to recover from hibernation/sleep automatically. To fix this, you’ll need to switch to SATA Compatibility mode and boot normally before changing the configuration back to AHCI.
There’s also one temporary fix that allowed a lot of affected users to boot normally – It involves running a couple of tests (Detection Error on HDD0 (Main HDD) error test and Detection Error on HDD0 (Main HDD) error test) before booting up normally. But this is only a temporary fix.
Removing the Battery or CMOS Battery
Another potential scenario that might end up spawning the Detection Error on HDD0 (Main HDD) error is a glitch that is maintained by the CMOS (Complementary Metal-Oxide Semiconductor) or by your laptop battery.
If you previously made some hardware changes to your machine or your computer was forced to shut down unexpectedly, it’s possible that you’re dealing with an incorrect BIOS / UEFI preference – most commonly this issue is facilitated by conflicting overclocking information.
In case this scenario is applicable to your current situation, you should be able to get the issue resolved by temporarily removing the battery that is maintaining this error – If you’re encountering the issue on a laptop, that’s your laptop battery. In case you see the error on a PC (desktop), you’ll need to open up the back cases and take out the CMOS battery manually.
Option 1: Removing the Laptop battery
- If your laptop is plugged into a power outlet, unplug it and disconnect the power cable.
- Turn your laptop over so the bottom is facing up.
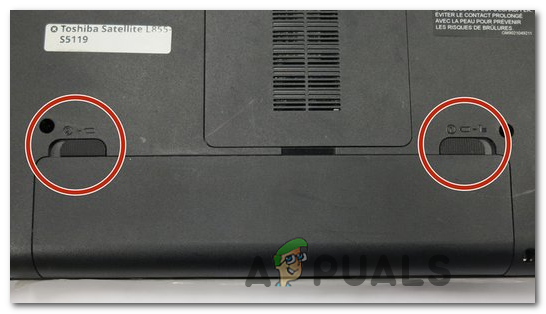
- Next, look for the battery latch at the bottom of the laptop. Once you locate your battery latch, toggle it so it’s set to unlock, so you’re able to take out the battery. You might need to gently pull it out once the latches are disengaged.
Unlocking the battery latches Note: Although the procedure is different across different manufacturers, this typically involves sliding the latch switch to the opposite side and holding in that position until the battery is released.
- Wait for a full minute after you take out the battery, then insert it back in and restart your laptop to see if the issue has been resolved.
Option 2: Removing the CMOS Battery
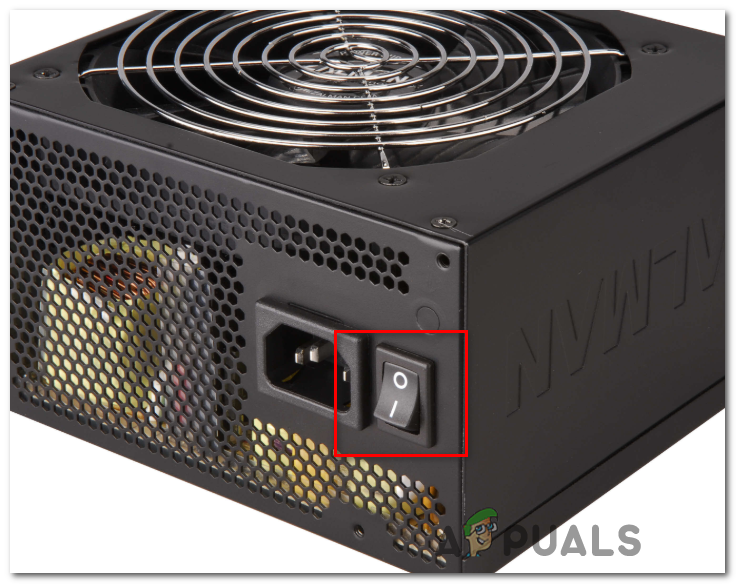
- Turn off your computer and unplug it from the power sources. As an extra measure, turn off the power from your PSU switch on the back.
Turning off the PSU switch - After the power is completely cut, equip yourself with a static wristband (if possible) and remove the slide cover.
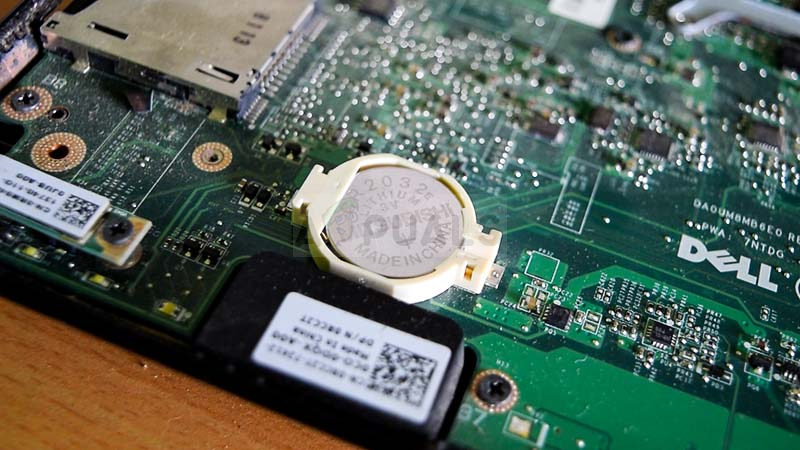
Note: Equipping yourself with a static wristband is preferred in order to ground yourself to the frame and avoid unpleasant situations where static electricity discharges end up producing damage to your PC components. - Once you see your entire motherboard, identify the CMOS battery – Usually, it’s located near your SATA / ATI slots. When you see it, use your fingernail or a non-conductive sharp object to remove it from it’s slot.
Removing the CMOS battery - After you remove it, wait for a full minute before inserting it back into the slot.
- Next, put the cover back on, connect the power cable back to the power outlet and flick the PSU power switch back ON before booting your computer again.
See if this operation is allowing you to get past the initial startup screen. If you’re still seeing the Detection Error on HDD0 (Main HDD) error, move down to the next potential fix below.
Ensuring that the HDD connection is solid
As it turns out, the Detection Error on HDD0 (Main HDD) is typically associated with a bad connection between the hard drive and the connector on your motherboard.
If this scenario is applicable and as long as you’re not dealing with failing HDD or motherboard, you should be able to fix the problem by opening the cover of your PC / laptop and ensuring that your HDD is correctly connecting to your motherboard.
In case you never did this before, here’s a quick step by step guide that will walk you through the entire process:
- Shut down and Unplug your PC from the power outlet.
Optional: Equip yourself with an anti-static wrist strap and ground yourself to the frame in order to avoid instances where static electricity can cause damage to the internals of your computer. - Open the side or back cover of your PC and locate the problematic HDD. If you have two HDDs, make sure you’re focusing on the one that’s storing your operating system.
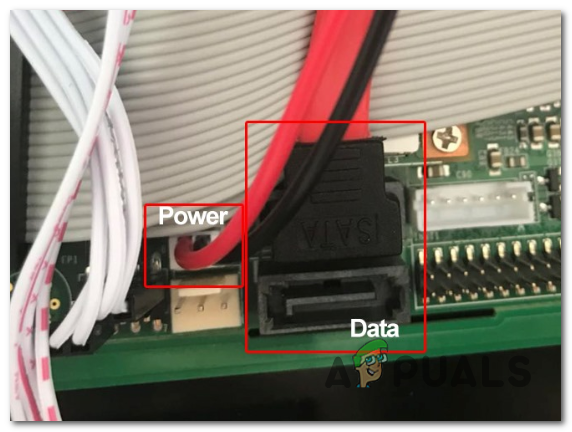
- Next, remove the data and the power connectors from both the HDD and motherboard ports.
Example of a SATA port/cable - Once the HDD is successfully disconnected, clean the connection ports on both sides and change the involved cables if you have spares.
- After you reconnect the HDD with the appropriate cables and you ensure that the connection is solid, put the case back, connect your PC to the power outlet and see if the issue is now resolved.
In case you’re still seeing the same Detection Error on HDD0 (Main HDD) error, move down to the next potential fix below.
Enabling UEFI Boot Mode
A lot of Lenovo users have confirmed that they were finally able to get the issue resolved after they’ve accessed their BIOS settings and switch the default boot mode from Legacy First to UEFI first mode – This option will be named differently across different models, but chances are you’ll find it under Startup options in the main BIOS menu.
If you are encountering this issue on a PC with a newer motherboard that’s using both UEFI and BIOS, you should be able to fix the issue by forcing UEFI First Mode. Here’s a quick guide on how to do this:
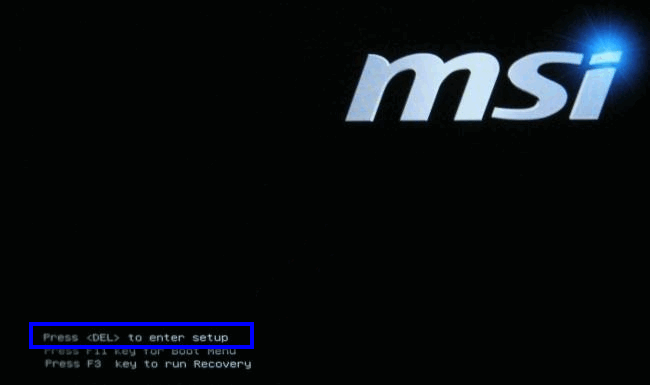
- Power your computer on and start pressing the Setup key repeatedly as soon as you see the first startup screen. With most computer configurations, the Setup key is one of the following keys: F2, F4, F6, F8, Del key, Esc key.
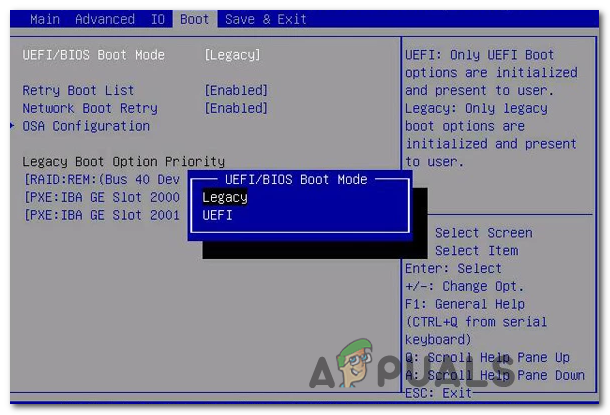
Press [key] to enter setup - After you manage to successfully land in your BIOS settings, look through the advanced settings and locate an option named Boot / Legacy Boot Priority. (or Legacy Boot Option Priority) It’s typically located in the Boot setting grouping.
- Once you see it, change the Legacy Boot Option Priority to Legacy.
Changing the default Legacy Boot Option Priority - After the modification was applied, save the current boot configuration and restart your computer to see if it boots normally.
In case you’re still encountering the same error message, move down to the next potential fix below.
Updating Lenovo’s HDD Firmware (if applicable)
In case you are encountering the Detection Error on HDD0 (Main HDD) error on a Lenovo Laptop (especially on a ThinkPad), there’s a very high chance that you’re having this problem due to a driver incompatibility between the Chipset Driver and Intel RST driver.
Fortunately, Lenovo is aware of this problem and already released a hotfix for this issue. This utility will automatically scan for updates on the chipset and Intel RST driver, resolving most incompatibilities that might lead to the apparition of the Detection Error on HDD0 (Main HDD) error.
IMPORTANT: In order to apply this fix, you need to take the OS HDD out and connect it to a healthy PC as secondary storage (don’t boot from it).
To apply it on your computer, visit this link (here) and download Lenovo’s auto-updater. After the download is complete, use a utility like WinZip or 7zip to extract the contents of the Lenovo_Firmware Utility.
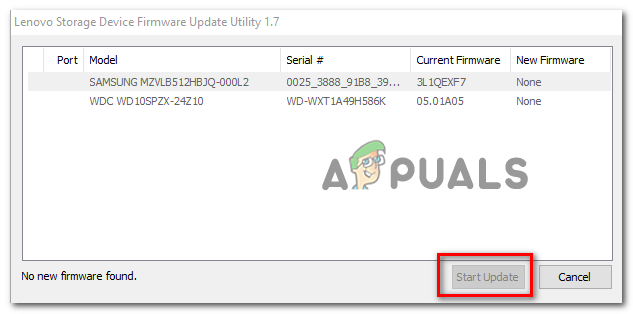
After you download the Lenovo_Firmware Utility, double-click on fwwbinsd.exe and click Yes at the UAC (User Account Control) in order to grant admin access.
Once the utility is open, select the problematic drive and click on Start update to install the firmware update.
After the firmware was installed, connect the HDD back to the Computer where you previously encountered the Detection Error on HDD0 (Main HDD) error on and see if the issue is now resolved.
In case you’re still seeing the same startup error, move down to the next potential fix below.
Waking the drive manually from Hibernation
According to several affected users, the Detection Error on HDD0 (Main HDD) error can also occur when an SSD or HDD is being stuck in Hibernation mode. This typically happens if there’s a power source or another factor contributed to the total loss of power. When this happens, there’s a chance that your storage device will be unable to recover automatically.
If this scenario is applicable, you should be able to get the issue resolved by accessing your BIOS settings and changing the SATA integration to compatibility mode – this will serve the purpose of waking up the drive back up.
After you do this and your HDD / SSD exits hibernation, you’ll need to go back into your BIOS settings and change the usage of SATA back to AHCI.
Here’s a step by step guide that will allow you to do this:
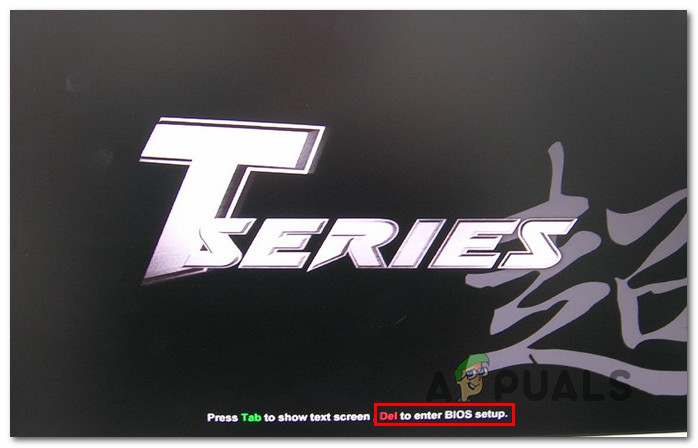
- Power on your computer and start pressing the Setup (BIOS key) as soon as you see the initial screen.
Pressing the Setup key to enter BIOS settings Note: You should see the Setup key displayed on the screen, but in case you can’t, search online for the specific Setup key according to your motherboard manufacturer.
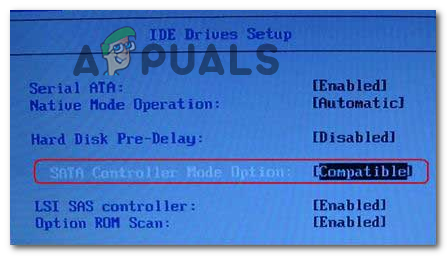
- Once you are inside your BIOS settings, make your way to Devices and change the SATA Controler Mode Option to Compatible. This will serve the purpose of waking your storage device from hibernation.
Waking the computer from hibernation Note: With certain configurations, you might find this setting option under the Advanced tab.
- After you do this, save your current BIOS configuration and boot normally in order to ensure that your HDD or SSD wakes up from hibernation.
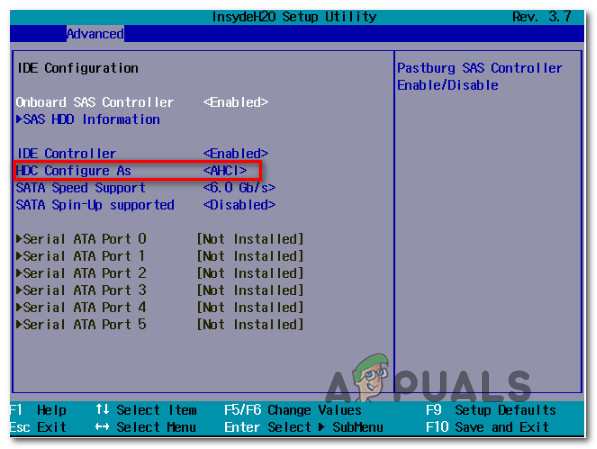
- If the procedure is complete and you no longer get the Detection Error on HDD0 (Main HDD) error, follow step 1 once again to get back to your BIOS settings and change the default IDE Configuration menu back to AHCI – Typically from the IDE Controller or SATA Configuration menu.
Changing the HDC Configuration of IDE to AHCI - Save the modifications and see if the issue is now resolved.
In case the same problem is still occurring, move down to the next potential fix below.
Doing Testing on Lenovo (Temporary Fix)
if none of the methods above have allowed you to fix the issue, and you are facing this with a Lenovo laptop, it’s very likely that you are facing this issue due to BIOS glitch. You should be able to fix it by updating the BIOS version on your Lenovo laptop.
But in case you don’t want to do this (for various reasons), one temporary fix that will allow you to boot without encountering the Detection Error on HDD0 (Main HDD) error. But keep in mind that this is not a permanent fix.
The vast majority of users facing this problem have reported that the fix below only resolved the issue temporarily. It’s very likely that even if the steps below allow you to boot normally, you will end up seeing the error message again at the next system startup.
If you are determined of deploying this fix, follow the instructions below:
- Start your computer normally and as soon as you see the initial screen, start pressing the F10 key repeatedly.
- The Detection Error on HDD0 (Main HDD) error will still pop up, but that’s what is supposed to happen.
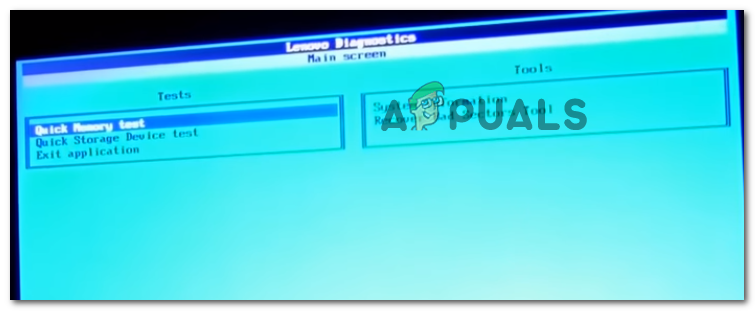
- At the error screen, press Esc and wait until you see the Lenovo Diagnostics screen.
Lenovo Diagnostics Screen - Inside the Lenovo Diagnostics screen, run both the Quick Memory test and the Quick Storage Device test in quick succession.
- After both tests are completed (and they pass successfully), exit the Lenovo Diagnostics screen and see if your computer is able to boot normally.
If the error returns, it’s very likely that you are dealing with a failing HDD or SSD and you will need to take your PC to a technician in order to figure out what’s wrong.