Fix: NVIDIA Control Panel Shows only 3D Settings
This problem occurs when users try to access the NVIDIA Control Panel but are unable to see other panes except the Manage 3D Settings entry. This mostly occurs to laptop users and they can often blame the integrated graphics card for this problem.
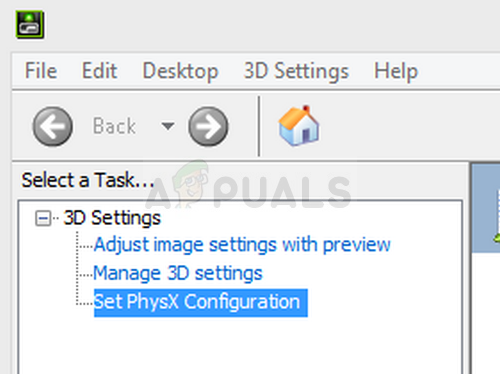
This occurs when the integrated graphics card is managing certain aspects of your computer’s display settings. Sometimes it’s not a real problem and it’s rather a mistake by design. However, sometimes you wish to edit certain settings regarding your NVIDIA graphics card but you are unable to do so because of this problem. Follow the methods we have prepared in order to resolve this problem.
What Causes NVIDIA Control Panel to Show Only 3D Settings?
There are many causes to this specific problem and they are almost exclusively related to your integrated graphics card which may be causing these problems. They can often be resolved easily if you can identify your cause from the list below:
- Old or outdated graphics card drivers may be causing all sorts of issues, including this one. Consider updating them as soon as possible.
- If the integrated graphics processor is selected by default in BIOS, it may cause all sorts of problems and you should change that as a possible fix.
- The NVIDIA Control Panel process may simply be buggy so make sure you try to restart it.
Solution 1: Update Your Graphics Card Drivers
This is quite a general method for most graphics-related problem but users have reported that simply reinstalling the drivers (installing the latest ones) resolved the problem and NVIDIA Control Panel will finally fully recognize and use the NVIDIA graphics card you have mounted.
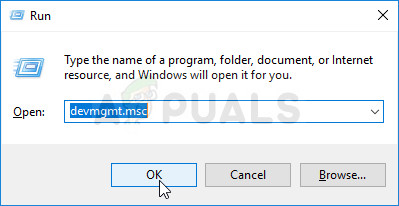
- Click the Start menu button, type in “Device Manager” afterward, and select it from the list of available results by simply clicking the first one. You can also tap the Windows Key + R key combo in order to bring up the Run dialog box. Type in “devmgmt.msc” in the dialog box and click OK in order to run it.
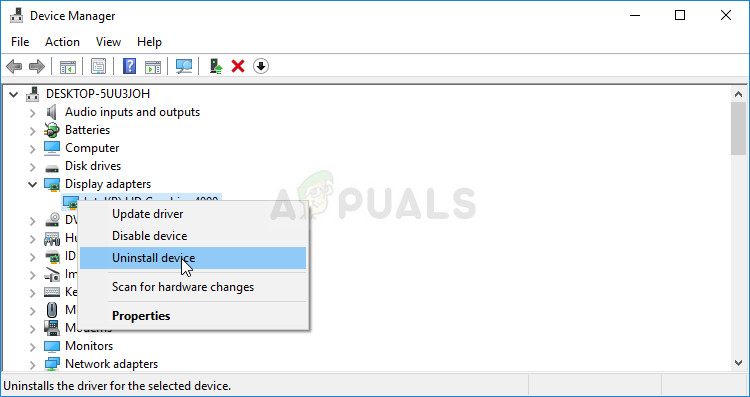
- Since it’s the video card driver you want to update on your computer, expand the Display adapters section, right click on your NVIDIA graphics card and choose the Uninstall Device.
- Confirm any dialogues or prompts which may ask you to confirm the uninstallation of the current graphics device driver and wait for the process to complete.
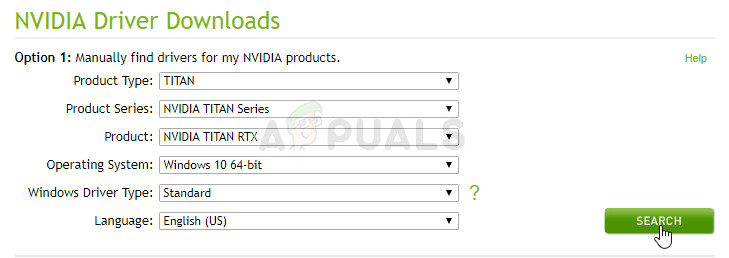
- Look for your graphics card driver on NVIDIA’s website. Input the required information about the card and your operating system and click on Search.
- A list of all available drivers should appear. Make sure to select the most recent entry, click on its name and the Download button afterward. Save it to your computer, open it, and follow the instructions on-screen in order to install it. Check to see if the problem still occurs.
Solution 2: Choose the Default Graphics Processor in BIOS
The worst case scenario is that your computer is constantly using your integrated graphics card instead of the NVIDIA’s one. This should be changed inside BIOS settings and it can be done easily. Even though some people feel uneasy when making changes in BIOS, following the instructions below carefully will surely cause no harm to your computer.
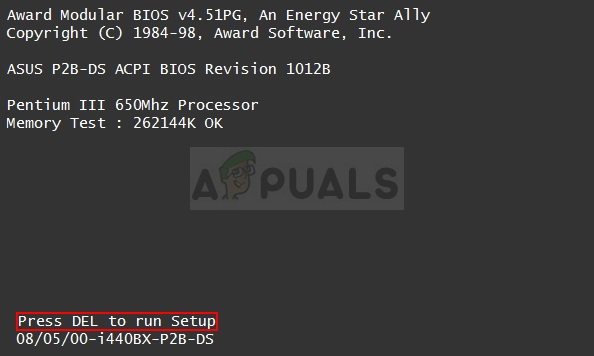
- Turn your PC on again and try to enter BIOS settings by pressing the BIOS key as the system is about to start. The BIOS key is typically displayed on the boot screen, saying “Press ___ to enter Setup.” or something similar to that. There are other keys as well. The usual BIOS keys are F1, F2, Del, etc.
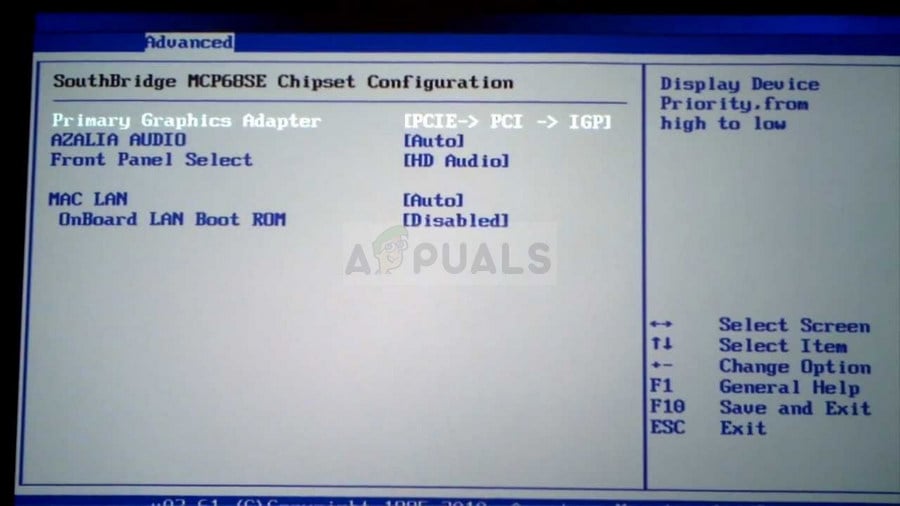
- Now it’s time to change your default graphics card from the integrated one to the NVIDIA’s one. The option you need to change is located under different tabs on BIOS firmware tools by different manufacturers. That means there is no unique way to find it. It’s usually located under the Advanced tab but there are many names for the same option.
- Use the arrow keys to navigate to the Advanced, Advanced BIOS Features or a similar sounding option inside BIOS. Inside, select an option named North Bridge Configuration, Video Configuration, Internal Graphics or a similar option inside.
Choosing the Primary Graphics Adapter - When you locate the proper option in any area of the BIOS settings screen, look for an option called Primary Video Controller, Primary Video Adapter or Initiate Graphic Adapter. Press Enter in order to select it and choose GFX0 or PEG to switch to a peripheral component interconnect express card, PCI in order to use a PCI-connected card or AGP to use an accelerated graphics port-connected card. The option you should choose depends on how your card is connected to your computer.
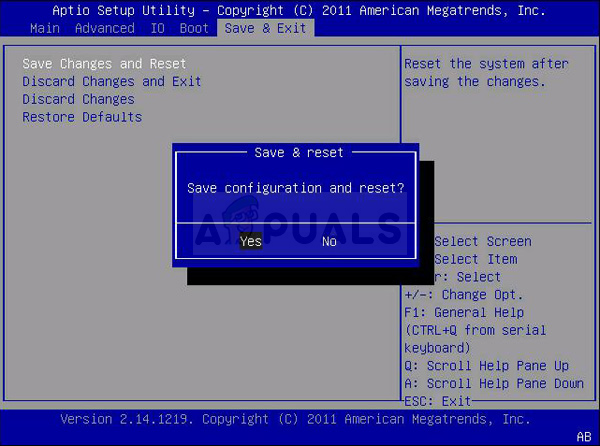
- Navigate to the Exit section and choose to Exit Saving Changes. This will proceed with the computer’s boot. Check to see if the problem persists.
Solution 3: Disable the Onboard Graphics Card in Device Manager
If you wish to edit certain settings inside the NVIDIA Control Panel but fail to locate them since they are handled by your integrated Intel graphics card, you can choose to simply disable the integrated card and use the NVIDIA’s one all the time. This will resolve the problem but may cause your laptop to have worse battery life.
- Click the Start menu button, type in “Device Manager” afterward, and select it from the list of available results by simply clicking the first one. You can also tap the Windows Key + R key combo in order to bring up the Run dialog box. Type in “devmgmt.msc” in the dialog box and click OK in order to run it.
- Since it’s the video card driver you want to update on your computer, expand the Display adapters section, right click on your integrated graphics card and choose the Disable Device.
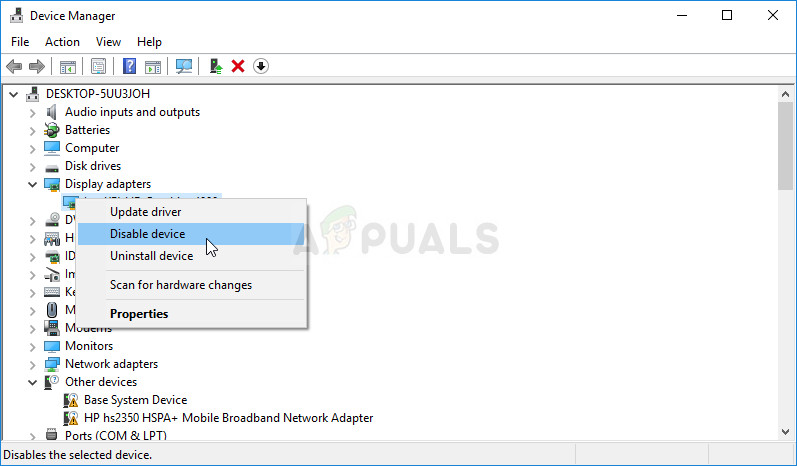
- Check to see if other settings appear inside NVIDIA Control Panel after you restart your computer.
Solution 4: Restart the NVIDIA Control Panel Process
This method is quite simple when compared to other methods displayed in this article and it can be used if you were able to see all display-related settings inside NVIDIA Control Panel in the past and the problem started to occur in the present. This method will resolve the problem if it was related to a simple bug.
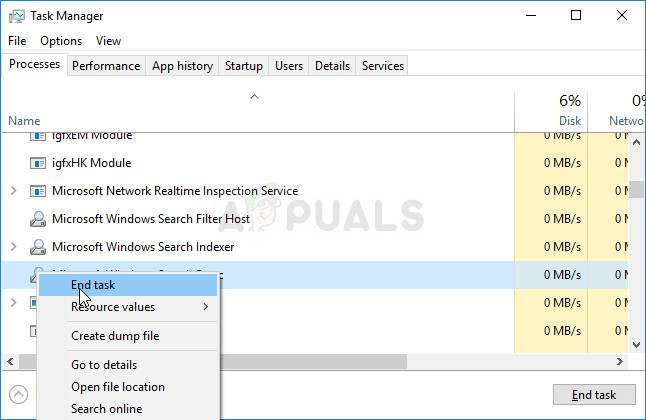
- Use the Ctrl + Shift + Esc key combination by pressing the keys in the same time to open the Task Manager utility.
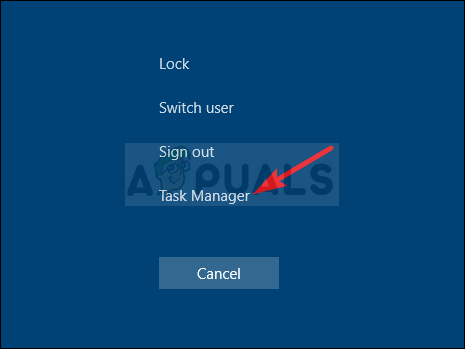
- Alternatively, you can use the Ctrl + Alt + Del key combination and select Task Manager from the popup blue screen which will appear with several options. You can also search for it in the Start menu.
- Click on More details at the bottom left part of the window in order to expand Task Manager and search for the NVIDIA Control Panel It should be located right under Background processes. Select it and choose the End task option from the lower right part of the window.
- Check to see if the problem regarding missing settings inside NVIDIA Control Panel has been resolved after restarting NVIDIA Control Panel.