How to Screen Record on A Chromebook [3 Different Ways]
- Utilize built-in features or third-party apps to capture screen activities on a Chromebook. Options include Screen Capture, Screencast, and Nimbus Screen Recorder for different needs like including device audio or webcam footage.
- Chromebook's Screen Capture tool records video without device audio, while Screencast, included in ChromeOS Version 103, records with audio and webcam support. Both save recordings in WEBM format or provide shareable links.
- Nimbus Screen Recorder, a Chrome extension, allows recording Chrome tabs with device audio. It's ideal for users needing to capture internal sounds from videos or applications not supported by built-in tools.
Imagine this: you’re exploring the cool world of your Chromebook, discovering exciting digital landscapes that you can’t wait to show off. What’s your move in these moments? It’s simple: you think of screen recording.
Now, picture a tool that’s like magic—it helps you effortlessly capture and save all the cool stuff you’re doing on your Chromebook. In this post, let’s delve deep into the steps to screen record on your Chromebook.
Table of Contents:

What is Screen Recording?
Screen recording is like making a video of everything happening on your computer or device screen. It’s a way to capture and save what you see and do on your screen, similar to taking a video of your digital activities.
- Remember Fun Times: Record cool moments from video calls, online events, or anything you do digitally for future memories.
- Help Others: Make videos to show solutions to common problems. It makes it simple for others to understand and follow your instructions.
- Show Your Cool Moments: Easily share your great gaming skills, computer talents, or anything exciting on your Chromebook with your friends and family.
READ MORE: How to Record FaceTime with Audio on iPhone & Mac ➜
How to Screen Record on Chromebook
There are several ways to screen record on your Chromebook. Check out the methods we’ve gathered below.
1. Screen Record on Chromebook Using Screen Capture
Your Chromebook boasts a handy tool known as the Screen Capture feature, making screen recording a breeze. Here’s a straightforward guide to using it:
Open the app or screen you wish to record.
Head to the Quick Settings menu located at the bottom-right corner of your screen.
Select Screen Capture from the Quick Settings menu.
Quick Settings > Screen Capture A new bottom bar menu appears. Initially set to screenshot mode, click the video icon to switch to screen recording.
Select Video from Screen Capture Choose your recording preference:
Full-screen: Records everything on your entire screen.
Partial: Allows you to select a specific area for recording.
Active Window: Captures only the currently active window.
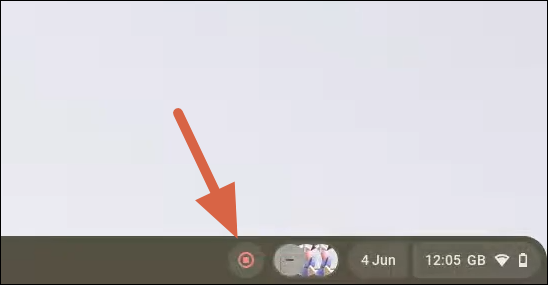
Click the Record button to kickstart your screen recording. Execute the actions you want to capture, then click the stop icon in the taskbar to conclude the recording.
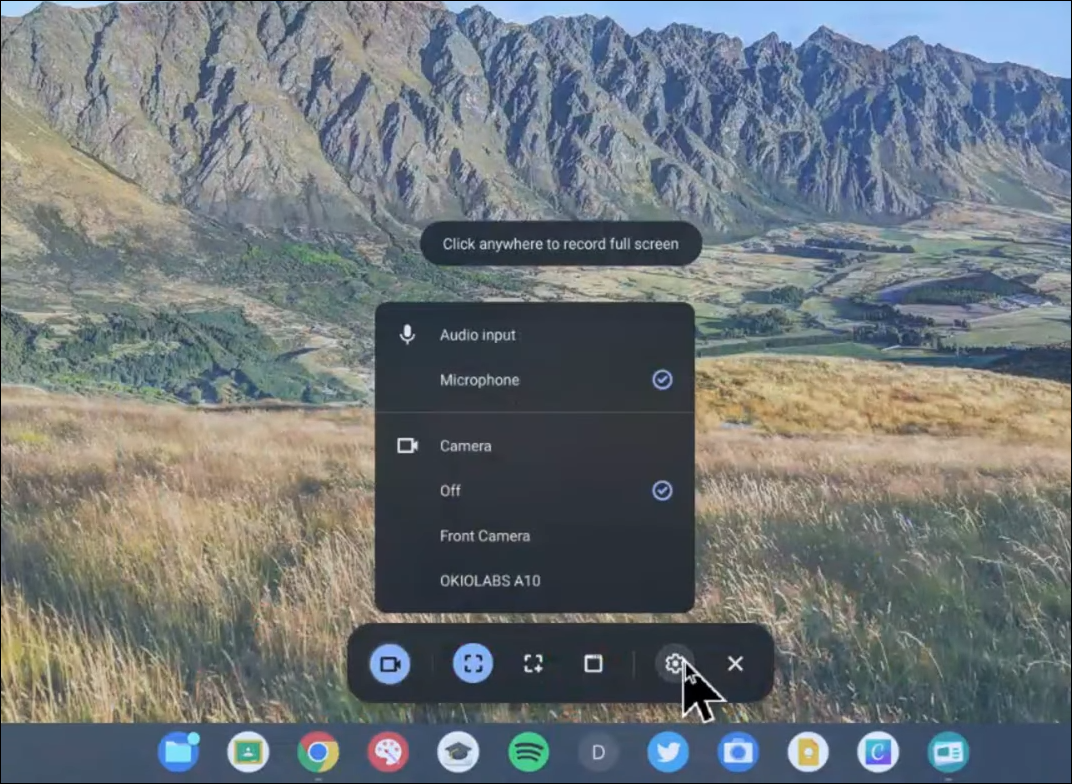
For a voiceover, click the Settings icon. Turn on the Microphone under Audio input and explore options like adding your webcam view, and displaying clicks, and keystrokes.
Recording Settings


You can find your saved screen recording in a WEBM format within the Downloads folder in the Files app.
2. Screen Record on Chromebook Using Screencast
Screencast app, a gem included in ChromeOS Version 103, offers a dynamic approach to screen recording. This app brings a trifecta of features, allowing you to record your screen, capture audio from your microphone, and simultaneously grab video from your webcam.
Plus, it throws in a nifty marker tool, letting you draw and annotate directly on your screen while recording. Here’s how you can use the Screencast app to record your screen on a Chromebook.
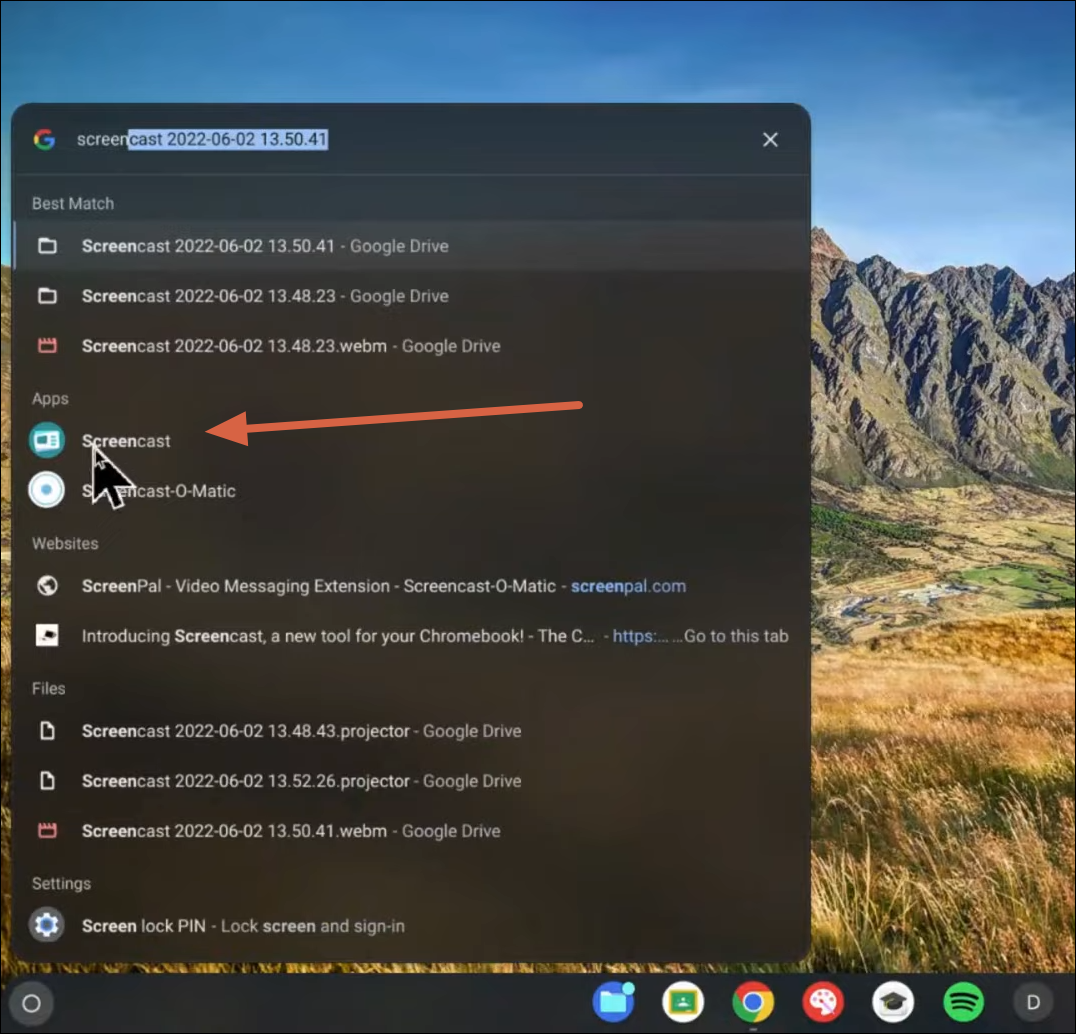
On a Chromebook running Chrome OS 103 or later, open the App Drawer, search for and open the Screencast app.
Search for Screencast app Now, select the New Screencast button, found at the top-left corner to start screen recording on your Chromebook.
New Screencast Button You can choose to record the full-screen area, window, or partial area. Decide whether to include microphone audio and webcam video. These options are on by default and can be adjusted in the Settings icon at the bottom.
Tap the red icon on the shelf to commence the screen recording. Explore tools by clicking the Pen icon for annotations and relocate the webcam view to your preferred corner.
When your recording is complete, hit the red Stop button on the Chrome OS Shelf.
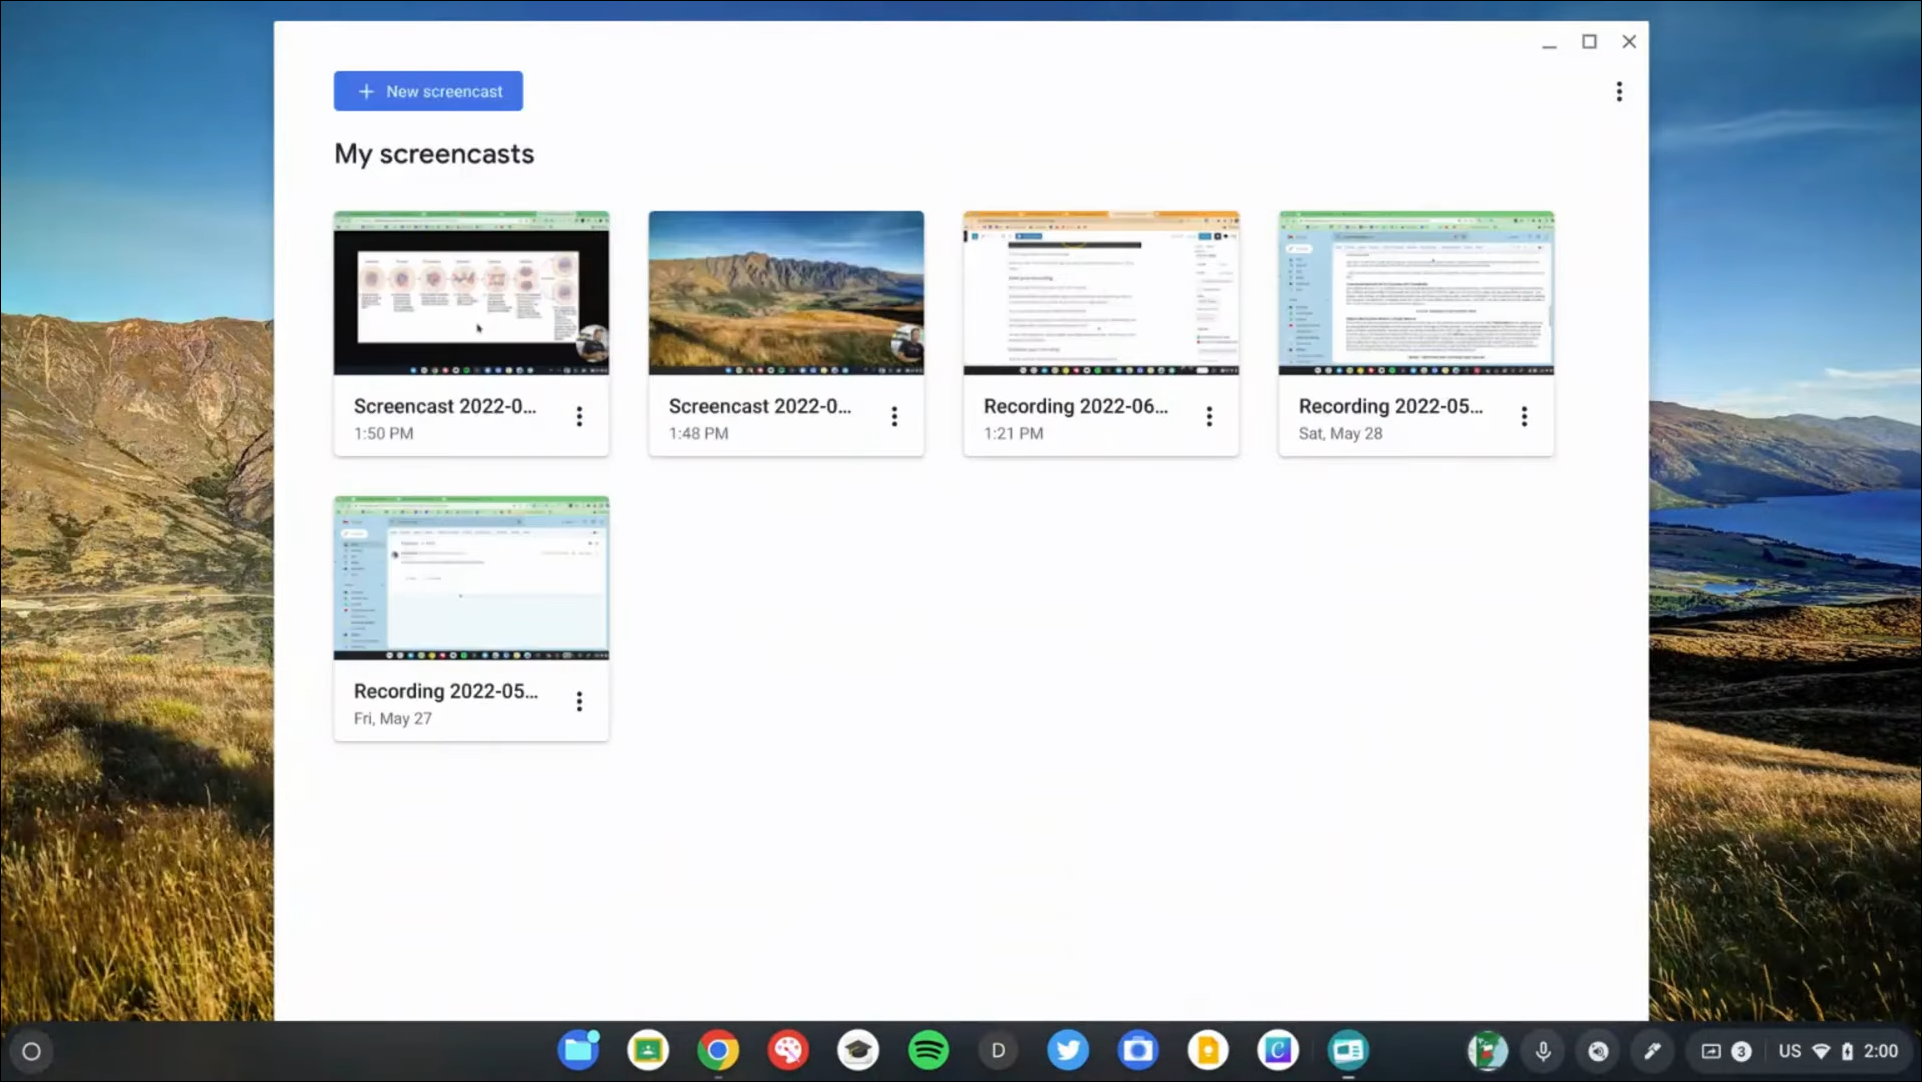
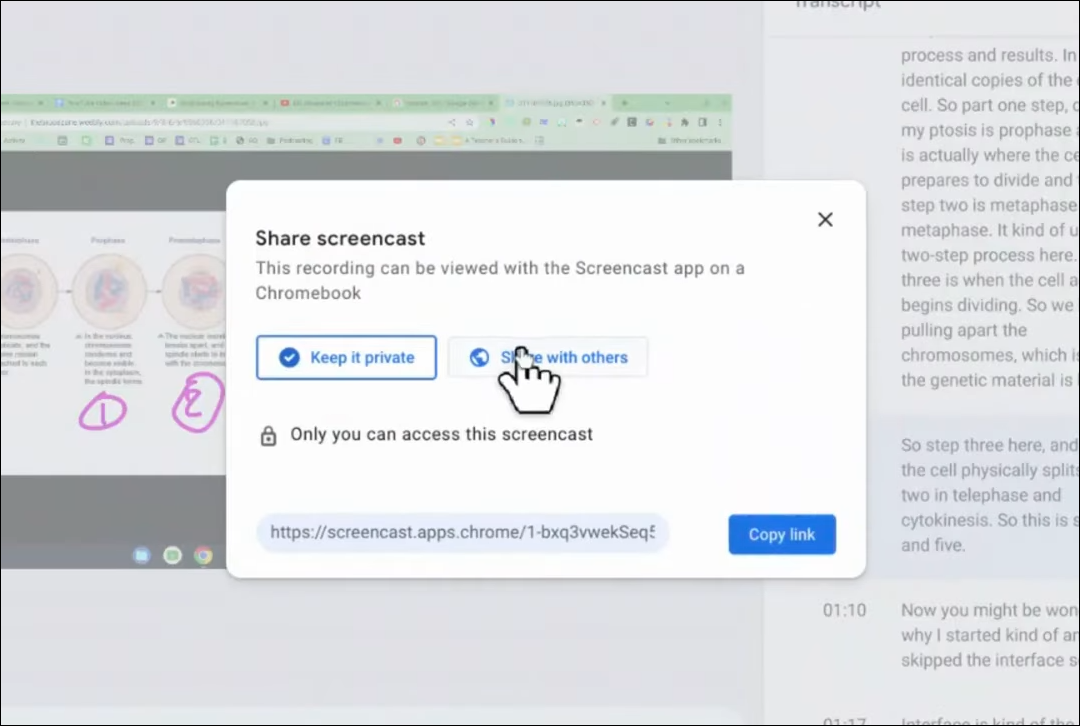
Stop Recording Locate your recording within the Screencast app. Click Share to generate a shareable link. Keep in mind that Screencast doesn’t save the video locally.
Share Recording
READ MORE: How to Play Fortnite on Chromebook in 2023 [Working] ➜
3. Record Screen on Chromebook with Device Audio
While ChromeOS’s built-in methods for screen recording are excellent for most users, those desiring to capture device audio may explore third-party alternatives.
A prime example is the Nimbus Screen Recorder, among the top Chrome extensions available for this purpose. Here’s a step-by-step guide on using Nimbus Screen Recorder or a similar alternative:
Begin by navigating to the Chrome Web Store and installing the Nimbus Screen Recorder tool.
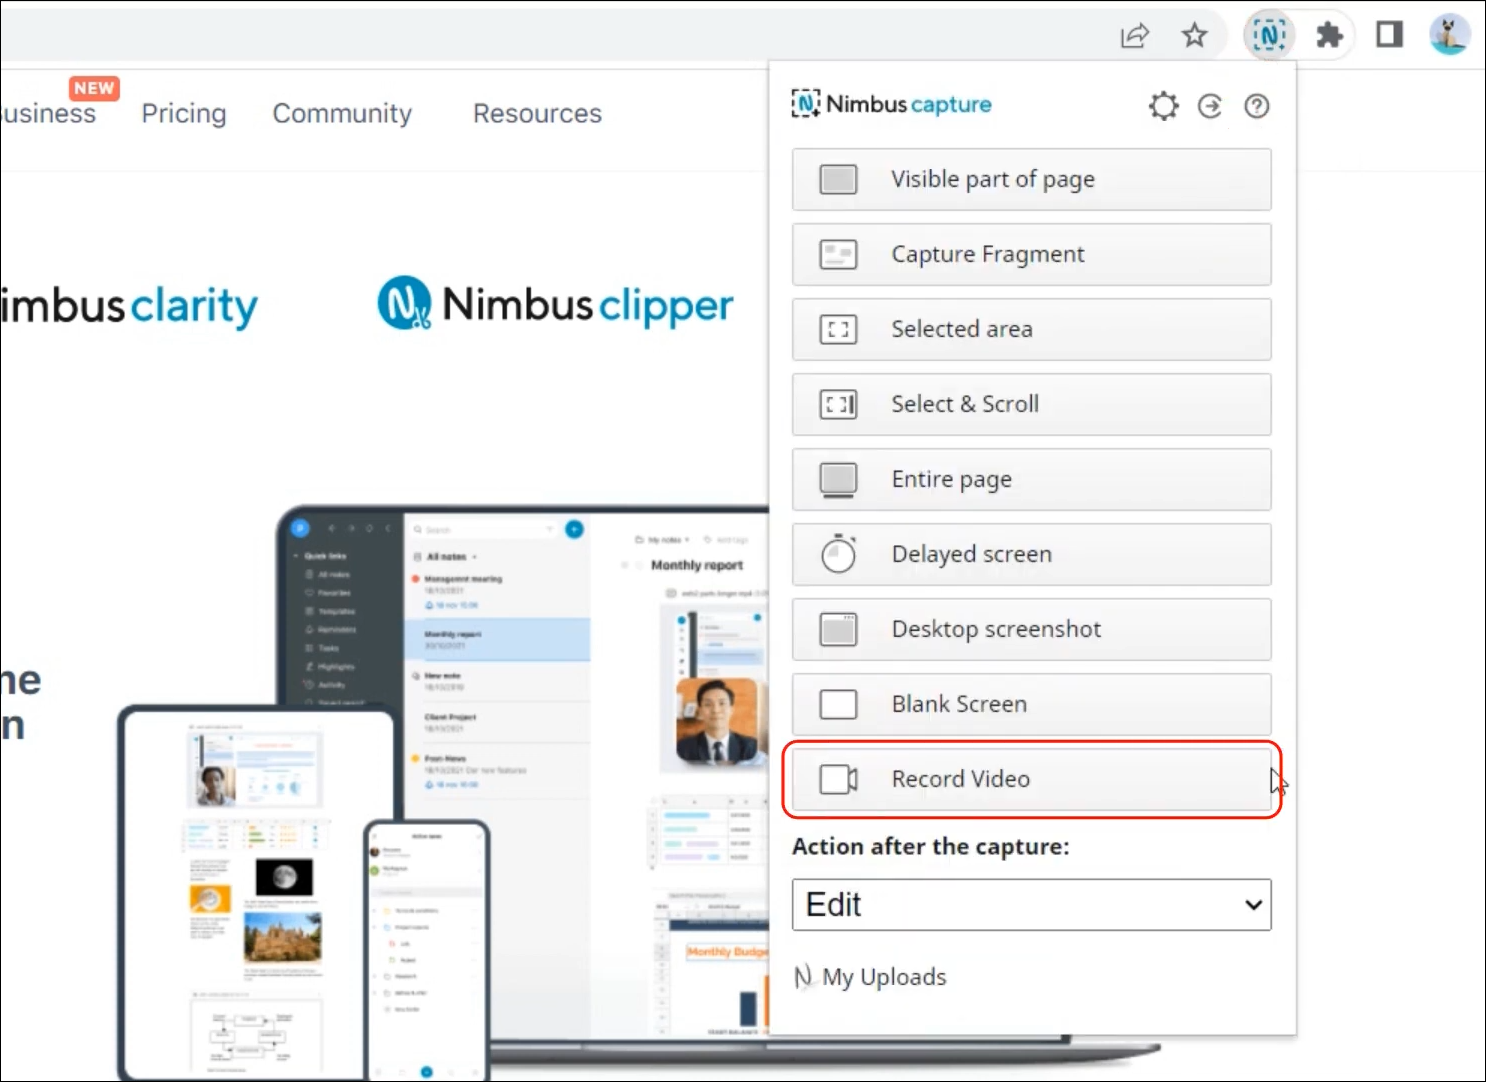
Once installed, launch the newly added extension from the extension toolbar and select the Record Video option.
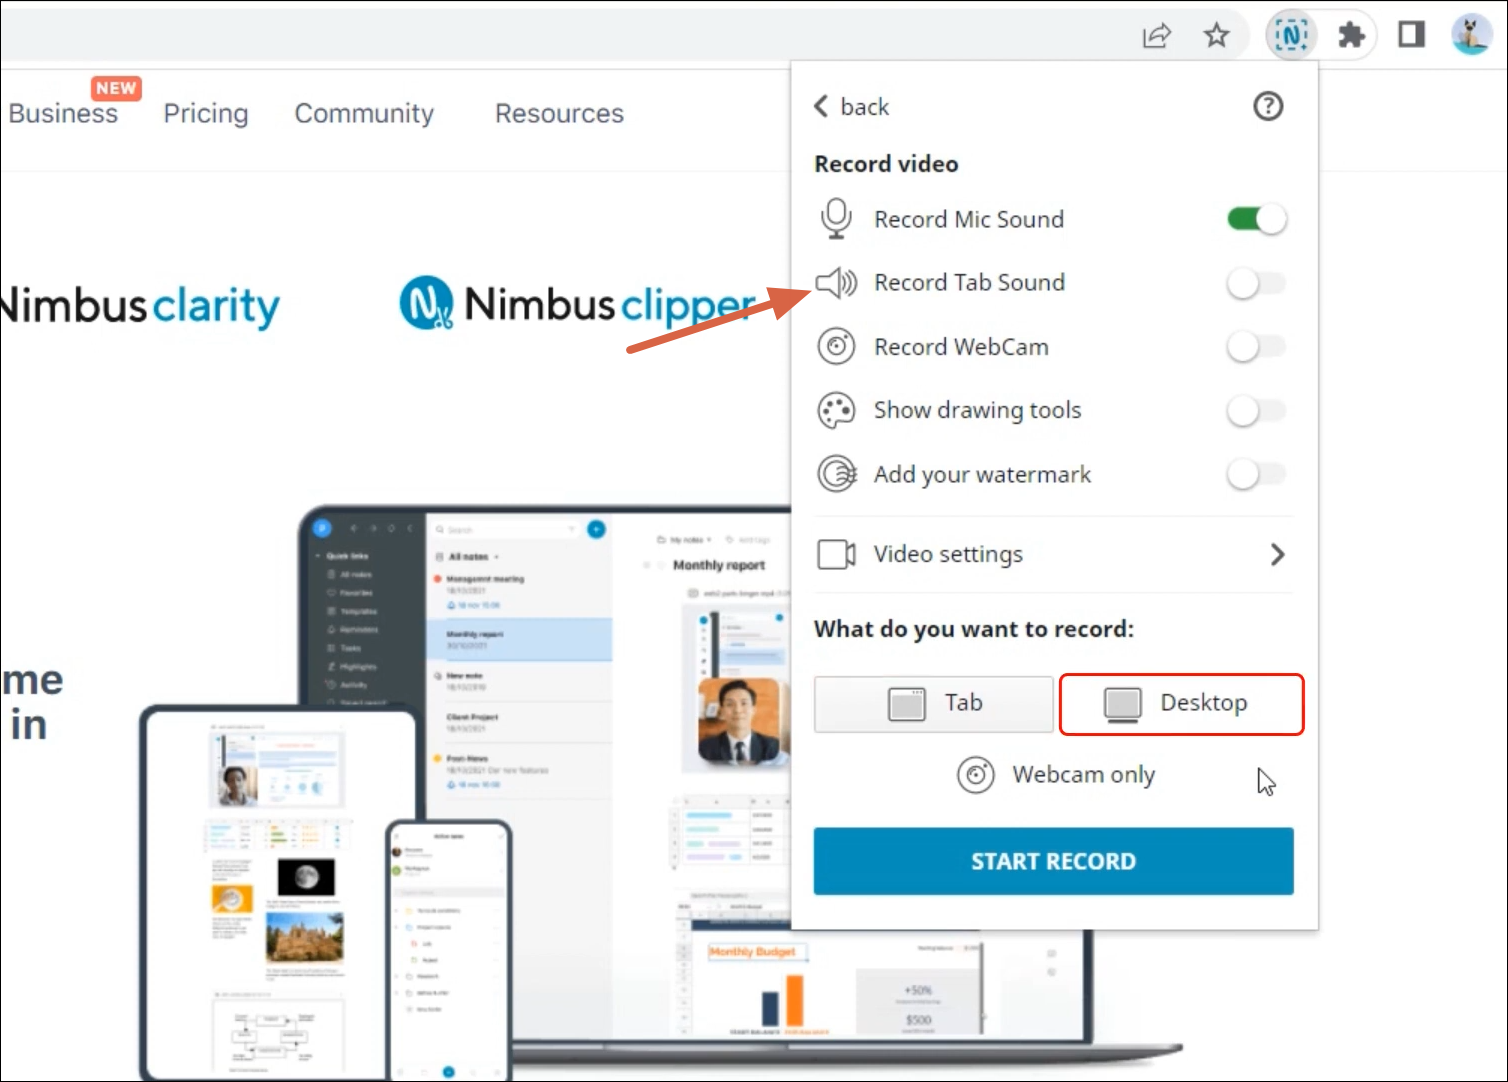
Record Video – Nimbus Screen Recorder In the dropdown menu, choose Tab at the bottom and enable Record Tab Sound. This setting ensures the internal recording of audio specifically for Chrome Tabs, excluding other applications.
Record Tab Sound Chromebook With the configuration complete, click on Start Record, and you’re all set. Now, you can record your Chromebook screen with device audio using this Chrome extension.
READ MORE: The Best Dark Mode Extensions For Browsers ➜
Conclusion
Recording your Chromebook screen is easy—you can use the built-in options or go for a third-party choice, depending on what you need. You can add notes, include your webcam, and even capture the sound from your device.
So, whether you go for the simple Screen Capture, the flexible Screencast, or the extra audio features of Nimbus Screen Recorder, recording your Chromebook screen lets you be creative, share things easily, and have a more enjoyable digital experience.
FAQs
Yes, you can use video editing apps from the Chrome Web Store or upload your recordings to online platforms for editing.
Yes, you can use screen recording to capture video calls on your Chromebook. Just ensure that you set up your recording preferences to include the audio input from your microphone if you want to capture the conversation.
While built-in options usually don’t impose time limits, third-party screen recording tools may have limitations based on their specific features or free versions. It’s advisable to check the details of the tool you’re using.